BGMの再生
BGMの再生
次はBGMの再生だ。BGM再生にはAVFoundationフレームワークを使う。GameControllerのヘッダに追加した、AVAudioPlayerというのがそのクラスになる。SEと同じく、GameControllerクラスの初期化時に以下のコードを追加しておく。AVAudioPlayerのplayメソッドを呼ぶことでBGMの再生が開始される。
  // BGMプレイヤーの作成と再生
  NSString*	path = [[NSBundle mainBundle] pathForResource:@"bgm00" ofType:@"caf"];
  NSURL		*url = [NSURL fileURLWithPath:path isDirectory:NO];
  bgmPlayer = [[AVAudioPlayer alloc] initWithContentsOfURL:url error:nil];
  bgmPlayer.numberOfLoops = -1;//無限ループに設定
  [bgmPlayer play];//再生開始
また、stop や pause のメソッドで再生の停止を行うことができる。うさぎが死亡した時にBGMを停止するのなら、死亡のタイミングで以下のようにすればBGMの再生が停止する。
[bgmPlayer stop];//再生停止
コア・オーディオ・ファイル
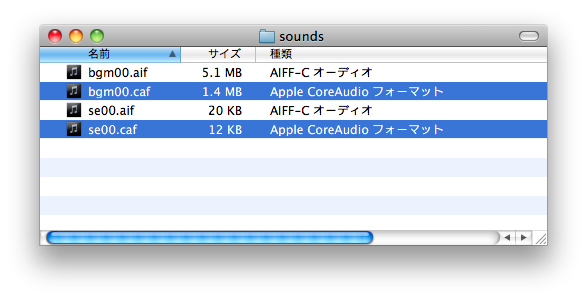
今回使用した .cafというファイルはコア・オーディオ・ファイルという、iOS / Mac OS用に拡張されたオーディオフォーマットで、iPhoneの着信音などにも使用されている。なぜ、cafにするかといえば、AIFやWAVに比べてファイルサイズを小さくできるからだ。同形式のAIFやWAVをcafファイルに変換するとサイズが以下のようになる。
|
| 図2:サウンドファイルのサイズ |
コア・オーディオファイルへの変換はMac OS Xの「ターミナル」のafconvert というコマンドから行うことができる。ターミナルは、アプリケーション/ユーティリティ/ターミナル.app にある。コマンドは次のような書式になっており、オプションには主に以下のものがある。
| afconvert [オプション...] | 入力ファイル名 [出力ファイル名] |
|---|---|
| -f | 出力ファイルのフォーマット |
| -c | 出力ファイルのチャンネル数 |
| -d | 出力ファイルのデータフォーマット |
| -b | 出力ファイルのビットレート |
ターミナルを起動して以下のようにコマンドを入力すればbgm00.aifというファイルがcafに変換される。
$ afconvert -f caff -d ima4 bgm00.aif
ただし、オプションは出力ファイルのフォーマットにより変わるので、詳しくはヘルプで確認してほしい。ヘルプは以下のように打ち込めば表示される。
$ afconvert -h
1つ1つ変換するのが面倒ならば、以下のコマンドでカレントディレクトリー内のaifファイルを全てcafファイルに変換することができる。
$ find . -name '*.aif' -exec afconvert -f caff -d ima4 {} \;
ライフの表示
次はうさぎのライフを表示しよう。ライフ用に「ハートマーク」の画像を用意してプロジェクトに登録する。それを画面の右上に表示する。表示は前回作成した EffectViewクラスを使う。これはうさぎがダメージを受けた時にアニメーション付きでハートマークを消すためだ。このようにいろいろと汎用的に使えるクラスを作っておけば後々使い回しができて便利なのである。
以下がその部分のコードだ、これをGameControllerの初期化に追記する。
  //ライフ表示
  EffectView*	efView;
  lifeImageArray = [[NSMutableArray array] retain];
  UIImage*	image = [UIImage imageNamed:@"LifeHart.png"];
  for (int i=0; i < 3; i++) {
    efView = [[EffectView alloc] initWith:image];
    efView.isFinishDelete = YES;
    [lifeImageArray addObject:efView];
    [gameView addSubview:efView];
    [efView release];
    efView.center = CGPointMake(320-24-(24*i),32);
  }
これをうさぎがダメージを受けた時に1つずつ消していくわけだ。うさぎがダメージを受けた時に以下のようなコードで4倍の大きさに拡大しながら、透明になりつつ消えてくれる。
  //ライフを消す
  EffectView*	efView = [lifeImageArray objectAtIndex:pieceView.life];
  [lifeImageArray removeObjectAtIndex:pieceView.life];
  [efView setAnimeOpacityFrom:1.0 To:0.0 Duration:0.2];
  [efView setAnimeBoundsScaleFrom:1.0 To:4.0 Duration:0.2];
制限時間の設定と表示
「Rabbit Maze」のゲームオーバーのルールに「タイムオーバー」がある。それをゲームオーバーの条件として追加すると共に、時間の表示を行ってみよう。制限時間を計るためにタイマーを使って時間をカウントするようにし、時間がくればゲームオーバーのフローに進むようにする。まず制限時間とタイマーの設定だ。GameControllerのプロパティーに以下を追加。
  NSTimer*	gameTimer;		//タイマー
  BOOL		isGameOver;		//ゲームオーバーフラグ
  int		gameTimeCount;	//時間のカウント
  UILabel*	timeLabel;
そして、GameControllerの初期化時に表示用のラベルとタイマーを作って実行する。
  gameTimeCount = 90;	//制限時間
  //タイム表示
  timeLabel = [[UILabel alloc] initWithFrame:CGRectMake(0, 0, 100, 32)];
  [gameView addSubview:timeLabel];
  timeLabel.backgroundColor = [UIColor clearColor];
  timeLabel.textColor = [UIColor whiteColor];
  timeLabel.center = CGPointMake(160, 32);
  [timeLabel release];
  timeLabel.textAlignment = UITextAlignmentCenter;
  timeLabel.font = [UIFont boldSystemFontOfSize:28];
  timeLabel.text = [NSString stringWithFormat:@"%02d:%02d",
        gameTimeCount/60,
        gameTimeCount-(60*(gameTimeCount/60))];
  //タイマー開始
  gameTimer = [NSTimer scheduledTimerWithTimeInterval:1.0	//1秒ごとにタイマー実行
        target:self
        selector:@selector(gameTimeCount:)
        userInfo:nil
        repeats:YES];
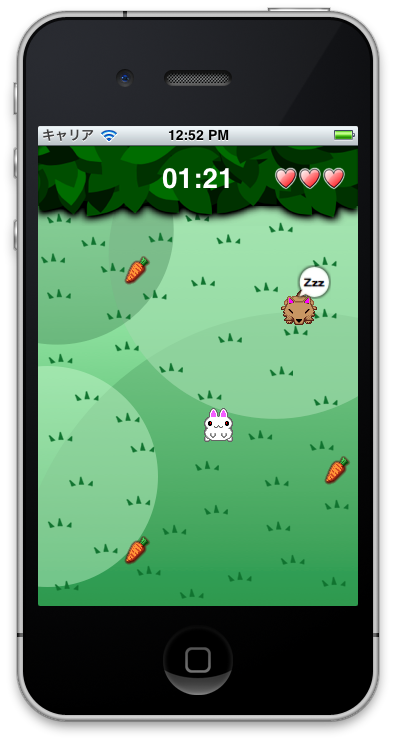
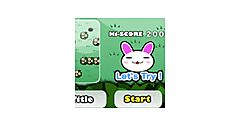
ライフと残り時間がこのように表示される。
|
| 図3:ライフと残り時間表示 |
以下がタイマー実行時に呼ばれるメソッドだ、タイムを更新して90秒経過すればゲームオーバーとしている。ゲームオーバーのフラグを立て、BGM、タイマー、キャラクターを停止させてゲームオーバーの文字を表示している。そしてゲームオーバーのフラグが立っている場合、タッチイベントやオオカミの追跡ロジックを無効にする処理も追記しておく。
-(void)gameTimeCount:(NSTimer*)timer
{
  gameTimeCount--;	//タイムを更新

  timeLabel.text = [NSString stringWithFormat:@"%02d:%02d",
        gameTimeCount/60,
        gameTimeCount-(60*(gameTimeCount/60))];

  NSLog(@"Time:%d",gameTimeCount);
  //タイムオーバー
  if( gameTimeCount  <= 0 ) {
    isGameOver = YES;
    [gameTimer invalidate];
    gameTimer = nil;
    [bgmPlayer stop];//BGM再生停止
    enemyView.state = STATE_STAY;	//オオカミ停止
    pieceView.state = STATE_STAY;	//うさぎ停止
    //ゲームオーバー
    EffectView*	efView = [[[EffectView alloc] initWith:[UIImage
            imageNamed:@"GameOver.png"]] autorelease];
            efView.isFinishDelete = NO;
            efView.isLoop = NO;
            [gameView addSubview:efView];
    efView.center = CGPointMake(320/2, 460/2);
    [efView setAnimeBoundsScaleFrom:0.0 To:1.0 Duration:0.5];
  }
}
- この記事のキーワード


