連載 [第7回] :
今日からはじめる Pulumiでカンタン インフラ運用・管理Pulumi Kubernetes Operatorを活用してPulumiのCI/CDを実現しよう
2023年9月13日(水)

第7回となる今回は、PulumiにおけるCI/CDの概要を解説し、Pulumi Kubernetes Operatorを利用してPulumi Programを自動デプロイするハンズオンを実践していきます。
・GitHubにPulumi project用repository作成
Pulumi Kubernetes OperatorがAWSでリソースを作成するために参照するpulumi programをGitHub repositoryに用意します。あらかじめGitHubアカウントを作成しておきます。今回用意するProgramはAWSにS3 Bucketをデプロイする内容となり、Pythonで作成します。
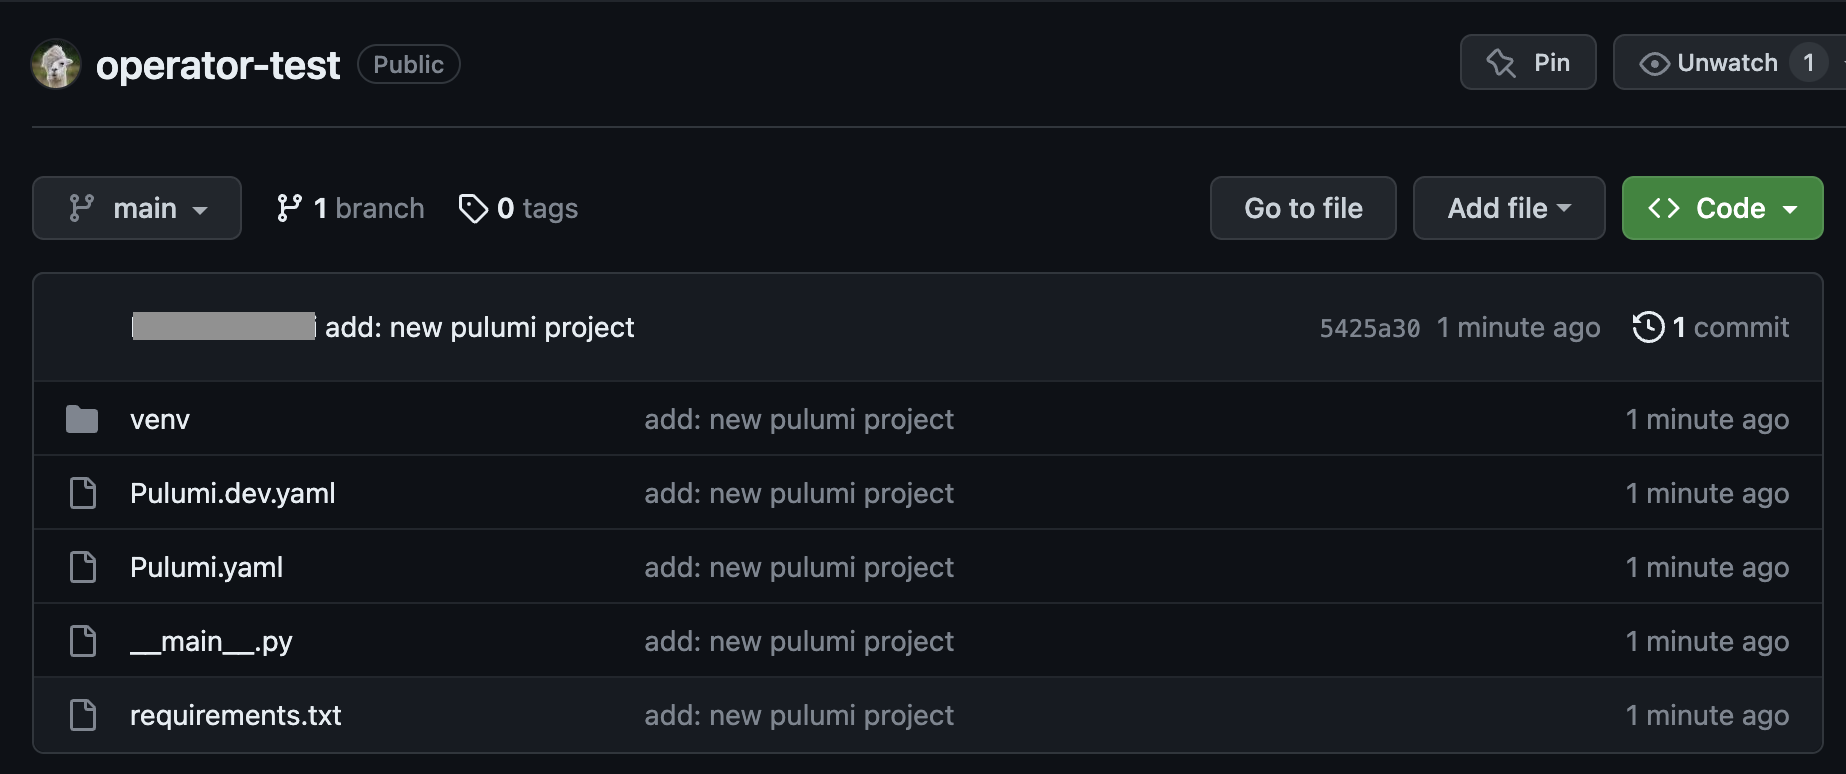
- GitHubにログイン後、新しいレポジトリを作成します(筆者は「operator-test」公開レポジトリを作成しました)。
- ローカルPCのターミナルで作成したレポジトリをcloneしてディレクトリ移動後、「pulumi new」コマンドでProgram(Project)のひな形を作成します。「project name」「project description」「stack name」はデフォルト値で設定し、「aws:region:」については「ap-northeast-1」を設定しました。
$ git clone https://github.com/<account_name>/operator-test.git

$ cd operator-test

$ pulumi new aws-python

This command will walk you through creating a new Pulumi project.

Enter a value or leave blank to accept the (default), and press <ENTER>.
Press ^C at any time to quit.

project name: (operator-test)
project description: (A minimal AWS Python Pulumi program)
Created project 'operator-test'

Please enter your desired stack name.
To create a stack in an organization, use the format <org-name>/<stack-name> (e.g. `acmecorp/dev`).
stack name: (dev)
Created stack 'dev'

aws:region: The AWS region to deploy into: (us-east-1) ap-northeast-1
Saved config

Installing dependencies…
~~~
Your new project is ready to go! ✨

To perform an initial deployment, run `pulumi up`
- 生成されたProgramを編集して、以下のコードを記載します(おそらく生成時点で以下コードが記載されていると思いますが、念のため)。
$ vi __main__.py ~~ ""An AWS Python Pulumi program""" import pulumi from pulumi_aws import s3 # Create an AWS resource (S3 Bucket) bucket = s3.Bucket('my-bucket') # Export the name of the bucket pulumi.export('bucket_name', bucket.id) - operatorを使ったProgramの自動デプロイを実行する場合、「pulumi new」で自動生成される「venv」ディレクトリ(pythonの仮想実行環境)は不要なので、ここでディレクトリごと削除します。
$ rm -rf ./venv
- 現在までに作成したファイルをGitHub remote repositoryにpushします(今回は便宜上main branchにそのままpushします。Operatorの同期対象branchもmain branchを指定する予定です)。
$ pwd
/***/operator-test

$ git add . --all

$ git commit -m "add: new pulumi project"

$ git push
この時点でremoteにProgramが用意されているのが確認できます。
・Kubernetes cluster作成
Pulumi Kubernetes OperatorをデプロイするEKS Cluster(Elastic Kubernetes Service)をAWS CloudShellからEKS Cluster作成コマンド「eksctl」で作成します。
- AWSマネジメントコンソールからCloudShellを起動します。
- EKS Cluster作成コマンド「eksctl」をインストールします(公式ドキュメントはこちら)
[cloudshell-user@ip-10-6-43-90 ~]$ ARCH=amd64

[cloudshell-user@ip-10-6-43-90 ~]$ PLATFORM=$(uname -s)_$ARCH

[cloudshell-user@ip-10-6-43-90 ~]$ curl -sLO "https://github.com/eksctl-io/eksctl/releases/latest/download/eksctl_$PLATFORM.tar.gz"

[cloudshell-user@ip-10-6-43-90 ~]$ curl -sL "https://github.com/eksctl-io/eksctl/releases/latest/download/eksctl_checksums.txt" | grep $PLATFORM | sha256sum --check
~~~
eksctl_Linux_amd64.tar.gz: OK

[cloudshell-user@ip-10-6-43-90 ~]$ tar -xzf eksctl_$PLATFORM.tar.gz -C /tmp && rm eksctl_$PLATFORM.tar.gz

[cloudshell-user@ip-10-6-43-90 ~]$ sudo mv /tmp/eksctl /usr/local/bin

[cloudshell-user@ip-10-6-43-90 ~]$ eksctl version
~~~
0.155.0
- EKS Cluster作成コマンド「eksctl」を実行時に参照するClusterの設定ファイル(yaml)を作成します。
$ vi cluster.yaml ~~~ apiVersion: eksctl.io/v1alpha5 kind: ClusterConfig metadata: name: operator-test-cluster region: ap-northeast-1 nodeGroups: - name: operator-ng instanceType: t2.micro desiredCapacity: 2 - 作成したClusterの設定ファイルを指定して「eksctl」コマンドを実行します(筆者の環境ではコマンド実行から16分ほどで作成が完了しました)。
[cloudshell-user@ip-10-6-43-90 ~]$ eksctl create cluster -f cluster.yaml
2023-09-01 14:46:00 [ℹ]  eksctl version 0.155.0
2023-09-01 14:46:00 [ℹ]  using region ap-northeast-1
~~~
2023-09-01 15:02:03 [✔]  EKS cluster "operator-test-cluster" in "ap-northeast-1" region is ready
AWSマネジメントコンソールから、EKS Clusterが無事作成されているのが確認できます。 - CloudShellに戻り、正常にClusterとの通信が行えるか確認します。出力としてnodeの情報が返って来れば、無事Clusterとの通信が行えています。
[cloudshell-user@ip-10-6-43-90 ~]$ kubectl get node

~~~
NAME                                                STATUS   ROLES    AGE     VERSION
ip-192-168-14-194.ap-northeast-1.compute.internal   Ready    <none>   5m46s   v1.25.12-eks-8ccc7ba
ip-192-168-52-28.ap-northeast-1.compute.internal    Ready    <none>   5m50s   v1.25.12-eks-8ccc7ba
・Pulumi StackControllerデプロイ
作成したEKS ClusterにStackControllerをデプロイしていきます。デプロイ作業はAWS CloudShellで行います。
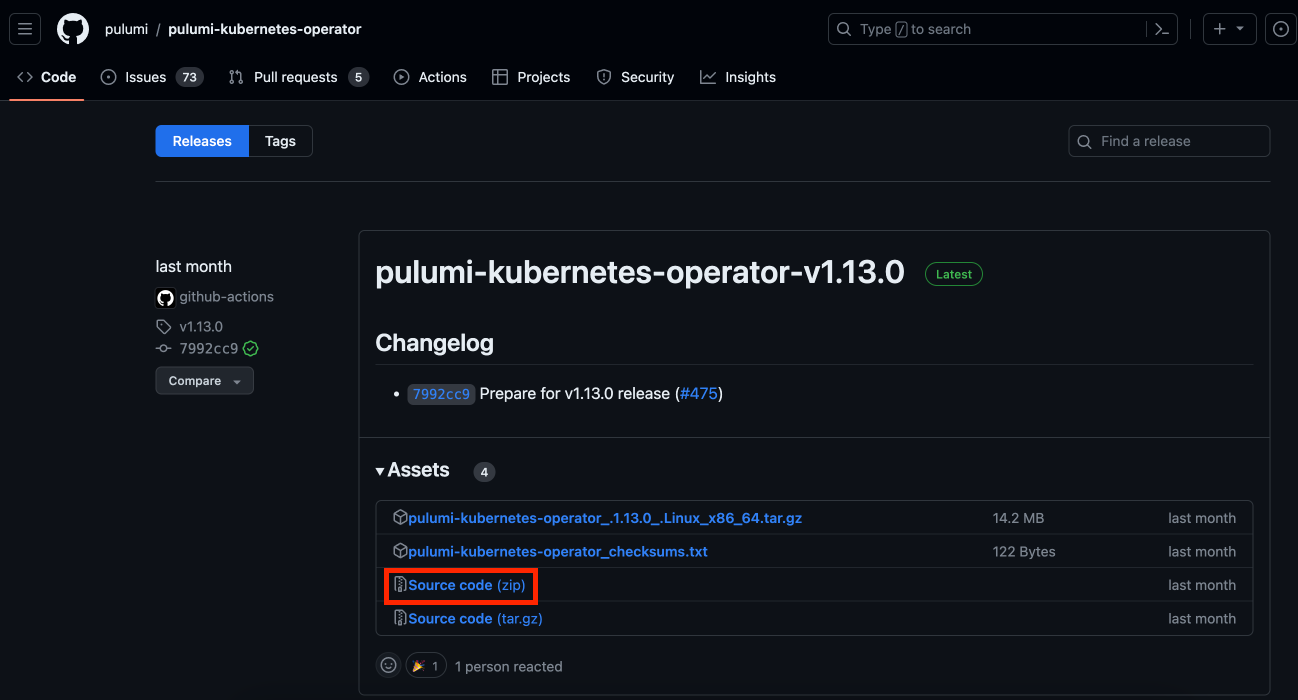
- 最新のPulumiKubernetes Operator(今回はversion 1.13.0)の「Source code(zip)」をダウンロードします。
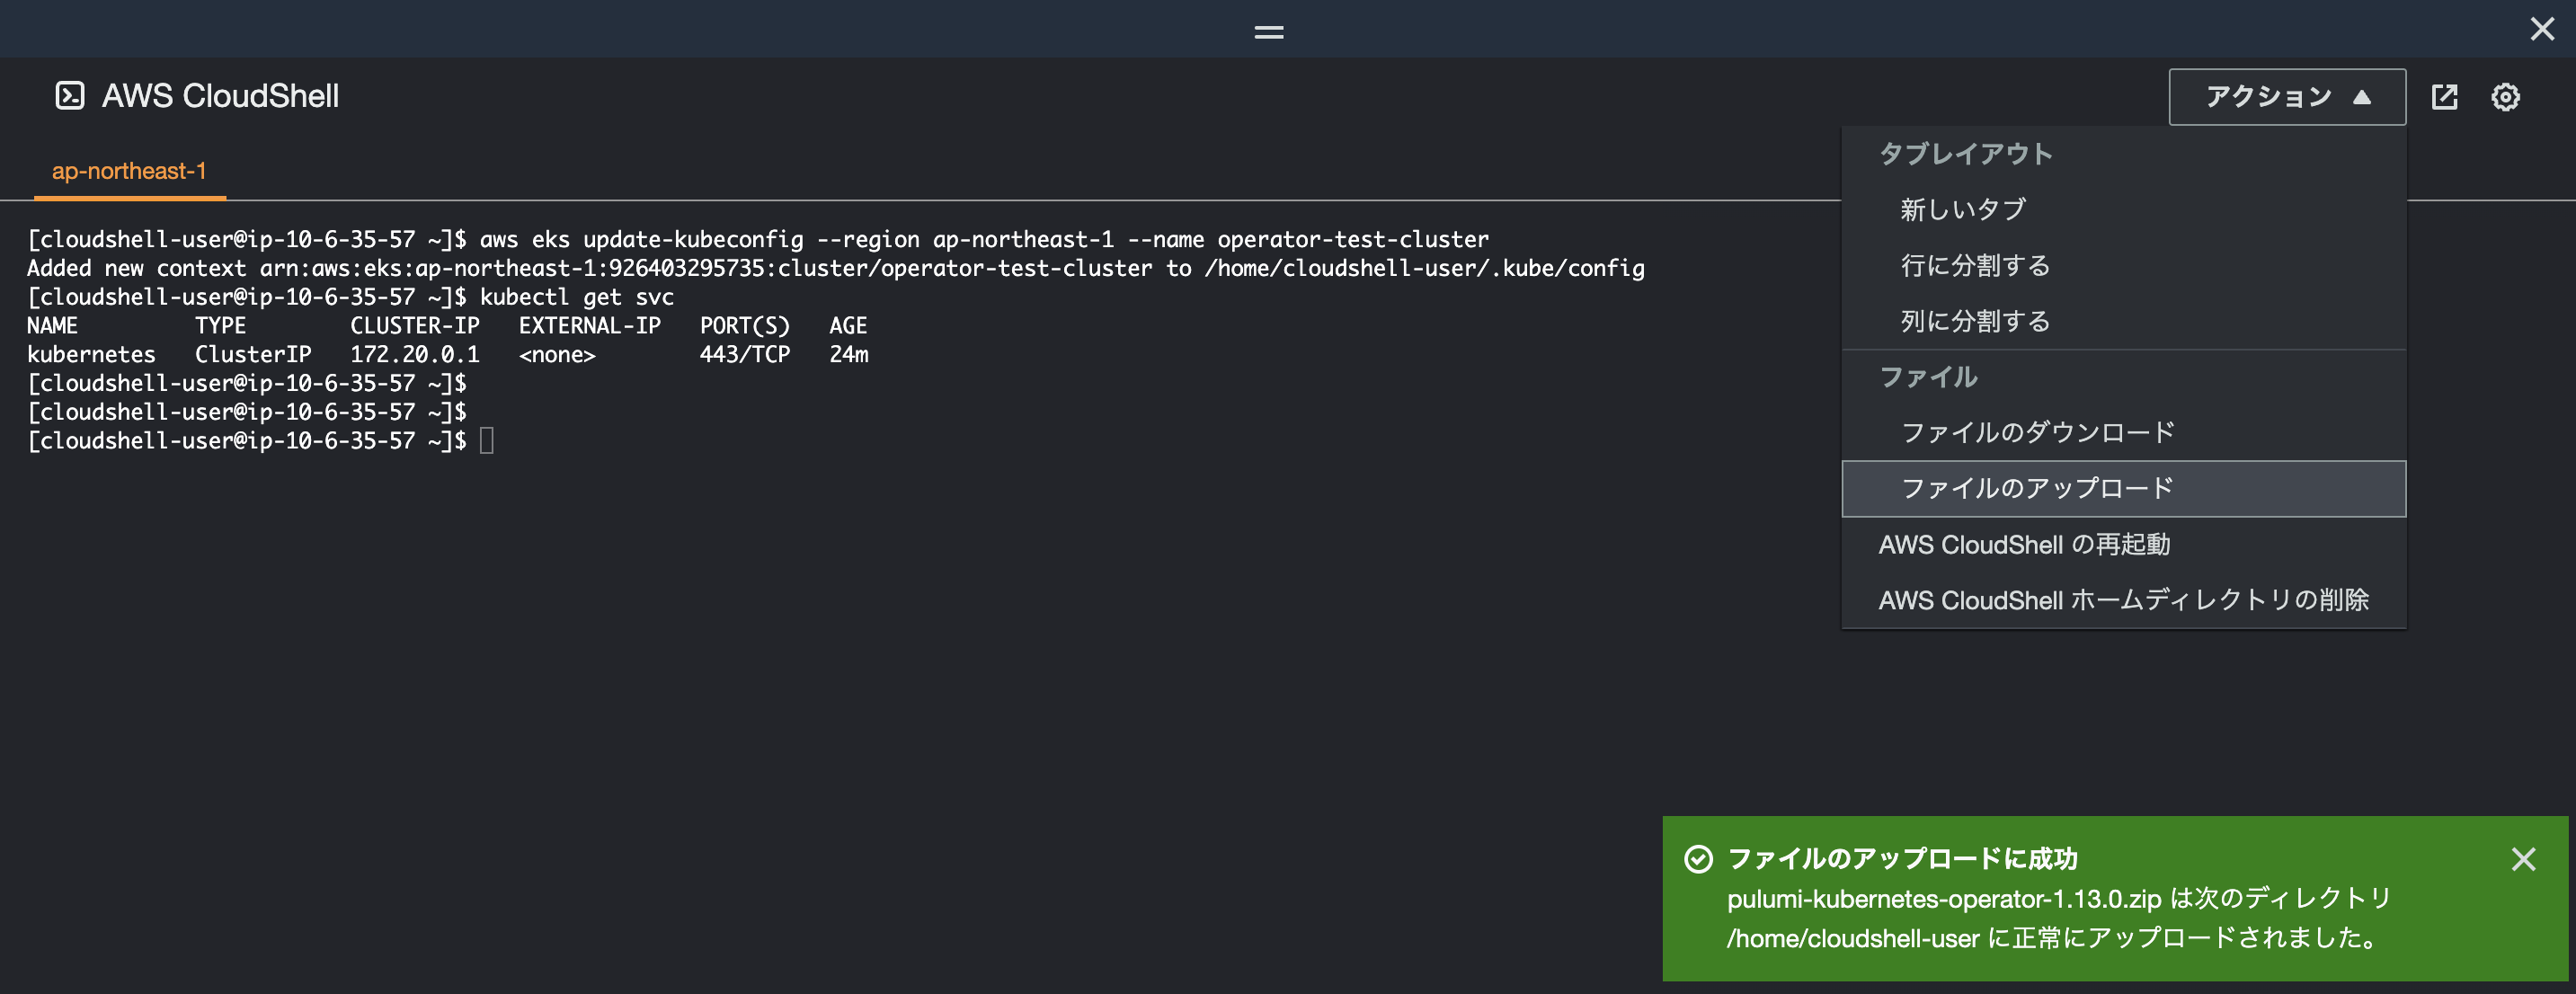
- ダウンロードした「Source code(zip)」をCloudShellにアップロードします。
- アップロードした「Source code(zip)」を展開します。
[cloudshell-user@ip-10-6-35-57 ~]$ ls
pulumi-kubernetes-operator-1.13.0.zip

[cloudshell-user@ip-10-6-35-57 ~]$ unzip pulumi-kubernetes-operator-1.13.0.zip
- 展開したSource codeの「deploy/crds」に移動して、ClusterにCustomResourceDefinitions(CRDs)をkubectlでデプロイします。
[cloudshell-user@ip-10-6-35-57 ~]$ cd pulumi-kubernetes-operator-1.13.0/deploy/crds

[cloudshell-user@ip-10-6-35-57 crds]$ ls
pulumi.com_programs.yaml  pulumi.com_stacks.yaml

[cloudshell-user@ip-10-6-35-57 crds]$ kubectl apply -f .
customresourcedefinition.apiextensions.k8s.io/programs.pulumi.com created
customresourcedefinition.apiextensions.k8s.io/stacks.pulumi.com created

[cloudshell-user@ip-10-6-35-57 crds]$ kubectl get crd | grep pulumi
programs.pulumi.com                          2023-09-01T08:12:00Z
stacks.pulumi.com                            2023-09-01T08:12:00Z
- 次にSource codeの「deploy/yaml」に移動して、ClusterにAPI resourceをデプロイします。
[cloudshell-user@ip-10-6-35-57 crds]$ cd ../yaml/

[cloudshell-user@ip-10-6-43-90 yaml]$ pwd
/***/pulumi-kubernetes-operator-1.13.0/deploy/yaml

[cloudshell-user@ip-10-6-35-57 yaml]$ ls
operator.yaml  role_binding.yaml  role.yaml  service_account.yaml

[cloudshell-user@ip-10-6-35-57 yaml]$ kubectl apply -f .
deployment.apps/pulumi-kubernetes-operator created
role.rbac.authorization.k8s.io/pulumi-kubernetes-operator created
rolebinding.rbac.authorization.k8s.io/pulumi-kubernetes-operator created
serviceaccount/pulumi-kubernetes-operator created

[cloudshell-user@ip-10-6-35-57 ~]$ kubectl get all
NAME                                              READY   STATUS    RESTARTS   AGE
pod/pulumi-kubernetes-operator-54f79c86bb-8wx27   1/1     Running   0          3m45s

NAME                                         TYPE        CLUSTER-IP      EXTERNAL-IP   PORT(S)             AGE
service/kubernetes                           ClusterIP   10.100.0.1      <none>        443/TCP             23m
service/pulumi-kubernetes-operator-metrics   ClusterIP   10.100.234.65   <none>        8383/TCP,8686/TCP   100s

NAME                                         READY   UP-TO-DATE   AVAILABLE   AGE
deployment.apps/pulumi-kubernetes-operator   1/1     1            1           3m45s

NAME                                                    DESIRED   CURRENT   READY   AGE
replicaset.apps/pulumi-kubernetes-operator-54f79c86bb   1         1         1       3m45s
連載バックナンバー
Think ITメルマガ会員登録受付中
Think ITでは、技術情報が詰まったメールマガジン「Think IT Weekly」の配信サービスを提供しています。メルマガ会員登録を済ませれば、メルマガだけでなく、さまざまな限定特典を入手できるようになります。
全文検索エンジンによるおすすめ記事
- PulumiでAWSリソースをデプロイしよう
- Kubeflowを構築する
- SecretもPulumiで使いこなしたい! PulumiのSecurityを試してみよう
- Pulumiの最新機能「Pulumi ESC」を使ってみよう
- 「Pulumi Automation API」でPulumi CLIの機能をコード化しよう
- コンテナ上のマイクロサービスの認証強化 ~StrimziとKeycloak~
- 既に存在するリソースをPulumiで管理してみよう
- Policy as Codeでインフラのコンプライアンスを自動実現! 「Pulumi CrossGuard」を活用してみよう
- NGINX Ingress Controllerの柔軟なアプリケーション制御、具体的なユースケースと設定方法を理解する
- TerraformからPulumiへの移行


