Installing OpenSolaris in VirtualBox
Installing OpenSolaris in VirtualBox
In addition to installing OpenSolaris 2008.05 directly to a disk, you can also install it in a virtual OS environment, such as VirtualBox and VMware. This introduces how to install VirtualBox on Windows Vista and install OpenSolaris 2008.05 in a virtual OS environment.
It is recommended that a host machine has at least 2 GB of physical memory when you want to use VirtualBox running on Windows Vista.
Installation procedure
1. Go to http://www.virtualbox.org/wiki/Downloads to download VirtualBox.
2. Download and install the VirtualBox binaries for the platform for your machine.
In this example, download VirtualBox-1.6.0-Win_x86.msi for Windows and double-click the VirtualBox installation file to start the installer. Follow the instruction in the installer to complete the installation.
3. Once the installation completes, restart VirtualBox.
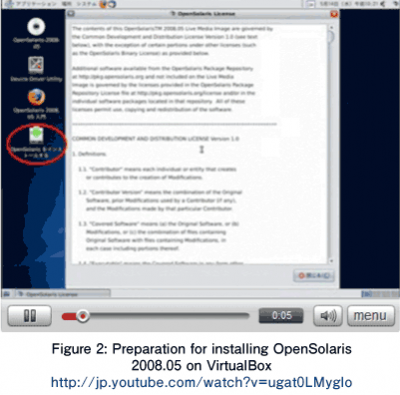
For the preparation for installing OpenSolaris 2008.05 after invoking VirtualBox, see Figure 2.
4. Create a new virtual machine. Click New in the toolbar.
5. You now get a dialog window, Welcome to the New Virtual Machine Wizard!. Click the Next button.
6. Enter a name for the new virtual machine (such as OpenSolaris1), select Solaris as the OS type, and then click the Next button.
7. Select a virtual hard disk to be used as the boot hard disk of the virtual machine.
When you see
If you have created the one, select the virtual hard disk and then click the Next button. (Go to Step 13.)
8. When "Welcome to the Create New Virtual Disk Wizard!" appears, click the Next button.
9. Select the type of virtual hard disk image and then click Next.
In this example, I will choose Dynamic expanding image.
10. Select the size of virtual hard disk image and then click the Next butotn.
In this case, I will choose 10 GB.
11. The Create New Virtual Disk Summary dialog window appears to give you a summary of how your new virtual hard disk will be created. Click the Finish button.
12. Select the newly created virtual hard disk and then click the Next button.
13. The Create New Virtual Machine Summary dialog appears to give you the parameters of your new virtual machine for OpenSolaris 2008.05. Click the Finish button.
14. Click the CD/DVD-ROM to mount the CD/DVD-ROM on the host.
15. Select the Mount CD/DVD-ROM drive checkbox. Select an appropriate host and then click the OK button.
16. Insert the OpenSolaris 2008.05 CD and then click the Start. A GRUB window appears. Then, install your desired applications following the normal steps to install applications to a hard disk drive.
- この記事のキーワード


