ロジックコードを記述する
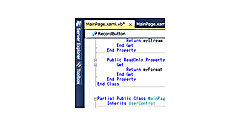
ソリューションエクスプローラー内のChart.xamlを展開して表示される、Chart.xaml.vbをダブルクリックして、リスト5のコードを記述します。
ロジックコードを記述する
リスト5 (Chart.xaml.vb)
Option Strict On

Imports System.Xml.Linq

System.Collections.ObjectModel 名前空間には、再利用可能なライブラリのオブジェクトモデルで、コレクションとして使用できるクラスが含まれています。
Imports System.Collections.ObjectModel

ProductInfoクラス内に文字列型の「品名」、数値型の「小計」のプロパティを定義しておきます。
Public Class ProductInfo
  Property 品名 As String
  Property 小計 As Integer
End Class

Partial Public Class Chart
  Inherits PhoneApplicationPage

  Public Sub New()
    InitializeComponent()
  End Sub

ProductInfoクラス型の新しいObservalCollectionのインスタンスmyProductInfoを作成します。ObservalCollectionクラスは、項目が追加や削除された時、またはリスト全体が更新された時に、通知を提供する動的なデータコレクションを表すクラスです。
  Dim myProductInfo As New ObservableCollection(Of ProductInfo)
  Dim xmlFile As String
画面の遷移で移動した時に最初に呼ばれるイベント
ClearメソッドでProductInfoクラス型のObservalCollectionのインスタンスmyProductInfoをクリアしておきます。この処理を行っていないと、コレクション内に同じデータが蓄積され、グラフにダブって表示されます。
  ここで、MainPage.xamlから渡された文字データを受け取ります。文字データはNavigationContextのQueryStringにDictionary として提供されます。送信時のキーワード(この場合menu)を基に渡された文字列情報を、myParam(“menu”)として取得します。XMLのファイル名が渡されます。
XElement.Loadメソッドで渡されたXMLファイル(xmlFile変数の値)を読み込みます。
Descendantsメソッドで、子孫要素であるすべての <情報> 要素のコレクションに対して、各要素を変数result に格納しながら、ProductInfoクラスの「品名」プロパティに<品名>要素の値を、「小計」プロパティに、数値に変換した<小計>要素の値を指定し、AddメソッドでmyProductInfoオブジェクトに追加していきます。
SerialChart1のDataContextプロパティに現在実行中のインスタンスを指定します。
  Protected Overrides Sub OnNavigatedTo(e As System.Windows.Navigation.NavigationEventArgs)
    myProductInfo.Clear()
    Dim myParam As IDictionary(Of String, String) = NavigationContext.QueryString
    xmlFile = myParam("menu")
    Dim xmldoc As XElement = XElement.Load(xmlFile)

    For Each result In From c In xmldoc.Descendants("情報") Select c
      With myProductInfo
        .Add(New ProductInfo With {.品名 = result.Element("品名").Value, _
                                   .小計 = CType(result.Element("小計").Value, Integer)})
      End With
    Next
    SerialChart1.DataContext = Me
    MyBase.OnNavigatedTo(e)
  End Sub

  ProductInfoクラス型のObservalCollectionであるDataというプロパティを定義します。myProductInfoを戻り値とします。ここのDataプロパティを、Chart.xaml内の<amq:SerialChart>要素のDataSourceプロパティにバインドします。
  Public ReadOnly Property Data() As ObservableCollection(Of ProductInfo)
    Get
      Return myProductInfo
    End Get
  End Property
[円グラフ]ボタンがクリックされた時の処理
NavigationService.Navigateメソッドで、これから作成するPieChartPage.xamlに遷移します。その際、引数にXMLファイル名を渡します。
  Private Sub PieChartButton_Click(sender As Object, e As System.Windows.RoutedEventArgs) Handles PieChartButton.Click
    NavigationService.Navigate(New Uri(String.Format("/PieChartPage.xaml?menu={0}", xmlFile), UriKind.Relative))
  End Sub
End Class
Windows Phone 縦向きのページの作成(PieChartPage.xaml)
VS2010メニューの「プロジェクト(P)/新しい項目の追加(W)」と選択して、「Windows Phone 縦向きのページ」を選択します。「名前(N)」には「PieChartPage.xaml」指定し、[追加(A)]ボタンをクリックします(図8参照)。
表示されるXAMLコードをリスト6のように編集します。
リスト6 編集されたXAMLコード(PieChartPage.xaml)
(1)amqという、Chartコントロールを使用可能にするための名前空間を定義します。xmlns:amq=”と入力すると、値の一覧が表示されますので、その中から「AmCharts.Windows.QuickCharts(AmCharts.Windows.QuicCharts.WP」を選択します(図5参照)。
(2)次に、Page Transitionを使用するため、toolkitという名前空間を定義しますxmlns:toolkit=”と入力すると、値の一覧が表示されますので、その中から「Microsoft.Phone.Controls(Microsoft.Phone.Controls.Toolkit)」を選択します(図6参照)。
(3)Windows Phone 7.1 SDK 日本語版では、フォントの設定なしにアプリケーションを実行し、タイトルやテキストに日本語を使った場合、日本語フォントが使われないで変な表示になってしまうことがあります。これを解消するには、書き出されるXAMLコードのアプリケーションのトップである<phone:PhoneApplicationPage>要素内に、
 Language=  "ja-JP"
と指定しておきます。
(4)TurnstileTransitionのコードを追加します。コードを追加しただけではPage Transitionは機能しません。App.xaml.vb内のRootFrame = New PhoneApplicationFrame()の部分を、RootFrame = New TransitionFrameと書き換えてください。
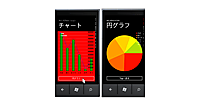
(5)<amq:と入力して表示されるインテリセンスから、PieChartを選択します。データソースとなるDataSourceにはVBコード内で定義するプロパティ名「Data」を指定します。TitleMemberPathには「品名」、ValueMemberPathには「小計」を指定します。「品名」や「小計」はVBコードのクラス内で定義されたプロパティ名です。
(6)Topに戻るButtonを配置します。

<phone:PhoneApplicationPage
  x:Class="ChartSample.PieChartPage"
  xmlns="http://schemas.microsoft.com/winfx/2006/xaml/presentation"
  xmlns:x="http://schemas.microsoft.com/winfx/2006/xaml"
  xmlns:phone="clr-namespace:Microsoft.Phone.Controls;assembly=Microsoft.Phone"
  xmlns:shell="clr-namespace:Microsoft.Phone.Shell;assembly=Microsoft.Phone"
  xmlns:d="http://schemas.microsoft.com/expression/blend/2008"
  xmlns:mc="http://schemas.openxmlformats.org/markup-compatibility/2006"

xmlns:amq="clr-namespace:AmCharts.Windows.QuickCharts;assembly=AmCharts.Windows.QuickCharts.WP" ■(1)
  xmlns:toolkit="clr-namespace:Microsoft.Phone.Controls;assembly=Microsoft.Phone.Controls.Toolkit" ■(2)
  FontFamily="{StaticResource PhoneFontFamilyNormal}"
  FontSize="{StaticResource PhoneFontSizeNormal}"
  Foreground="{StaticResource PhoneForegroundBrush}"
  SupportedOrientations="Portrait" Orientation="Portrait"
  mc:Ignorable="d" d:DesignHeight="768" d:DesignWidth="480"
  shell:SystemTray.IsVisible="True" Language="ja-JP"> ■(3)

  <toolkit:TransitionService.NavigationInTransition> ■(4)
    <toolkit:NavigationInTransition>
      <toolkit:NavigationInTransition.Backward>
        <toolkit:TurnstileTransition Mode="BackwardIn"/>
      </toolkit:NavigationInTransition.Backward>
      <toolkit:NavigationInTransition.Forward>
        <toolkit:TurnstileTransition Mode="ForwardIn"/>
      </toolkit:NavigationInTransition.Forward>
    </toolkit:NavigationInTransition>
  </toolkit:TransitionService.NavigationInTransition>
  <toolkit:TransitionService.NavigationOutTransition>
    <toolkit:NavigationOutTransition>
      <toolkit:NavigationOutTransition.Backward>
        <toolkit:TurnstileTransition Mode="BackwardOut"/>
      </toolkit:NavigationOutTransition.Backward>
      <toolkit:NavigationOutTransition.Forward>
        <toolkit:TurnstileTransition Mode="ForwardOut"/>
      </toolkit:NavigationOutTransition.Forward>
    </toolkit:NavigationOutTransition>
  </toolkit:TransitionService.NavigationOutTransition> ■(4)

  <!--LayoutRoot is the root grid where all page content is placed-->
  <Grid x:Name="LayoutRoot" Background="Transparent">
    <Grid.RowDefinitions>
      <RowDefinition Height="Auto"/>
      <RowDefinition Height="*"/>
    </Grid.RowDefinitions>

    <!--TitlePanel contains the name of the application and page title-->
    <StackPanel x:Name="TitlePanel" Grid.Row="0" Margin="12,17,0,28">
      <TextBlock x:Name="ApplicationTitle" Text="MY APPLICATION" Style="{StaticResource PhoneTextNormalStyle}"/>
      <TextBlock x:Name="PageTitle" Text="円グラフ" Margin="9,-7,0,0" Style="{StaticResource PhoneTextTitle1Style}"/>
    </StackPanel>

    <!--ContentPanel - place additional content here-->
    <Grid x:Name="ContentPanel" Grid.Row="1" Margin="12,0,12,0">
      <Grid.RowDefinitions>
        <RowDefinition Height="*" />
        <RowDefinition Height="Auto" />
      </Grid.RowDefinitions>
      <amq:PieChart x:Name="PieChart1"
                       DataSource="{Binding Data}"
                       TitleMemberPath="品名"
                       ValueMemberPath="小計"
                       > ■(5)
      </amq:PieChart>
      <Button Content="Topへ戻る" Grid.Row="1" Name="PieChartButton" /> ■(6)
    </Grid>
  </Grid>
 ~コード略~
</phone:PhoneApplicationPage>
ソリューションエクスプローラー内のPieChartPage.xamlを展開して表示される、PieChartPage.xaml.vbをダブルクリックして、リスト7のコードを記述します。
ロジックコードを記述する
リスト7 (PieChartPage.xaml.vb)
※リスト5 (Chart.xaml.vb)とほとんど同じコードです。リスト5の解説を参照してください。
- この記事のキーワード


