複合モーションを使った、針を回転させるサンプル
複合モーションを使った、針を回転させるサンプル
3つ目は、複合モーションを使ったサンプルです。「複合モーション」は、「複合モーションセンサー」という1個のセンサーが用意されているのではなく、加速度センサー、ジャイロスコープセンサー、コンパスセンサーにより取得可能なデータを連携して扱える複合APIです。
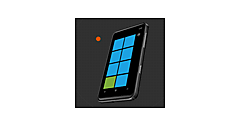
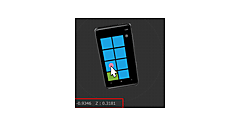
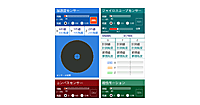
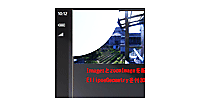
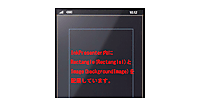
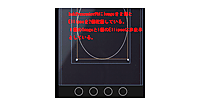
ここでは、デバイスの姿勢を表すAttitudeプロパティの値を取得して、視覚的に表示してみます(図5)。
今回紹介しているのは、Silverlightアプリですが、複合モーションを使うメリットは、Quaternionなどの値を利用する、.Xna Frameworkによるゲームに顕著です。
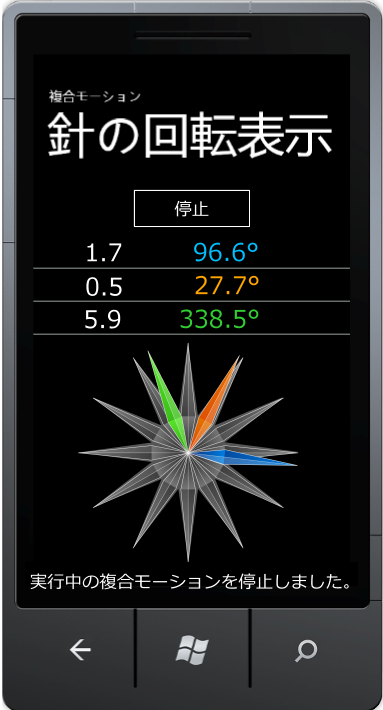 |
図5:複合モーションで取得されたデータを角度に変換して、針の画像を回転させる(クリックで拡大) |
プロジェクトの作成
VS 2010のメニューから[ファイル(F)/新規作成(N)/プロジェクト(P)]「Windows Phone アプリケーション」を選択して、「MotionSample」プロジェクトを作成します。Windows Phoneのバージョンは7.1です。
Imageという名前のフォルダを作って、4枚のPNG画像を追加しておきます。ダウンロードされたサンプルファイルには画像ファイルは追加済みです。
MainPage.xamlの編集とコントロールの追加
ツールボックスからButtonコントロールを1個、TextBlockコントロールを7個配置します。また、Imageコントロールを4個配置して、画像を参照しておきます。
XAMLコードは、リスト5のように編集します。
リスト5 編集されたXAMLコード(MainPage.xaml)
前掲のリスト1同様、Image要素の中に、Image.Projection要素を追加します。さらに、その子として、PlaneProjection要素を追加します。
~前略~ <!--LayoutRoot は、すべてのページ コンテンツが配置されるルート グリッドです-->
  <Grid x:Name="LayoutRoot" Background="Transparent">
    <Grid.RowDefinitions>
      <RowDefinition Height="Auto"/>
      <RowDefinition Height="*"/>
    </Grid.RowDefinitions>

    <!--TitlePanel contains the name of the application and page title-->
    <StackPanel x:Name="TitlePanel" Grid.Row="0" Margin="12,17,0,28">
      <TextBlock x:Name="ApplicationTitle" Text="複合モーション" Style="{StaticResource PhoneTextNormalStyle}"/>
      <TextBlock x:Name="PageTitle" Text="針の回転表示" Margin="9,-7,0,0" Style="{StaticResource PhoneTextTitle1Style}"/>
    </StackPanel>

    <!--ContentPanel - place additional content here-->
    <Grid x:Name="ContentPanel" Grid.Row="1" Margin="0,0,0,0">

      <Button Content="開始" Height="80" HorizontalAlignment="Left" Margin="140,0,0,0" Name="Button1" VerticalAlignment="Top" Width="200" />

      <!--●計測結果(Attitude ラジアンと角度)-->

      <!--Pitch-->
      <TextBlock Height="48" HorizontalAlignment="Left" Margin="80,80,0,0" Name="PitchRad" Text="Pitch" VerticalAlignment="Top" Width="150" FontSize="30" />
      <TextBlock Height="48" HorizontalAlignment="Left" Margin="200,80,0,0" Name="PitchAngle" Text="(Angle)" VerticalAlignment="Top" Width="150" FontSize="30" Foreground="DeepSkyBlue" TextAlignment="Right" />
      <Line x:Name="Line1" X1="0" Y1="130" X2="480" Y2="130" Stroke="#FFDDDDDD" StrokeThickness="1"></Line>

      <!--Roll-->
      <TextBlock Height="48" HorizontalAlignment="Left" Margin="80,130,0,0" Name="RollRad" Text="Roll" VerticalAlignment="Top" Width="150" FontSize="30" />
      <TextBlock Height="48" HorizontalAlignment="Left" Margin="200,130,0,0" Name="RollAngle" Text="(Angle)" VerticalAlignment="Top" Width="150" FontSize="30" Foreground="Orange" TextAlignment="Right" />
      <Line x:Name="Line2" X1="0" Y1="180" X2="480" Y2="180" Stroke="#FFDDDDDD" StrokeThickness="1"></Line>

      <!--Yaw-->
      <TextBlock Height="48" HorizontalAlignment="Left" Margin="80,180,0,0" Name="YawRad" Text="Yaw" VerticalAlignment="Top" Width="150" FontSize="30" />
      <TextBlock Height="48" HorizontalAlignment="Left" Margin="200,180,0,0" Name="YawAngle" Text="(Angle)" VerticalAlignment="Top" Width="150" FontSize="30" Foreground="LimeGreen" TextAlignment="Right" />
      <Line x:Name="Line3" X1="0" Y1="230" X2="480" Y2="230" Stroke="#FFDDDDDD" StrokeThickness="1"></Line>

      <!--針の表示-->
      <Image Height="332" HorizontalAlignment="Left" Margin="70,240,0,0" Name="Image1" Stretch="Fill" VerticalAlignment="Top" Width="332" Source="/MotionSample;component/Image/AngleImage.png" />

        <Image Height="332" HorizontalAlignment="Left" Margin="70,240,0,0" Name="YawHand" Stretch="Fill" VerticalAlignment="Top" Width="332" Source="/MotionSample;component/Image/YawHand.png">
          <Image.Projection>
            <PlaneProjection x:Name="MyYawHandProjection" />
          </Image.Projection>
        </Image>
        <Image Height="332" HorizontalAlignment="Left" Margin="70,240,0,0" Name="RollHand" Stretch="Fill" VerticalAlignment="Top" Width="332" Source="/MotionSample;component/Image/RollHand.png">
          <Image.Projection>
            <PlaneProjection x:Name="MyRollHandProjection" />
          </Image.Projection>
        </Image>
        <Image Height="332" HorizontalAlignment="Left" Margin="70,240,0,0" Name="PitchHand" Stretch="Fill" VerticalAlignment="Top" Width="332" Source="/MotionSample;component/Image/PitchHand.png">
          <Image.Projection>
            <PlaneProjection x:Name="MyPitchHandProjection" />
          </Image.Projection>
        </Image>

        <TextBlock Height="30" HorizontalAlignment="Left" Margin="15,570,0,0" Name="TextBlock1" Text="センサーの状態" VerticalAlignment="Top" Width="450" FontSize="24" />
    </Grid>
  </Grid>
<!--ApplicationBar の使用法を示すサンプル コード--> ~後略~
リスト6 ロジックコード(MainPage.xaml.vb)
名前空間のインポートと変数の宣言
Microsoft.Devices.Sensors名前空間と、Xna.Framework名前空間もインポートしておきます。
複合モーションのセンサーオブジェクトと、計測間隔、X軸の回転・ピッチ(ピッチング)、Y軸の回転・ロール(ローリング)、Z軸の回転・ヨー(ヨーイング)の生データおよび角度データを代入する変数を宣言します。
Option Strict On
Imports Microsoft.Devices.Sensors
Imports Microsoft.Xna.Framework

Partial Public Class MainPage
  Inherits PhoneApplicationPage

  ' Constructor
  Public Sub New()
    InitializeComponent()
  End Sub

  Dim MyMotion As Motion '複合モーションのセンサー
  Dim MyTimeSpan As Integer = 300 '計測間隔。
  Dim MyPitch, MyRoll, MyYaw As Single 'Pitch、Roll、Yaw の生データ(rad)
  Dim MyAttitudeX, MyAttitudeY, MyAttitudeZ As Single  'デバイスの角度データ
このページがロードされた時の処理
デバイスがセンサーをサポートしているかどうかをチェックして、サポートしていなければ、メッセージを表示します。
  Private Sub MainPage_Loaded(sender As Object, e As System.Windows.RoutedEventArgs) Handles MyBase.Loaded
    '複合モーションがサポートされていない機種への対応
    If Motion.IsSupported = False Then
      MessageBox.Show("このデバイスは複合モーションをサポートしていません。")
      Button1.IsEnabled = False
      Exit Sub
    Else
      Button1.IsEnabled = True
    End If
  End Sub
ボタンがタップされた時の処理
このサンプルでは、1個のボタンをタップする都度、センシングの開始と停止を切り替えます。センサーオブジェクトが有効であれば、センサーを停止し、ボタンの文字列を「開始」にします。
一方、センサーオブジェクトが空であれば、複合モーションの新しいインスタンスを作成して、ボタンの文字列を「停止」にしたうえで、センシングを実行します。
  Private Sub Button1_Tap(sender As Object, e As System.Windows.Input.GestureEventArgs) Handles Button1.Tap
    If MyMotion IsNot Nothing AndAlso MyMotion.IsDataValid Then
      Try
        MyMotion.Stop()
        MyMotion = Nothing
        TextBlock1.Text = "実行中の複合モーションを停止しました。"
        Button1.Content = "開始"
      Catch
        MessageBox.Show("複合モーションの停止に失敗しました。")
      End Try
    Else
      If MyMotion Is Nothing Then
        MyMotion = New Motion
        MyMotion.TimeBetweenUpdates = TimeSpan.FromMilliseconds(MyTimeSpan)
        AddHandler MyMotion.CurrentValueChanged, Sub(senderValue As Object, eValue As SensorReadingEventArgs(Of MotionReading))

Deployment.Current.Dispatcher.BeginInvoke(Sub() CurrentValueChanged(eValue.SensorReading))
                                             End Sub
      End If

      Try
        Button1.Content = "停止"
        TextBlock1.Text = "計測を開始しました。"
        MyMotion.Start()
      Catch
        MessageBox.Show("計測を開始できませんでした。")
      End Try
    End If
  End Sub
センサーデータが更新された時の処理
センサーデータが更新された時、ピッチ・ロール・ヨーの生データを取得し、これをMathHelper.ToDegreesで角度に変換します。
生データと角度データをTextBlock内に表示し、角度を指定して3軸の針の図形を時計回りに回転させます。
  Private Sub CurrentValueChanged(MyReading As MotionReading)

    'デバイスの姿勢 (ピッチ、ロール、ヨー)
    'MotionReading 構造体 Attitude プロパティで取得される、Pitch、Roll、Yaw の値(rad)
    MyPitch = MyReading.Attitude.Pitch
    MyRoll = MyReading.Attitude.Roll
    MyYaw = MyReading.Attitude.Yaw

    'デバイスの姿勢 (ピッチ、ロール、ヨー) を角度に変換
    MyAttitudeX = MathHelper.ToDegrees(MyPitch)
    MyAttitudeY = MathHelper.ToDegrees(MyRoll)
    MyAttitudeZ = MathHelper.ToDegrees(MyYaw)

    'ピッチ、ロール、ヨーのデータを表示
    PitchRad.Text = CStr(MyPitch.ToString("F1"))
    RollRad.Text = CStr(MyRoll.ToString("F1"))
    YawRad.Text = CStr(MyYaw.ToString("F1"))

    'ピッチ、ロール、ヨーの角度データを表示
    PitchAngle.Text = CStr(MyAttitudeX.ToString("F1")) & "°"
    RollAngle.Text = CStr(MyAttitudeY.ToString("F1")) & "°"
    YawAngle.Text = CStr(MyAttitudeZ.ToString("F1")) & "°"

    'もとめた角度を指定して、3軸それぞれの図形を時計回りに回転
    MyPitchHandProjection.RotationZ = 360 - MyAttitudeX
    MyRollHandProjection.RotationZ = 360 - MyAttitudeY
    MyYawHandProjection.RotationZ = 360 - MyAttitudeZ

  End Sub
End Class
このように、Windows Phone のセンサーにより取得したデータを利用すると、実機を傾けたり、振ったりした時に処理を実行するインタフェースを実現できます。
さて、今回の「Marketplaceのアプリから解説するWindows Phoneの実践サンプルコード集」で、Windows Phoneのサンプル解説は一応完結です。先日、Windows Phone 8が発表されましたが、リリースされたらぜひ試してみたいですね。
→参照:Windows Phone 8のスタート画面は「最高にエレガント」(ギズモード・ジャパン)
ここまで、いろいろなサンプルを紹介してきましたが、皆さまのWindows Phoneアプリ作成の一助になれば幸いです。皆さんもどしどしアプリを開発して、APP HUBより申請していただければと思います。
長い間お疲れさまでした。
APP HUB登録の一連の流れについては、下記リンクの記事も参照してください。
→参照:Windows Phoneアプリ制作からマーケットプレイス公開までを完全ガイド!
【参考リンク】
- この記事のキーワード


