コンテンツベースルーティングの実行
コンテンツベースルーティングの実行
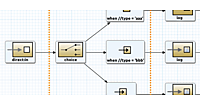
先ほどと同様の手順で、Camel Contextルートを実行します。実行に成功すると、リスト6のような出力が得られます。
リスト6:コンテンツベースルーティングの実行結果
[INFO] Starting Camel ...
[mel.test.blueprint.Main.main()] MainSupport                    INFO  Apache Camel 2.12.0.redhat-610379 starting
[mel.test.blueprint.Main.main()] Activator                      INFO  Camel activator starting
[mel.test.blueprint.Main.main()] Activator                      INFO  Camel activator started
[mel.test.blueprint.Main.main()] BlueprintExtender              INFO  No quiesce support is available, so blueprint components will not participate in quiesce operations
[         Blueprint Extender: 1] BlueprintContainerImpl         INFO  Bundle simple-route is waiting for namespace handlers [http://camel.apache.org/schema/blueprint]
[         Blueprint Extender: 1] BlueprintCamelContext          INFO  Apache Camel 2.12.0.redhat-610379 (CamelContext: camel-1) is starting
[         Blueprint Extender: 1] ManagedManagementStrategy      INFO  JMX is enabled
[         Blueprint Extender: 1] BlueprintCamelContext          INFO  AllowUseOriginalMessage is enabled. If access to the original message is not needed, then its recommended to turn this option off as it may improve performance.
[         Blueprint Extender: 1] BlueprintCamelContext          INFO  StreamCaching is not in use. If using streams then its recommended to enable stream caching. See more details at http://camel.apache.org/stream-caching.html
[         Blueprint Extender: 1] FileEndpoint                   INFO  Endpoint is configured with noop=true so forcing endpoint to be idempotent as well
[         Blueprint Extender: 1] FileEndpoint                   INFO  Using default memory based idempotent repository with cache max size: 1000
[         Blueprint Extender: 1] XPathBuilder                   INFO  Created default XPathFactory com.sun.org.apache.xpath.internal.jaxp.XPathFactoryImpl@4e370ac4
[         Blueprint Extender: 1] BlueprintCamelContext          INFO  Route: route1 started and consuming from: Endpoint[file://src/data?noop=true]
[         Blueprint Extender: 1] BlueprintCamelContext          INFO  Total 1 routes, of which 1 is started.
[         Blueprint Extender: 1] BlueprintCamelContext          INFO  Apache Camel 2.12.0.redhat-610379 (CamelContext: camel-1) started in 0.206 seconds
[1) thread #0 - file://src/data] 1                              INFO  uk message
[1] thread #0 - file://src/data] 2                              INFO  other messages
ファイルが適切なフォルダに振分けられていることも確認しておきましょう(図22)。
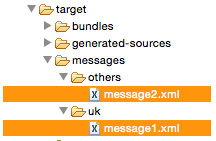
図22:target/messages/配下にXMLファイルがコピーされていることを確認
RedHat JBoss Fuse Server上で動かす
ここまで作り上げたプロジェクトを、サーバ上で稼働させる手順をご紹介します。第3回の記事では、karafコンソールからのデプロイメント方法を案内しました。今回は、JBoss Developer Studioからデプロイする方法を案内します。
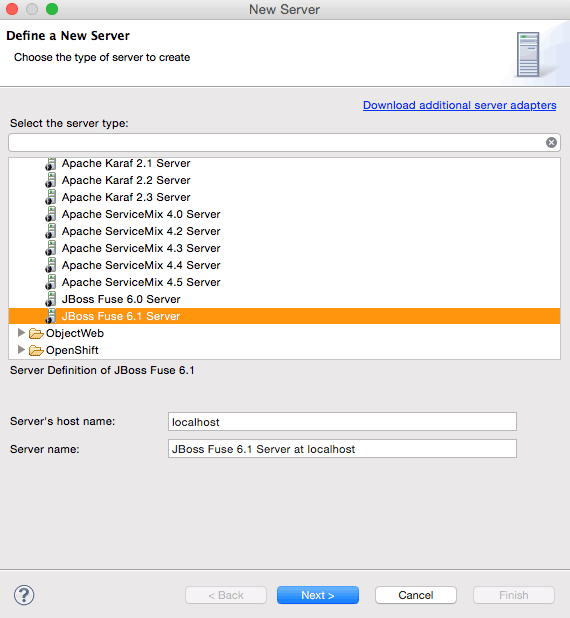
JBoss Developer Studioの下部にあるパースペクティブに配置されている[Servers]パースペクティブ上で右クリックメニューから[New]−[Server]を選択します。ウィザードが表示されるので、「JBoss Fuse 6.1 Server」を選択して、[Next]をクリックします(図23)。
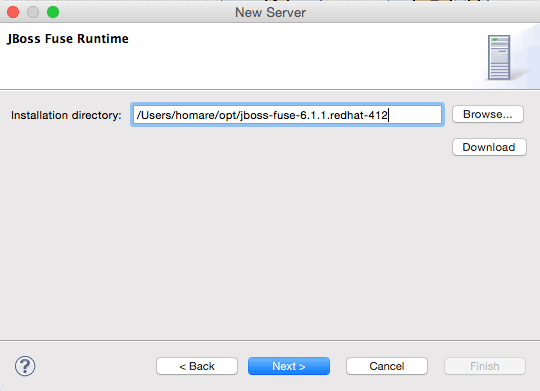
インストール先ディレクトリは、Fuseをインストールしたパスを入力します(図24)。
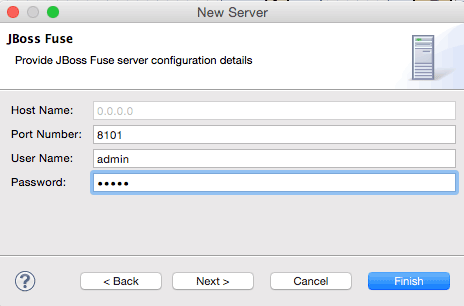
ポート番号はデフォルトのまま(8101)、ユーザ名は「admin」、パスワードは「admin」を指定します(図25)。
[Finish]ボタンをクリックすると、図26のような設定が表示されます。
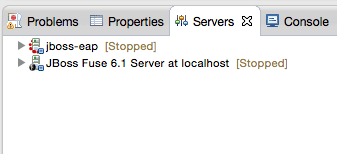
図26:設定したサーバが表示されることを確認
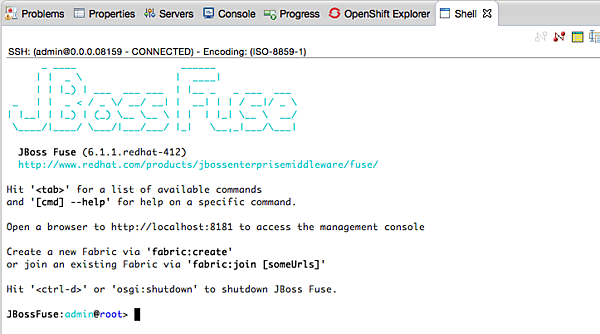
作成されたサーバ定義の右クリックメニューから[Start}を選択します。しばらくすると、JBoss Fuseのコンソールが起動します(図27)。
simple-routeプロジェクトを右クリックし、[Run AS]−[Maven Install]を実行するとプロジェクトビルドされ、ローカルのMavenリポジトリ(ユーザホーム/.m2)に配備されます。
シェルウィンドウから、図28の通りにコマンドを実行します。

図28:サーバにルートをデプロイ
以上で、サーバ上へのsimple-routeプロジェクトのデプロイが完了しました。
サーバ上で実行確認します。シェルを起動して、以下のコマンドを実行します(リスト7)。
リスト7:サーバ上でプロジェクトを実行する
# JBoss Fuseのインストールディレクトリへ移動
$ cd <JBoss Fuseのインストールルートパス>
# ソースディレクトリにテストデータ(meeage1.xml, message2.xml)をコピー
$ cp <simple-routeプロジェクトのsrc/data/message*.xml> src/data
実行後には、結果も確認しておきましょう(リスト8)。
リスト8:サーバ上でのプロジェクトの実行結果を確認
# ターゲットディレクトリの確認
$ ls –R target/messages
others uk

target/messages/others: #othersディレクトリ配下にmessages2.xmlがコピーされている
messges2.xml

target/messages/uk: #ukディレクトリ配下にmessages1.xmlがコピーされている
messages1.xml
いかがでしたでしょうか? 今回はFuse上で、簡単なファイル操作シナリオを通じて、プロジェクト実装の流れから実行までを体験いただきました。次回は、Webサービスを利用したシナリオを元に、より応用的な使い方をご案内する予定です。
- この記事のキーワード


