XAML(ImageComment.xaml)の編集
XAML(ImageComment.xaml)の編集
書き出されるImageComment.xamlをリスト3のように編集します。
リスト3 編集されたXAMLコード(ImageComment.xaml)
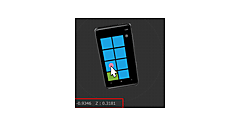
(1)図2のようにエミュレーターを横に倒した場合、画像もそれに伴って横向きに表示されるようにするには、PhoneApplicationPageを選択し、表示されるプロパティウィンドウの[その他]パネルにあるSupportedOrientationsプロパティに、PortraitOrLandscapeを指定します。
(2)<phone:PhoneApplicationPage.Resources>プロパティ要素内に、ListBoxTemplateというキーのテンプレートを定義します。<StackPanel>要素内に、<Image>要素を配置し、WidthとHeightプロパティを指定します。Sourceプロパティに「画像名」をバインドします。Marginプロパティに10を指定し、余白を設定しています。次に<TextBloc>要素を配置し、Textプロパティに「説明」をバインドします。次に<Button>要素を配置し、Contentプロパティに「戻る」、ClickイベントにPageBackイベントハンドラを指定しています。<StackPanel>要素のスタックされる要素の向きを設定するOrientationプロパティの値は、デフォルトでVerticalですので、これらの要素は垂直方向に配置されます。ここで指定する名称はVBコード内のクラスで定義するプロパティ名です。
(3)x:NameがPageTitleのTextBlockのTextプロパティを削除します。ここにはプログラムから選択された画像のタイトル名を表示させます。
(4)<ListBox>要素のItemTemplateに(2)で定義したListBoxTemplateを参照させます。

<phone:PhoneApplicationPage xmlns:toolkit="clr-namespace:Microsoft.Phone.Controls;assembly=Microsoft.Phone.Controls.Toolkit"
x:Class="WP7_Pivot.ImageComment"
  xmlns="http://schemas.microsoft.com/winfx/2006/xaml/presentation"
  xmlns:x="http://schemas.microsoft.com/winfx/2006/xaml"
  xmlns:phone="clr-namespace:Microsoft.Phone.Controls;assembly=Microsoft.Phone"
  xmlns:shell="clr-namespace:Microsoft.Phone.Shell;assembly=Microsoft.Phone"
  xmlns:d="http://schemas.microsoft.com/expression/blend/2008"
  xmlns:mc="http://schemas.openxmlformats.org/markup-compatibility/2006"
  FontFamily="{StaticResource PhoneFontFamilyNormal}"
  FontSize="{StaticResource PhoneFontSizeNormal}"
  Foreground="{StaticResource PhoneForegroundBrush}"
  SupportedOrientations="PortraitOrLandscape" Orientation="Portrait" ■(1)
  mc:Ignorable="d" d:DesignHeight="768" d:DesignWidth="480"
  shell:SystemTray.IsVisible="True">
  <phone:PhoneApplicationPage.Resources>
    <DataTemplate x:Key="ListBoxTemplate"> ■(2)
      <StackPanel>
        <Image Width="640" Height="480" Source="{Binding 画像名}" Margin="10" />
        <TextBlock Text="{Binding 説明}" />
        <Button x:Name="backButton" Content="戻る" Click="PageBack"/>
      </StackPanel>
    </DataTemplate>

    </phone:PhoneApplicationPage.Resources>
  <!--LayoutRoot is the root grid where all page content is placed-->
  <Grid x:Name="LayoutRoot" Background="Transparent">
    <Grid.RowDefinitions>
      <RowDefinition Height="Auto"/>
      <RowDefinition Height="*"/>
    </Grid.RowDefinitions>

    <!--TitlePanel contains the name of the application and page title-->
    <StackPanel x:Name="TitlePanel" Grid.Row="0" Margin="12,17,0,28">
      <TextBlock x:Name="ApplicationTitle" Text="APPLICATION" Style="{StaticResource PhoneTextNormalStyle}"/>
      <TextBlock x:Name="PageTitle" Margin="9,-7,0,0" Style="{StaticResource PhoneTextTitle1Style}"/> ■(3)
    </StackPanel>

    <!--ContentPanel - place additional content here-->
    <Grid x:Name="ContentPanel" Grid.Row="1" Margin="12,0,12,0">
      <ListBox Height="Auto" HorizontalAlignment="Left" Margin="27,25,0,0" Name="ListBox1" VerticalAlignment="Top" Width="Auto" ItemTemplate="{StaticResource ListBoxTemplate}"/> ■(4)
    </Grid>
  </Grid>
  ~コード略~
  </phone:PhoneApplicationPage.ApplicationBar>-->
</phone:PhoneApplicationPage>
Windows Phone Portrait Page(PersonalInfoDeatils.xaml)の追加
VS2010メニューの「プロジェクト(P)/新しい項目の追加(W)」と選択して、「Windows Phone Portrait Page」を追加します。「名前(N)」には、PersonalInfoDetails.xamlと指定します(図8参照)。個人情報の詳細データを表示するページです。
x:NameがPageTitleというTextBlockのTextプロパティに「詳細データ表示」と指定します。
エミュレーターデザイン画面上に、ツールボックスからTextBlockとButtonコントロールを1個ずつ配置します。ButtonコントロールのContentプロパティには「Topに戻る」と指定します。書き出されるXAMLコードはリスト4のようになります。
リスト4 書き出されたXAMLコード(PersonalInfoDetails.xaml)
(1)図2のようにエミュレーターを横に倒した場合、画像もそれに伴って横向きに表示されるようにするには、PhoneApplicationPageを選択し、表示されるプロパティウィンドウの[その他]にあるSupportedOrientationsプロパティに、PortraitOrLandscapeを指定します。

<phone:PhoneApplicationPage
  x:Class="WP7_Pivot.PersonalInfoDetails"
  xmlns="http://schemas.microsoft.com/winfx/2006/xaml/presentation"
  xmlns:x="http://schemas.microsoft.com/winfx/2006/xaml"
  xmlns:phone="clr-namespace:Microsoft.Phone.Controls;assembly=Microsoft.Phone"
  xmlns:shell="clr-namespace:Microsoft.Phone.Shell;assembly=Microsoft.Phone"
  xmlns:d="http://schemas.microsoft.com/expression/blend/2008"
  xmlns:mc="http://schemas.openxmlformats.org/markup-compatibility/2006"
  FontFamily="{StaticResource PhoneFontFamilyNormal}"
  FontSize="{StaticResource PhoneFontSizeNormal}"
  Foreground="{StaticResource PhoneForegroundBrush}"
  SupportedOrientations="PortraitOrLandscape" Orientation="Portrait" ■(1)
  mc:Ignorable="d" d:DesignHeight="768" d:DesignWidth="480"
  shell:SystemTray.IsVisible="True">

  <!--LayoutRoot is the root grid where all page content is placed-->
  <Grid x:Name="LayoutRoot" Background="Transparent">
    <Grid.RowDefinitions>
      <RowDefinition Height="Auto"/>
      <RowDefinition Height="*"/>
    </Grid.RowDefinitions>

    <!--TitlePanel contains the name of the application and page title-->
    <StackPanel x:Name="TitlePanel" Grid.Row="0" Margin="12,17,0,28">
      <TextBlock x:Name="ApplicationTitle" Text="APPLICATION" Style="{StaticResource PhoneTextNormalStyle}"/>
      <TextBlock x:Name="PageTitle" Text="詳細データ表示" Margin="9,-7,0,0" Style="{StaticResource PhoneTextTitle1Style}"/>
    </StackPanel>

    <!--ContentPanel - place additional content here-->
    <Grid x:Name="ContentPanel" Grid.Row="1" Margin="12,0,12,0">
      <TextBlock Height="312" HorizontalAlignment="Left" Margin="9,129,0,0" Name="TextBlock1" Text="TextBlock" VerticalAlignment="Top" Width="441" FontFamily="Portable User Interface" FontSize="32" />
      <Button Content="TOPに戻る" Height="81" HorizontalAlignment="Left" Margin="19,11,0,0" Name="Button1" VerticalAlignment="Top" Width="426" />
    </Grid>
  </Grid>

  <!--Sample code showing usage of ApplicationBar-->
  ~コード略~
</phone:PhoneApplicationPage>
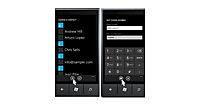
リスト4を設定して表示されるエミュレーター画面は図9のようになります。
| 図9:リスト4を設定して表示されるPersonalInfoDetails.xamlのデザイン画面(クリックで拡大) |
<後編に続く>
- この記事のキーワード


