Herokuを利用する環境を整備する
Herokuを利用する環境を整備する
まずはHerokuのアカウントを取得しましょう。サインアップ(https://api.heroku.com/signup)からメールアドレスを登録します。すると確認のメールが送信されてくるので、そのメールに書いてあるリンクから本登録のフォームへ進んでください。図のような画面が表示されるはずです。
 | 図3:サインアップ |
Herokuアカウントを取得した後、Herokuのコマンドラインツールを次のコマンドでインストールします。
$ gem install heroku
これでherokuコマンドを使えるようになりました。早速ターミナル上でHerokuにログインしてみましょう。
$ heroku login
Enter your Heroku credentials.
Email: <Herokuに登録したメールアドレスを入力します>
Password:  <Herokuに登録したパスワードを入力します>
Could not find an existing public key.
Would you like to generate one? [Yn] Y
Generating new SSH public key.
Uploading ssh public key /Users/mah_lab/.ssh/id_rsa.pub
SSHの公開鍵がない場合は自動的に検知し、生成してくれます。これでHerokuにサンプルアプリケーションをデプロイする準備が整いました!
サンプルアプリケーションをHeroku向けに修正する
とはいえ、少しだけサンプルアプリケーションを手直しする必要があります。Gemfileを開き、次の内容で全て上書きしてください。
source 'https://rubygems.org'

gem 'rails', '3.2.5'
gem 'sqlite3', group: [:development, :test]
gem 'pg', group: :production

group :assets do
  gem 'sass-rails',   '~> 3.2.3'
  gem 'coffee-rails', '~> 3.2.1'

  gem 'uglifier', '>= 1.0.3'
end

gem 'jquery-rails'
その後、以下のコマンドで設定を有効化し、Gitにコミットしておきます。
$ bundle
$ git add .
$ git commit -m "Setting for Heroku Deploy"
Herokuにデプロイする
まずHerokuのアプリケーションを以下のコマンドで作成します。
$ heroku create --stack cedar
Creating freezing-galaxy-4772... done, stack is cedar
http://freezing-galaxy-4772.herokuapp.com/ | git@heroku.com:freezing-galaxy-4772.git
Git remote heroku added
!    Notice: on Wed, 20 June, our default stack will change to Cedar. http://bit.ly/Lh0rM5
するとGitのリモートリポジトリにHerokuが登録されます。
$ git remote -v
heroku	git@heroku.com:freezing-galaxy-4772.git (fetch)
heroku	git@heroku.com:freezing-galaxy-4772.git (push)
これでHerokuにGitでデプロイすることが可能になりました。以下のコマンドを実行してデプロイしましょう。
$ git push heroku master
Counting objects: 74, done.
Delta compression using up to 4 threads.
Compressing objects: 100% (65/65), done.
Writing objects: 100% (74/74), 26.92 KiB, done.
Total 74 (delta 2), reused 0 (delta 0)

-----> Heroku receiving push
-----> Ruby/Rails app detected
-----> Installing dependencies using Bundler version 1.2.0.pre
  Running: bundle install --without development:test --path vendor/bundle --binstubs bin/--deployment
Fetching gem metadata from https://rubygems.org/.......
  Installing rake (0.9.2.2)
  Installing i18n (0.6.0)
  Installing multi_json (1.3.6)
  Installing activesupport (3.2.5)
  Installing builder (3.0.0)
  Installing activemodel (3.2.5)
  Installing erubis (2.7.0)
  Installing journey (1.0.3)
  Installing rack (1.4.1)
  Installing rack-cache (1.2)
  Installing rack-test (0.6.1)
  Installing hike (1.2.1)
  Installing tilt (1.3.3)
  Installing sprockets (2.1.3)
  Installing actionpack (3.2.5)
  Installing mime-types (1.18)
  Installing polyglot (0.3.3)
  Installing treetop (1.4.10)
  Installing mail (2.4.4)
  Installing actionmailer (3.2.5)
  Installing arel (3.0.2)
  Installing tzinfo (0.3.33)
  Installing activerecord (3.2.5)
  Installing activeresource (3.2.5)
  Installing coffee-script-source (1.3.3)
  Installing execjs (1.4.0)
  Installing coffee-script (2.2.0)
  Installing rack-ssl (1.3.2)
  Installing json (1.7.3) with native extensions
  Installing rdoc (3.12)
  Installing thor (0.15.2)
  Installing railties (3.2.5)
  Installing coffee-rails (3.2.2)
  Installing jquery-rails (2.0.2)
  Installing pg (0.13.2) with native extensions
  Using bundler (1.2.0.pre)
  Installing rails (3.2.5)
  Installing sass (3.1.19)
  Installing sass-rails (3.2.5)
  Installing uglifier (1.2.4)
  Your bundle is complete! It was installed into ./vendor/bundle
  Post-install message from rdoc:
  Depending on your version of ruby, you may need to install ruby rdoc/ri data:
  <= 1.8.6 : unsupported
  = 1.8.7 : gem install rdoc-data; rdoc-data --install
  = 1.9.1 : gem install rdoc-data; rdoc-data --install
  >= 1.9.2 : nothing to do! Yay!
  Cleaning up the bundler cache.
-----> Writing config/database.yml to read from DATABASE_URL
-----> Preparing app for Rails asset pipeline
  Running: rake assets:precompile
-----> Rails plugin injection
  Injecting rails_log_stdout
  Injecting rails3_serve_static_assets
-----> Discovering process types
  Procfile declares types      -> (none)
  Default types for Ruby/Rails -> console, rake, web, worker
-----> Compiled slug size is 15.8MB
-----> Launching... done, v4
  http://freezing-galaxy-4772.herokuapp.com deployed to Heroku

To git@heroku.com:freezing-galaxy-4772.git
* [new branch]      master -> master
最後にHeroku側のDBをセットアップし、ブラウザでHerokuにデプロイされたサンプルアプリケーションのURLを叩いてみましょう。
$ heroku run rake db:migrate
Connecting to database specified by DATABASE_URL
Migrating to CreateBlogs (20120611031345)
==  CreateBlogs: migrating====================================================
-- create_table(:blogs)
  -> 0.0541s
==  CreateBlogs: migrated (0.0542s)===========================================

$ heroku open
Opening http://freezing-galaxy-4772.herokuapp.com/
Herokuでも図のように、サンプルアプリケーションが動くようになりました。もうこれからは git push heroku master するだけでどんどんHerokuにアプリケーションをデプロイしていくことができます。
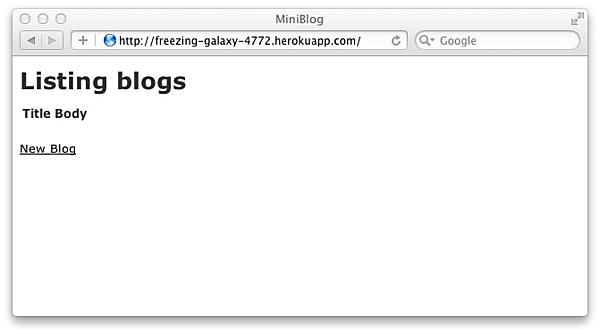 | 図4:Herokuにデプロイされたサンプルアプリケーション |
ただ、Gitだけだとデプロイ時のDBマイグレーション等を自動的にはやってくれないので、heroku_sanという便利なGemを使ってデプロイ作業を楽にしています。
今回はHerokuをご紹介した後、Ruby on Railsのサンプルアプリケーションを用いたHerokuへのデプロイ作業を体験して頂きました。全くRuby on Railsの環境を構築していないところからの説明でしたので、少しその部分が長くなってしまいましたが、Rails環境構築の手順として使っていただければと思います。
次回はiPhoneアプリのテストアプリケーションを簡単に配布することのできるTestFlightについてご紹介します。
<執筆協力 DaVinciWare(http://www.davinciware.com/)>
この記事をシェアしてください
関連記事
Active Recordのその先へ ~RailsでMongoDBを使う~
2010年10月27日 20:00
Node.jsとExpress.jsで開発したWebアプリをeXcaleで動かす
2013年1月17日 20:00
Rails4をはじめよう
2015年1月21日 18:00
youRoomとPivotalTrackerではじめる無駄のないコミュニケーション
2012年6月14日 20:00
VirtualBoxやVagrantを用いたRails開発環境の構築方法(後編)
2014年6月26日 23:00
expressで開発したWebアプリをeXcaleで動かす
2013年1月30日 20:00
バックナンバー
この記事の筆者
筆者の人気記事
Think ITでは、技術情報が詰まったメールマガジン「Think IT Weekly」の配信サービスを提供しています。メルマガ会員登録を済ませれば、メルマガだけでなく、さまざまな限定特典を入手できるようになります。
