画面上の図形を5本の指で操作する基本的なLeap Motionプログラムを作る
プログラム・コードはリスト4のようになります。
リスト4(UpDownModel.vb) 指のアップ・ダウンで円を拡大縮小するクラス
Imports System.ComponentModel
Imports Leap
Public Class UpDownModel

'  プロパティの値が変更されたことをクライアントに通知する、
'  INotifyPropertyChangedインターフェースをインプリメントしておく。
  Implements INotifyPropertyChanged

  Private ctlr As Controller
  Private listener As LeapListener

'  Newメソッド
'  各インスタンスを作成して、AddHandlerステートメントで、listenerオブジェクトの
'  LeapSwipeイベントに、SwipeActionベントハンドラ—を追加する。
  Public Sub New()
    ctlr = New Controller
    listener = New LeapListener
    ctlr.AddListener(listener)
    AddHandler listener.LeapSwipe, AddressOf Me.SwipeAction
  End Sub

‘ EllipseHeightプロパティの定義
  Private myHeight As Double

  Public Property EllipseHeight As Double
    Get
      Return myHeight
    End Get
    Set(value As Double)
      myHeight = value
      OnPropertyChanged("EllipseHeight")
    End Set
  End Property

'  EllipseWidthプロパティの定義
  Private myWidth As Double
  Public Property EllipseWidth As Double
    Get
      Return myWidth
    End Get
    Set(value As Double)
      myWidth = value
      OnPropertyChanged("EllipseWidth")
    End Set
  End Property

'  UpとDownによってEllipseHeightとEllipseWidthの値を変化させるSwipeActionメソッドの処理
  Private Sub SwipeAction(ByVal sd As SwipeDirection)
    Select Case sd
      Case SwipeDirection.Up
        EllipseHeight += 10
        EllipseWidth += 10

        Exit Select
      Case SwipeDirection.Down

        EllipseHeight -= 10
        EllipseWidth -= 10
        Exit Select
    End Select
  End Sub

' プロパティの値が変更された時に、変更されたことをクライアントに通知する
'  PropertyChangedイベント。
  Public Event PropertyChanged(sender As Object, e As PropertyChangedEventArgs) Implements INotifyPropertyChanged.PropertyChanged

'  OnPropertyChangedメソッドの処理
'  RaseEventでプロパティ名で初期化されたPropertyChangedイベントを発生させる。
  Private Sub OnPropertyChanged(ByVal propertyName As String)
    RaiseEvent PropertyChanged(Me, New PropertyChangedEventArgs(propertyName))
  End Sub
End Class
MainWindow.xaml内に[UpDownModel]を取り込む。
まず名前空間として「xmlns:local="clr-namespace:FingerRecognizeUpDown"」を定義します。
次に
※注意
リスト5(MainWindow.xaml) 「UpDownMode」を取り込んだMainWindow.xaml
<Window x:Class="MainWindow"
  xmlns="http://schemas.microsoft.com/winfx/2006/xaml/presentation"
  xmlns:x="http://schemas.microsoft.com/winfx/2006/xaml"
  xmlns:d="http://schemas.microsoft.com/expression/blend/2008"
  xmlns:mc="http://schemas.openxmlformats.org/markup-compatibility/2006" mc:Ignorable="d"
  xmlns:local="clr-namespace:FingerRecognizeUpDown"
  Title="MainWindow" Height="768" Width="1366" >
  <Window.DataContext>
    <local:UpDownModel/>
  </Window.DataContext>
 ・・・・以下コード略・・・・
</Window>
プログラム・コード(MainWindow.xaml.vb)指の個数を表示させる処理
MainWindows.xaml.vbファイルを見ていきましょう(リスト6)。
新しいControllerクラスのインスタンスであるleapメンバー変数を宣言します。次に、インク・ストローク(=System.Windows.Ink名前空間のStrokeクラスで表現される、WPF上でのインクの線)の外観を指定する新しいDrawingAttributesクラス(System.Windows.Ink名前空間)のインスタンスである「touchIndicatorメンバー変数」を宣言します。
MainWindow_Loadedメソッドの処理
MainWindow_Loadedメソッド(=メイン・ウィンドウのLoadedイベントのハンドラー)では、MainWindowが読み込まれたときの処理を実装します。
AddHandlerステートメントを使って、構成ツリーのオブジェクトがレンダリングされる直前に発生する「CompositionTarget.Renderingイベント」に対するイベント・ハンドラーとしてUpdateメソッドを指定します(※Updateメソッドの実装内容は後述)。
インク・ストロークの外観を表す、DrawingAttributesオブジェクトのインスタンス「touchIndicator」のWidthプロパティとHeightプロパティにそれぞれ「30」を指定します。スタイラスの形状を指定するStylusTipプロパティに「StylusTip.Ellipse」を指定して円形とします。Leap Motionの上で指をかざすと、かざした指の本数が5本で、30px(px=ピクセル)の円が表示されるようになります。
Updateメソッドの処理
次は、CompositionTarget.Renderingイベント・ハンドラーであるUpdateメソッドの処理です。
まず、上記のコードを実装した段階で、「Update」の位置に[エラー修正のオプション]というスマート・タグが表示されるので、そのタグのメニューから[’ ChangeBackgroundLeapMotion.MainWindow’ に ‘ Update’ のメソッド スタブを生成]をクリックすると、Updateメソッドのひな型が追加されます。次に、そのメソッド内を実装していきます。
「paintCanvas」という名前のInkPresenter内をクリアします。この処理を行っていないと、Updateメソッドは常に呼び出されているため、円を画面上で動かすと、円の軌跡が残ったまま表示されてしまいます。そのため、InkPresenter内をクリアする必要があります。
Leap Motionのフレームを表すFrame型(Leap名前空間)の変数「frame」を宣言します。InteractionBox型(Leap名前空間)の変数「interactionBox」を宣言し、そこにleap.Frame.InteractionBoxプロパティからInteractionBoxオブジェクトを取得します。InteractionBoxオブジェクトは、Leap Motionで認識できる可動範囲となります。InteractionBoxオブジェクトを使用することで、指やツール(=ペンなど)の位置を実際のディスプレイの座標系に変換できます。詳細な図については、「Leap Motionでのタッチ操作はどう開発するのか?」を参照してください。
Leap.Frame.Pointablesプロパティで得られるPointableListオブジェクト内を変数「Pointable」で反復処理しながら、1つずつPointableオブジェクトを処理し、それぞれのタッチ位置を取得していきます。
interactionBoxオブジェクトのNormalizePointメソッドに引数としてPointable.StabilizedTipPositionプロパティ値を渡し、ポインター上の位置を取得します。
変数「windowWidth」と「windowHeight」で表されたクライアント領域のウィンドウがある場合、
Dim tx As Double = normalizedPosition.x * windowWidth

Dim ty As Double = windowHeight - normalizedPosition.y * windowHeight
のコードで示す計算式を使用してこのウィンドウ内のタッチ・ポイントの2D座標を得ることができます。
最後に、
  Dim tips As New StylusPointCollection(New StylusPoint() {touchPoint})
  Dim touchStroke As New Stroke(tips, touchIndicator)
  paintCanvas.Strokes.Add(touchStroke)
と記述して、ディスプレイ上に円形のタッチ・ポイントを表示します。
実際のコードはリスト6になります。
リスト6(MainWindow.xaml.vb)
Imports Leap
Imports System.Windows.Ink
Class MainWindow
  Private leap As New Controller
  Private windowWidth As Double = 1366
  Private windowHeight As Double = 768
  Private touchIndicator As New DrawingAttributes

'  MainWindow_Loadedメソッドの処理
  Private Sub MainWindow_Loaded(sender As Object, e As RoutedEventArgs) Handles Me.Loaded
    AddHandler CompositionTarget.Rendering, AddressOf Update'  Updateメソッドをイベント・ハンドラーに追加する
    touchIndicator.Width = 30
    touchIndicator.Height = 30
    touchIndicator.StylusTip = StylusTip.Ellipse' スタイラスの形状を30pxの円形に指定する
  End Sub

'  Updateメソッドの処理
  Private Sub Update(sender As Object, e As EventArgs)
    paintCanvas.Strokes.Clear()
    windowWidth = Me.Width
    windowHeight = Me.Height

    Dim frame As Leap.Frame = leap.Frame

'  Leap Motionで認識できる可動範囲を取得する
    Dim interactionBox As InteractionBox = leap.Frame.InteractionBox
    For Each Pointable As Pointable In leap.Frame.Pointables
      Dim normalizedPosition As Leap.Vector = interactionBox.NormalizePoint(Pointable.StabilizedTipPosition)
      Dim tx As Double = normalizedPosition.x * windowWidth
      Dim ty As Double = windowHeight - normalizedPosition.y * windowHeight
      Dim touchPoint As StylusPoint = New StylusPoint(tx, ty) '  ウィンドウ内のタッチ・ポイントの位置を取得する

      Dim tips As New StylusPointCollection(New StylusPoint() {touchPoint})
      Dim touchStroke As New Stroke(tips, touchIndicator)
      paintCanvas.Strokes.Add(touchStroke) '  ディスプレイ上にタッチ・ポイントを表示
    Next
  End Sub
End Class
これでVS2012のメニューから[デバッグ]−[デバッグ開始]と実行すると、5本の指のアップ・ダウンで円が拡大縮小表示されます。
リスト5を見ていただくとわかりますが、画面のWidthに1366、Heightに768と指定し、全画面表示にはしていません。
※注意
サンプルをダウンロードして動かす場合は、「LeapCSharp.NET4.0.dll」や「LeapCSharp.dll」、「Leap.dll」を読者の方自身のフォルダ内にあるDLLファイルに指定し直さなければ動かない可能性があるので、動かない場合は再指定してください。
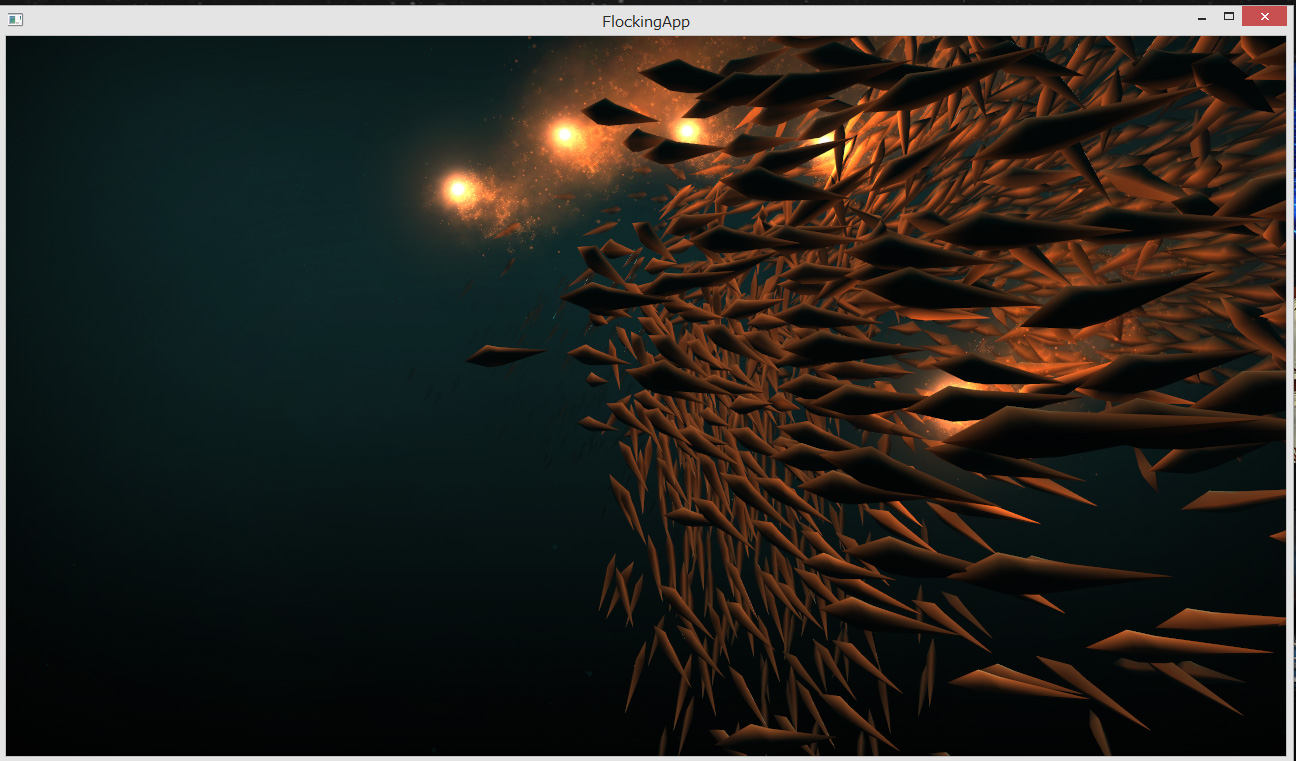
Leap Motionの有料、無料アプリを販売しているAirspace Storeがあります。
筆者は無料のアプリを2つほどダウンロードして試してみました。
まず、「Flocking」は下記の図のように、指の動きに合わせて魚群が移動する美しいアプリです。
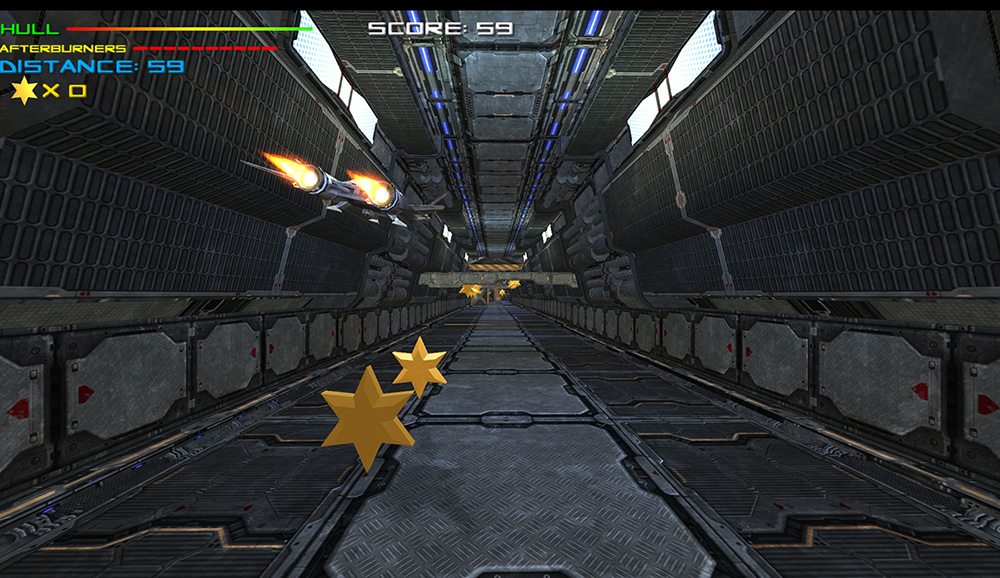
もう一つは「ESCAPE VELOCITY」というシューティングゲームです。筆者はゲームが苦手なため、全く操作ができませんでした(-_-;)
5本の指でオブジェクトを拡大・縮小させるプログラム


連載バックナンバー


Think ITメルマガ会員登録受付中
他にもこの記事が読まれています


全文検索エンジンによるおすすめ記事
- Leap Motionのスクリーン・タップを使った音声の再生と画像の表示
- 手の動きに合わせて画面上のキャラクターを操作するLeap Motionプログラムを作る
- 選択した画像を指の動きに合わせて回転させるLeap Motionプログラムを作る
- 張子の虎をキー・タップすると頭が上下に動くLeap Motionプログラムを作る
- Leap Motionで画像のトリミングと保存を行うためのサンプルプログラムを作る
- 画面に並んだ写真が指の動きに反応して回転するLeap Motionプログラムを作る
- マウス・カーソルで指定した画像の一部を拡大表示するLeap Motionプログラム
- 写真を突っついて一覧から削除、並び替えするLeap Motionプログラムを作る
- Leap MotionアプリをWindowsストアに申請して認定させる
- 好きな写真を指で選んで順番に拡大表示するLeap Motionプログラムを作る