タオの新人研修 Androidプログラミング 初めの1歩 第3回
プロジェクトの作成
プロジェクトの作成
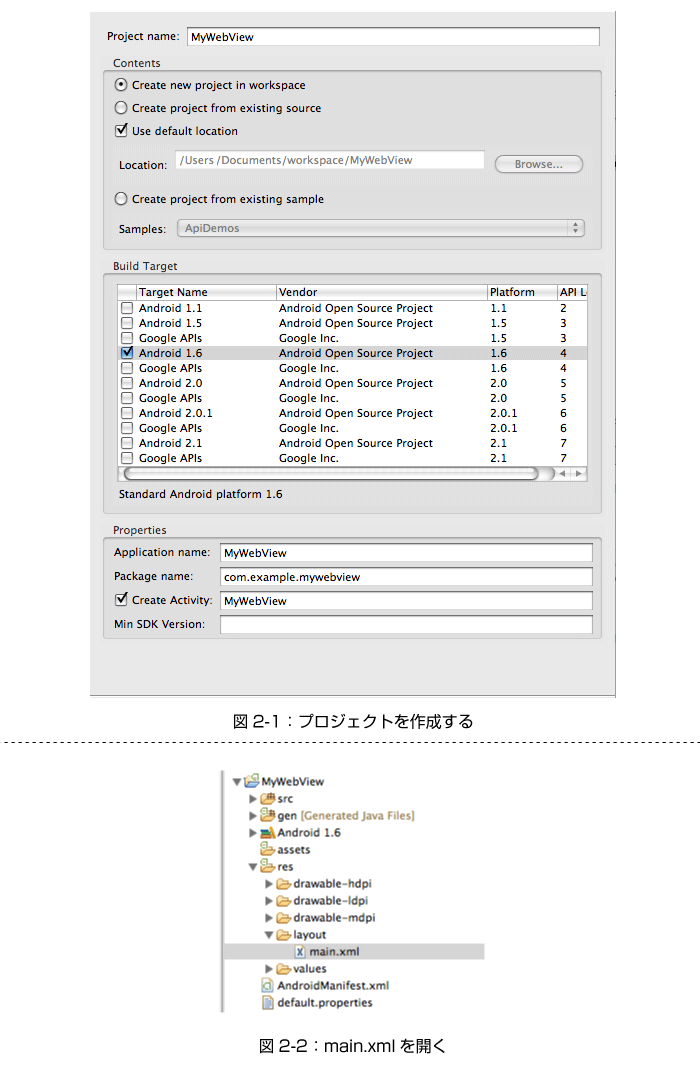
HelloAndroidの時と同じように、新たにプロジェクトを作成します。
プロジェクトの情報は、以下のように入力することにします。
- プロジェクト名(Project name): MyWebView
- ビルド・ターゲット(Build Target): Android 1.6
- アプリケーション名(Application name): MyWebView
- パッケージ名(Package name): com.example.mywebview
- アクティビティを作成(Create Activity): MyWebView
図2-1のような入力内容になります。
画面のデザインを変更する
新しく作成したプロジェクト「MyWebView」がWebViewを使用するように、レイアウトを変更します。
アンドロイド・アプリでは、画面のデザインをxmlで定義していいます。
Eclipseの左側ペイン(Package Explorer)からMyWebViewの画面定義を開いてみましょう。
MyWebView/res/layout/main.xmlを開いてみてください。
	<code>
<?xml version="1.0" encoding="utf-8"?>

<LinearLayout xmlns:android="http://schemas.android.com/apk/res/android"
    android:orientation="vertical"
    android:layout_width="fill_parent"
    android:layout_height="fill_parent"
    >

<i><font color="red"><TextView
    android:layout_width="fill_parent"
    android:layout_height="fill_parent"
    android:text="@string/hello"
    /></font></i>
</LinearLayout>
</code>
レイアウトの中に、「Text View」を使用することが書かれています。
この部分を、「WebView」を使うように書き換えます。
main.xmlを以下のように修正します。
	<code>
<?xml version="1.0" encoding="utf-8"?>

<LinearLayout xmlns:android="http://schemas.android.com/apk/res/android"
    android:orientation="vertical"
    android:layout_width="fill_parent"
    android:layout_height="fill_parent"
    >
<i><font color="red"><WebView
    android:id="@+id/main_webview"</font></i>
    android:layout_width="fill_parent"
    android:layout_height="wrap_content"
    android:text="@string/hello"
    />
</LinearLayout>
</code>
TextViewをWebViewに書き換えました。これで、アプリケーションはWebViewを使用するようになります。
android:id="@+id/main_webview"は、このWebViewに識別子をつけた、ということを意味します。この識別子については、次の章で詳しく説明します。
この記事をシェアしてください
関連記事
バックナンバー
この記事の筆者

筆者の人気記事
Think ITでは、技術情報が詰まったメールマガジン「Think IT Weekly」の配信サービスを提供しています。メルマガ会員登録を済ませれば、メルマガだけでなく、さまざまな限定特典を入手できるようになります。
