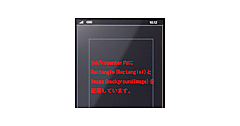
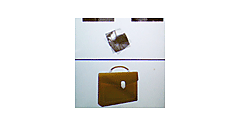
今回は、あらかじめ撮影した背景写真を切りぬいて、そのフレーム内に新しい写真を撮影するサンプルを紹介します。前回までと同様、カメラアプリでの使用を想定しています。
このサンプルの動作は以下の通りです。
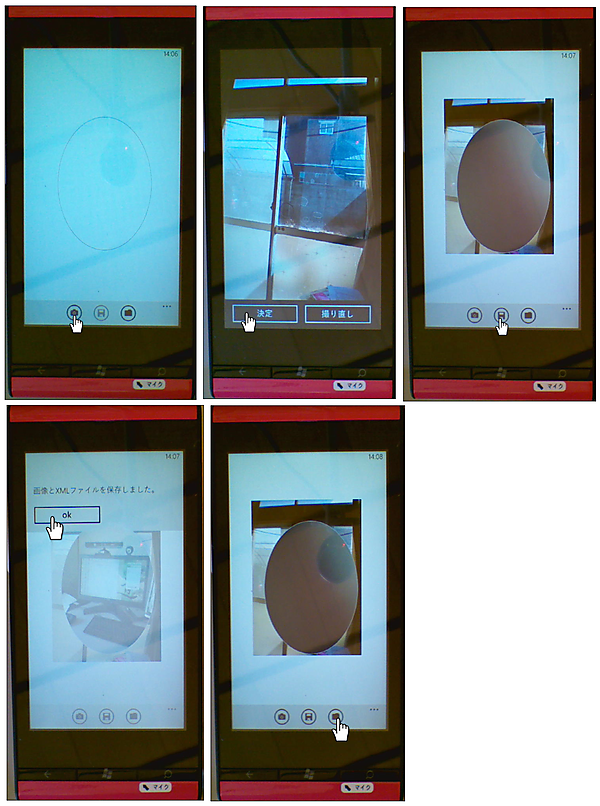
- CameraCaptureTaskを起動して写真を撮ります。
- 撮影した写真の中に縦長楕円フレームのPhotoCameraが起動します。
- 「保存」の「フロッピー」アイコンをタップして保存します(図1)。
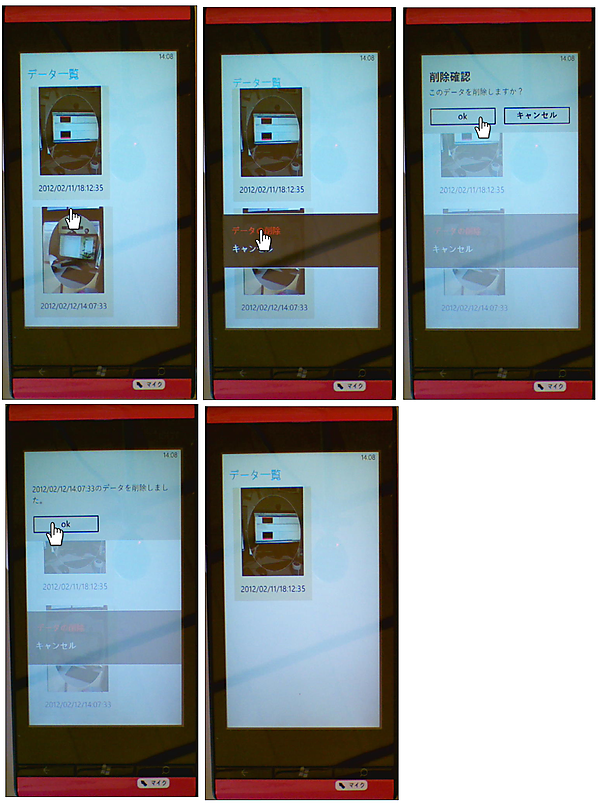
- 「データ一覧」の「フォルダ」アイコンをタップするとデータの一覧が表示されます。
- 表示されたデータをタップするとコンテキストメニューが表示されます。
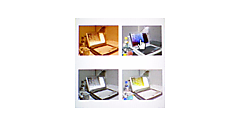
- 「データの削除」をタップすると選択した画像が削除されます(図2)。
この処理はMarketplaceに上げているDoublePicturesというアプリに使用しています。DoublePicturesは、撮影した写真に100以上のアイコンを使って装飾することのできるアプリです。今回紹介のサンプルで紹介する、写真をフレームにする機能も備えています。
(*)このサンプルはエミュレーターでも動作はしますが写真は撮れないため、実機での動作確認を原則とします。
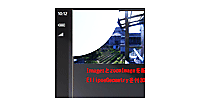
|
図1:CameraCaptureTaskを起動して写真を撮り、撮った写真を下絵にPhotoCameraが起動して写真を撮る(クリックで拡大) |
|
図2:「フォルダ」アイコンのタップで写した画像の一覧が表示される。任意の画像をタップするとコンテキストメニューが表示される。メニュー内の「データの削除」をタップすると、任意の画像が削除される(クリックで拡大) |
サンプル一式は、会員限定特典としてダウンロードできます。記事末尾をご確認ください。
実機(IS12T)で動かした動画はこちら
プロジェクトの作成
VS 2010のメニューから[ファイル(F)/新規作成(N)/プロジェクト(P)]と選択します。次に、「Windows Phone アプリケーション」を選択して、「名前(N)」に任意のプロジェクト名を指定します。ここでは「WP71_ CameraInCamera」という名前を付けています。Windows Phoneのバージョンは7.1を選択します。
ソリューションエクスプローラー内にIconsというフォルダを作り、C:\Program Files\Microsoft SDKs\Windows Phone\v7.1\Icons\darkにある、appbar.feature.camera.rest.pngとappbar.folder.rest.pngとappbar.save.rest.pngを追加しておきます。名前もcamera.pngとfolder.png、save.pngに変更しておきます。
これら3つの画像は、プロパティから「ビルドアクション」にコンテンツを指定してください。デフォルトのResourceのままでは画像は表示されませんので、注意してください。ダウンロードされたサンプルファイルには、これらのファイルは追加済です。
VS2010メニューの「プロジェクト(P)/参照の追加(R)」と選択して、Microsoft.Phone.Controls.ToolkitとSystem.Xml.Linqを追加しておいてください。
MainPage.xamlの編集とコントロールの追加
ツールボックスからInkPresenterコントロールを配置し、その子要素としてImageコントロール2個とEllipseコントロールを2個配置します。書き出されるXAMLコードをリスト1のように編集します。
リスト1 編集されたXAMLコード(MainPage.xaml)
(1)
(2)
CenterXとCenterYプロパティに0.5と指定します。回転を表すRotationに90を指定します。x:NameがbackgroundImageとなっている
(3)次に、
(4)2個目の
先の
(5)
<phone:PhoneApplicationPage
  x:Class="WP7_CameraInCamera.MainPage"
  xmlns="http://schemas.microsoft.com/winfx/2006/xaml/presentation"
  xmlns:x="http://schemas.microsoft.com/winfx/2006/xaml"
  xmlns:phone="clr-namespace:Microsoft.Phone.Controls;assembly=Microsoft.Phone"
  xmlns:shell="clr-namespace:Microsoft.Phone.Shell;assembly=Microsoft.Phone"
  xmlns:d="http://schemas.microsoft.com/expression/blend/2008"
  xmlns:mc="http://schemas.openxmlformats.org/markup-compatibility/2006"
  mc:Ignorable="d" d:DesignWidth="480" d:DesignHeight="696"
  FontFamily="{StaticResource PhoneFontFamilyNormal}"
  FontSize="{StaticResource PhoneFontSizeNormal}"
  Foreground="{StaticResource PhoneForegroundBrush}"
  SupportedOrientations="Portrait" Orientation="Portrait"
  shell:SystemTray.IsVisible="True">

  <!--LayoutRoot は、すべてのページ コンテンツが配置されるルート グリッドです-->
  <Grid x:Name="LayoutRoot" Background="Transparent">

    <!--ContentPanel - 追加コンテンツをここに入力します-->
    <Grid x:Name="ContentPanel" Grid.Row="1" Margin="12,0,12,0">
      <InkPresenter x:Name="Inkpresenter1" Width="336" Height="448"> ■(1)
        <Image Height="336" HorizontalAlignment="Left" x:Name="Image1" Stretch="Uniform" VerticalAlignment="Top" Width="448" Canvas.Left="-60" Canvas.Top="35"> ■(2)
          <Image.RenderTransform>
            <CompositeTransform Rotation="90" CenterX="224" CenterY="168"/>
          </Image.RenderTransform>
        </Image> ■(2)

        <Image Height="336" HorizontalAlignment="Left" x:Name="backgroundImage" Stretch="Uniform" VerticalAlignment="Top" Width="448" Canvas.Left="-53" Canvas.Top="55"  Visibility="Collapsed"> ■(2)
          <Image.RenderTransform>
            <CompositeTransform Rotation="90" CenterX="224" CenterY="168"/>
          </Image.RenderTransform>
        </Image> ■(2)

        <Ellipse x:Name="Ellipse1" Height="288" Stroke="Silver"  Width="384" Canvas.Left="320" Canvas.Top="39"> ■(3)
          <Ellipse.Fill>
            <VideoBrush x:Name="myVideoBrush" Stretch="Fill"/>
          </Ellipse.Fill>
          <Ellipse.RenderTransform>
            <CompositeTransform Rotation="90" CenterX="0.5" CenterY="0.5"/>
          </Ellipse.RenderTransform>
        </Ellipse> ■(3)

        <Ellipse x:Name="dummyEllipse" Height="288" Stroke="Silver"  Width="384" Canvas.Left="320" Canvas.Top="40" Visibility="Collapsed"> ■(4)
          <Ellipse.Fill>
            <ImageBrush x:Name="myImageBrush" Stretch="Fill"/>
          </Ellipse.Fill>
          <Ellipse.RenderTransform>
            <CompositeTransform Rotation="90" CenterX="0.5" CenterY="0.5"/>
          </Ellipse.RenderTransform>
        </Ellipse> ■(4)
      </InkPresenter> ■(1)
    </Grid>
  </Grid>
  <!--ApplicationBar の使用法を示すサンプル コード-->
  <phone:PhoneApplicationPage.ApplicationBar>
    <shell:ApplicationBar IsVisible="True" IsMenuEnabled="True">
      <shell:ApplicationBarIconButton IconUri="/Icons/camera.png" Text="カメラ起動" Click="CameraGo"/> ■(5)
      <shell:ApplicationBarIconButton IconUri="/Icons/save.png" Text="保存" Click="SaveGo" IsEnabled="False"/> ■(5)
      <shell:ApplicationBarIconButton IconUri="/Icons/folder.png" Text="データ一覧" Click="ListGo"/> ■(5)
    </shell:ApplicationBar>
  </phone:PhoneApplicationPage.ApplicationBar>
</phone:PhoneApplicationPage>
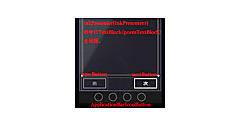
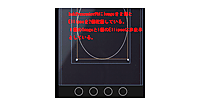
レイアウト図は図3のようになります。
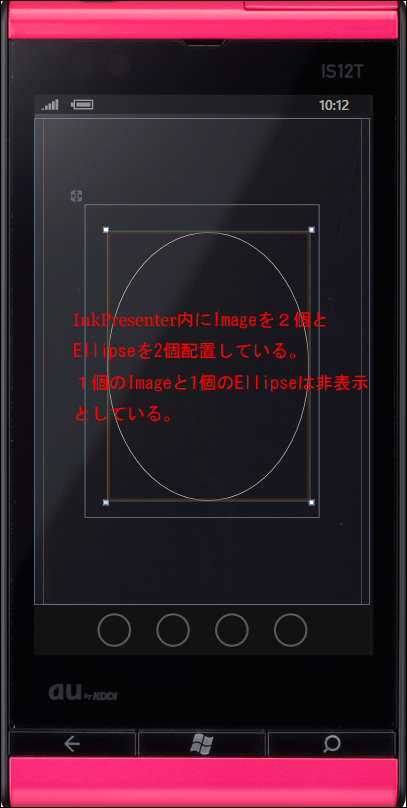 |
図3:各コントロールを配置した(クリックで拡大) |
次に、MainPage.xamlを展開して表示されるMainPage.xaml.vbをダブルクリックして、リスト2のコードを記述します。
ロジックコードを記述する
リスト2 (MainPage.xaml.vb)
Option Strict On
ランチャーやチューザーに関するクラスの含まれる、Microsoft.Phone.Tasks名前空間をインポートします。
Imports Microsoft.Phone.Tasks
Imports System.Windows.Media.Imaging
Imports Microsoft.Phone
仮想ファイルシステムを作成および使用するための型が含まれている、System.IO.IsolatedStorage名前空間をインポートします。分離ストレージによって、安全なクライアント側のストレージが提供されます。
Imports System.IO.IsolatedStorage
Imports System.IO
Imports System.Xml.Linq
Imports Microsoft.Devices
Partial Public Class MainPage
  Inherits PhoneApplicationPage

  ' コンストラクター
  Public Sub New()
    InitializeComponent()
  End Sub
カメラアプリケーションを起動するCameraCaptureTaskクラス用メンバ変数、myCameraTaskを宣言します。
Dim myCameraTask As CameraCaptureTask
バイト型の配列、imageByteをメンバ変数として宣言します。
Dim imageByte As Byte()
myCameraをPhotoCameraクラスのメンバ変数として宣言します。PhotoCameraクラスは、カメラアプリケーションの基本カメラ機能を提供し、イメージ キャプチャ、フォーカス、解像度、フラッシュ モードなどの機能を有効にして構成するためのメンバが含まれています。
  Dim myCamera As PhotoCamera

  Dim bufferValue As Integer = 5119
  Dim imageFileName As String
  Dim recordDate As String
WriteableBitmapクラス用メンバ変数imageSourceを宣言します。WriteableBitmapクラスは書き込み更新することのできるBitmapSourceを提供するクラスです。
Dim imageSource As WriteableBitmap
Imageクラスのメンバ変数myImageを宣言します。
  Dim myImage As Image
  Dim xmldoc As XElement
ページがアクティブになった時呼び出されるメソッド
変数storageを、ファイルとディレクトリを格納している分離ストレージ領域を表すIsolateStorageFileクラスとして宣言します。次に、DirectoryExistsメソッドでCameraInCameraというフォルダが存在しているかどうかをチェックし、存在していない場合は、CreateDirectoryメソッドでCameraInCameraというフォルダを作成します。
Path.CombineでCameraInCameraというフォルダとImageList.xmlというファイルを連結し、変数xmlFilePathに格納します。ImageList.xmlファイルがCameraInCameraフォルダに存在する場合は、「データ一覧」のフォルダアイコンの使用を可能にし、それ以外は使用不可としておきます。
新しいCameraCaptureTaskクラスのインスタンス、myCameraTaskオブジェクトを生成します。
AddHandlerステートメントで、チューザータスクが完了した時に発生するCompletedイベントに、イベントハンドラを追加します。イベントハンドラ内では以下の処理が実行されます。
カメラアプリケーションが起動して、写真がきちんと撮れた場合は、「フロッピー」アイコンの「保存」ボタンを使用可能にします。写真のデータを含むストリームのバイトの長さを取得し、バイト配列を作成します。
Readメソッドで、現在のストリームからバイトシーケンスを読み取り、読み取ったバイト数でストリーム内の位置を進めます。
ChosenPhoto.Readの書式は以下の通りです。
ChosenPhoto.Read(バイト配列,0ベースのバイトオフセット(現在のストリームから読み取ったデータの格納を開始します), 現在のストリームから読み取るバイトの最大数)
Seekメソッドで、現在のストリーム内の位置を設定します。書式は以下の通りです。
ChosePhoto.Seek(基点のパラメータのバイト オフセット, 参照ポイントを示すSeekOrigin型の値)
SeekOriginにはBeginを指定し、ストリームの先頭を指定しています。
WriteableBitmap型の変数imageSourceに、PictureDecoder.DecodeJpeg(resultArgs.ChosenPhoto)で、撮った写真をJPEGファイルとしてWriteableBitmapオブジェクトにデコードします。PictureDecoder.DecodeJpegメソッドはMicrosof.Phone名前空間に属しています。
Image1のSourceプロパティにimageSourceオブジェクトを指定し、非表示となっているbackgroundImageのSourceプロパティにもimageSourceオブジェクトを指定しておきます。
PhotoCameraクラスの新しいインスタンスを作成し、myVideoBrushという名前のVideoBrushにSetSourceメソッドでmyCameraオブジェクトを指定します。
AddHandlerステートメントで、カメラ オブジェクトが初期化された時に発生する、Initializedイベントにイベントハンドラを追加します。Succeededプロパティで、カメラ操作が失敗した時は処理を抜けます。それ以外は、フラッシュモードを自動に設定し、変数myResolution を使って、AvailableResolutionsプロパティで、使用できるカメラの解像度を参照します。
カメラでキャプチャしたイメージの解像度を設定できる、Resolutionプロパティに、先に取得したmyResolutionの一番先頭の解像度を指定します。一番先頭の解像度は640×480の解像度です。
Try~Catch~End Tryで例外処理を行います。例外が発生した場合は、メッセージを表示します。別スレッドからの表示になります。
AddHandlerステートメントで、イメージが利用可能な場合に発生する、CaptureImageAvailableイベントに、myCamera_CaptureImageAvailableイベントハンドラを追加します。
カメラのチューザータスクがキャンセルされた場合は、「フロッピー」アイコンの「保存」ボタンの使用を不可にして処理を抜けます。
ここの処理で、PhotoChooserTaskで撮られた写真の上に、PhotoCameraが起動します。
  Protected Overrides Sub OnNavigatedTo(e As System.Windows.Navigation.NavigationEventArgs)
    Dim storage As IsolatedStorageFile = IsolatedStorageFile.GetUserStoreForApplication
    If storage.DirectoryExists("CameraInCamera") = False Then
      storage.CreateDirectory("CameraInCamera")
    End If

    Dim xmlFilePath As String = Path.Combine("CameraInCamera", "ImageList.xml")
    If storage.FileExists(xmlFilePath) = True Then
      TryCast(ApplicationBar.Buttons(2), ApplicationBarIconButton).IsEnabled = True
    Else
      TryCast(ApplicationBar.Buttons(2), ApplicationBarIconButton).IsEnabled = False
    End If

    myCameraTask = New CameraCaptureTask
    AddHandler myCameraTask.Completed, Sub(resultSender As Object, resultArgs As PhotoResult)
        If resultArgs.TaskResult = TaskResult.OK Then
          TryCast(ApplicationBar.Buttons(1), ApplicationBarIconButton).IsEnabled = True
          imageByte = New Byte(CInt(resultArgs.ChosenPhoto.Length)) {}
          resultArgs.ChosenPhoto.Read(imageByte, 0, imageByte.Length)
          resultArgs.ChosenPhoto.Seek(0, SeekOrigin.Begin)
          imageSource = PictureDecoder.DecodeJpeg(resultArgs.ChosenPhoto, 480, 640)
        Image1.Source = imageSource
          backgroundImage.Source = imageSource
          myCamera = New PhotoCamera
          myVideoBrush.SetSource(myCamera)
          AddHandler myCamera.Initialized, Sub(cameraSender As Object, cameraArgs As CameraOperationCompletedEventArgs)
            Try
              If cameraArgs.Succeeded = False Then
                Exit Sub
              Else
                myCamera.FlashMode = FlashMode.Auto
                Dim myResolution As IEnumerable(Of Size) = myCamera.AvailableResolutions
                myCamera.Resolution = myResolution.First
              End If
            Catch
            Deployment.Current.Dispatcher.BeginInvoke(Sub()
                MessageBox.Show("カメラが起動するまでお待ちください。")
                                                   End Sub)
          End Try
              End Sub
          AddHandler myCamera.CaptureImageAvailable, AddressOf myCamera_CaptureImageAvailable

      Else
        TryCast(ApplicationBar.Buttons(1), ApplicationBarIconButton).IsEnabled = False
        Exit Sub
      End If
          End Sub
    End Sub
- この記事のキーワード


