ロジックコードを記述する
ロジックコードを記述する
リスト3 ListBoxに「画像」や「氏名」、「サイト名」の一覧が表示される処理 (MainPage.xaml.vb)
Option Strict On
Imports System.Windows.Documents
Imports System.Windows.Input
Imports System.Windows.Media
Imports System.Windows.Media.Animation
Imports System.Windows.Shapes
Imports Microsoft.Phone.Controls
Imports System.Xml.Linq
ImageInfoクラス内で「タイトル、画像名」プロパティを定義しておきます。
  Public Class ImageInfo
  Property タイトル As String
  Property 画像名 As String
End Class

Partial Public Class MainPage
  Inherits PhoneApplicationPage
  ~コード略~

ReadXmldocクラスの新しいインスタンスmyReadXmldocオブジェクトをメンバ変数として宣言します。
  Dim myReadXmldoc As New ReadXmldoc
画面の遷移で移動した時に最初に呼ばれるイベント
ここで、PersonalInfoDetails.xamlやmyFavoriteSite.xamlから渡された文字データを受け取ります。文字データはNavigationContextのQueryStringにDictionary として提供されます。PersonalInfoDetails.xamlやmyFavoriteSite.xamlからBack(←)ボタンがクリックされた時、MainPage.xamlに遷移する際、URL の最後に「? PivotIndex = 1」または「? PivotIndex = 2」といった形で値を渡しています。
ContainsKeyメソッドで、指定したキー(ここでは、PivotIndex)が Dictionary に格納されているかどうかを判断し、格納されている場合は、数値に変換して、myParam(“PivotIndex”)の値を変数PivotIndexに格納します。
PivotのSelectedIndexプロパティに変数PivotIndexの値を指定します。Pivotのインデックスは0から始まるため、1が渡されると2ページ目、2が渡されると3ページ目が表示されます。
  Protected Overrides Sub OnNavigatedTo(ByVal e As System.Windows.Navigation.NavigationEventArgs)
    Dim myParam As IDictionary(Of String, String) = NavigationContext.QueryString
    If myParam.ContainsKey("PivotIndex") Then
      Dim pivotIndex As Integer = Integer.Parse(myParam("PivotIndex"))
      Pivot1.SelectedIndex = pivotIndex
    End If
    MyBase.OnNavigatedTo(e)
  End Sub
ページが読み込まれた時の処理
画像一覧を表示するImageShowプロシージャを実行します。「氏名」の一覧を表示するNameShowプロシージャを実行します。「サイト名」の一覧を表示するSiteNameShowプロシージャを実行します。
  Private Sub MainPage_Loaded(ByVal sender As Object, ByVal e As RoutedEventArgs) Handles Me.Loaded
    ImageShow()
    NameShow()
    SiteNameShow()
  End Sub
画像のタイトルと画像の一覧を表示する処理
ImageInfoクラスの新しいリストであるmyImageInfoオブジェクトを宣言します。
ReadXmldocクラスのインスタンスmyReadXmldocでphoto関数を呼び出します。Descendantsメソッドで取得した<情報>要素のコレクションに対して、各要素を変数 result に格納しながら以下の処理を行います。
ImageInfoクラスの「タイトル」プロパティに<画像名>要素の属性”タイトル”の値を、「画像名」プロパティに<画像名>要素の値を指定し、リストであるmyImageInfoオブジェクトに追加していきます。
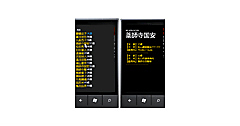
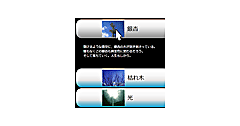
ListBox1のItemsSourceプロパティにmyImageInfoオブジェクトを指定します。これで、ListBoxにタイトルと画像の一覧が表示されます。
  Private Sub ImageShow()
    Dim myImageInfo As New List(Of ImageInfo)
    For Each result In From c In myReadXmldoc.photo.Descendants("情報") Select c
      myImageInfo.Add(New ImageInfo With {.タイトル = result.Element("画像名").Attribute("タイトル").Value, .画像名 = "Image/" & result.Element("画像名").Value})
    Next
    ListBox1.ItemsSource = myImageInfo
  End Sub
氏名の一覧を表示する処理
文字列型の新しいリストであるnameListオブジェクトを宣言します。
ReadXmldocクラスのインスタンスmyReadXmldocでpersonalInfo関数を呼び出します。Descendantsメソッドで取得した<情報>要素のコレクションに対して、各要素を変数 result に格納しながら以下の処理を行います。
リストであるnameListオブジェクトに<氏名>要素の内容を追加していきます。
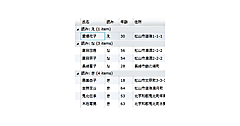
ListBox2のItemsSourceプロパティにnameListオブジェクトを指定します。これで、ListBoxに氏名の一覧が表示されます。
  Private Sub NameShow()
    Dim nameList As New List(Of String)
    For Each result In From c In myReadXmldoc.personalInfo.Descendants("情報") Select c
      nameList.Add(result.Element("氏名").Value)
    Next
    ListBox2.ItemsSource = nameList
  End Sub
サイト名の一覧を表示する処理
文字列型の新しいリストであるSiteNameListオブジェクトを宣言します。
ReadXmldocクラスのインスタンスmyReadXmldocでfavoriteSite関数を呼び出します。Descendantsメソッドで取得した<サイト名>要素のコレクションに対して、各要素を変数 result に格納しながら以下の処理を行います。
リストであるSiteNameListオブジェクトに<サイト名>要素の内容を追加していきます。
ListBox3のItemsSourceプロパティにSiteNameListオブジェクトを指定します。これで、ListBoxにサイト名の一覧が表示されます。
  Private Sub SiteNameShow()
    Dim siteNameList As New List(Of String)
    For Each result In From c In myReadXmldoc.favoriteSite.Descendants("サイト名") Select c
      siteNameList.Add(result.Value)
    Next
    ListBox3.ItemsSource = siteNameList
  End Sub
画像一覧から任意の画像が選択された時の処理
選択された画像のインデックスをmyIndex変数に格納します。NavigationService.Navigateメソッドで引数にインデックスの値を持たせて、ImageComment.xamlに遷移します。
  Private Sub ListBox1_SelectionChanged(ByVal sender As Object, ByVal e As System.Windows.Controls.SelectionChangedEventArgs) Handles ListBox1.SelectionChanged
    Dim myIndex As String = ListBox1.SelectedIndex.ToString
    NavigationService.Navigate(New Uri("/ImageComment.xaml?Index=" & myIndex, UriKind.Relative))
  End Sub
氏名一覧から任意の氏名が選択された時の処理
選択された氏名のインデックスをmyIndex変数に格納します。NavigationService.Navigateメソッドで引数にインデックスの値を持たせて、PersonalInfoDetails.xamlに遷移します。
  Private Sub ListBox2_SelectionChanged(ByVal sender As Object, ByVal e As System.Windows.Controls.SelectionChangedEventArgs) Handles ListBox2.SelectionChanged
    Dim myIndex As String = ListBox2.SelectedIndex.ToString
    NavigationService.Navigate(New Uri("/PersonalInfoDetails.xaml?personalInfoIndex=" & myIndex, UriKind.Relative))
  End Sub
サイト名一覧から任意のサイト名が選択された時の処理
選択されたサイト名のインデックスをmyIndex変数に格納します。NavigationService.Navigateメソッドで引数にインデックスの値を持たせて、myFavoriteSite.xamlに遷移します。
  Private Sub ListBox3_SelectionChanged(ByVal sender As Object, ByVal e As System.Windows.Controls.SelectionChangedEventArgs) Handles ListBox3.SelectionChanged
    Dim myIndex As String = ListBox3.SelectedIndex.ToString
    NavigationService.Navigate(New Uri("/myFavoriteSite.xaml?siteIndex=" & myIndex, UriKind.Relative))
  End Sub
End Class
ソリューションエクスプローラー内のImageComment.xamlを展開し、表示されるImageComment.xaml.vbをダブルクリックしてリスト4のロジックコードを記述します。
リスト4 拡大された画像とその説明を表示する処理(ImageComment.xaml.vb)
Option Strict On
Imports System.Xml.Linq

ImageInfo_commentクラス内で「画像名」と「説明」のプロパティを定義しておきます。
Public Class ImageInfo_comment
  Property 画像名 As String
  Property 説明 As String
End Class
Partial Public Class ImageComment
  Inherits PhoneApplicationPage

  ~コード略~

ReadXmldocクラスの新しいインスタンスmyReadXmldocオブジェクトをメンバ変数として宣言します。
  Dim myReadXmldoc As New ReadXmldoc
画面の遷移で移動した時に最初に呼ばれるイベント
ここで、MainPage.xamlの、ListBox1より選択された時点で渡された文字データを受け取ります。文字データはNavigationContextのQueryStringにDictionary として提供されます。送信時のキーワード(この場合Index)を基に渡された文字列情報を、myParam(“Index”)として取得します。
myParam(“Index”)の値を数値に変換して、変数Indexに格納します。
x:NameがPageTitleというTextBlockのTextプロパティに、ReadXmldocクラスのインスタンスmyReadXmldocでphoto関数を呼び出し、Descendantsメソッドで、変数Indexに該当する<画像名>要素の属性”タイトル”の値を指定します。タイトルが表示されます。
ImageInfo_commentクラスの新しいリストであるmyImageInfoオブジェクトを宣言します。
ReadXmldocクラスのインスタンスmyReadXmldocでphoto関数を呼び出します。ImageInfo_commentクラスの「画像名」プロパティに、Descendantsメソッドで取得したIndexに該当する<情報>要素の子要素<画像名>の値を指定し、また「説明」プロパティには<説明>要素の値を指定し、リストであるmyImageInfoオブジェクトに追加していきます。
ListBox1のItemsSourceプロパティにmyImageInfoオブジェクトを指定します。これで、ListBoxに画像と説明が表示されます。
  Protected Overrides Sub OnNavigatedTo(ByVal e As System.Windows.Navigation.NavigationEventArgs)
    Dim myParam As IDictionary(Of String, String) = NavigationContext.QueryString
    Dim Index As Integer = Integer.Parse(myParam("Index"))
    PageTitle.Text = myReadXmldoc.photo.Descendants("情報")(Index).Element("画像名").Attribute("タイトル").Value

    Dim myImageInfo As New List(Of ImageInfo_comment)

    myImageInfo.Add(New ImageInfo_comment With {.画像名 = "Image/" & myReadXmldoc.photo.Descendants("情報")(Index).Element("画像名").Value,
                                                .説明 = myReadXmldoc.photo.Descendants("情報")(Index).Element("説明").Value})
    ListBox1.ItemsSource = myImageInfo
  End Sub
[戻る]ボタンがクリックされた時の処理
前編の、「■XAML(ImageComment.xaml)の編集」内のリスト3の(2)で定義したListBoxTemplate内に配置した<Button>要素のClickイベントに指定したイベントハンドラです。
NavigationService.NavigateメソッドでMainPage.xamlに遷移します。
  Private Sub PageBack(ByVal sender As Object, ByVal e As EventArgs)
    NavigationService.Navigate(New Uri("/MainPage.xaml", UriKind.Relative))
  End Sub
エミュレーターのBack(←)ボタンのイベントを上書きする処理
エミュレーターの持っている本来のBack処理を、e.Cancel=Trueで無効とします。
NavigationService.NavigateメソッドでMainPage.xamlに遷移します。
このBackボタンのイベントを上書きする処理を記述していないと、エミュレーターのBack(←)をクリックした際エラーが発生しますので、注意してください。
Protected Overrides Subと入力すると、インテリセンス機能が働き、イベントの一覧が表示されますので、その中から選択してください。
  Protected Overrides Sub OnBackKeyPress(ByVal e As System.ComponentModel.CancelEventArgs)
    e.Cancel = True
    NavigationService.Navigate(New Uri("/MainPage.xaml", UriKind.Relative))
    MyBase.OnBackKeyPress(e)
  End Sub
End Class
- この記事のキーワード


