「Windows Phone 縦向きのページ」(IchiranPage.xaml(画像一覧))の作成
ApplicationBarIconButtonの「カメラ起動」アイコンがタップされた時の処理
Showメソッドでカメラを起動します。
  Private Sub GoCamera(sender As Object, e As EventArgs)
    myCameraTask.Show()
  End Sub
myImage(Canvasに追加されたカメラで撮影された画像)から指が離れた時の処理
ドラッグされるmyImageオブジェクトのYの位置が300より大きく、かつXの位置が200より大きい(つまりmyImageオブジェクトがカバン画像の領域に入った)場合は、myImageを非表示にし、カバンのアニメーションであるmyStoryboard1を開始します。
  Private Sub myImageDropped(sender As Object, e As MouseButtonEventArgs)
    Dim myImage As Image = DirectCast(sender, Image)
    If behavior.Y > 300 AndAlso behavior.X > 200 Then
      myImage.Visibility = Windows.Visibility.Collapsed
      Storyboard1.Stop()
      Storyboard1.Begin()
    End If
  End Sub
カバンのアニメーションであるStoryboard1が完了した時の処理
画像とXMLファイルを保存するImageSaveプロシージャを実行します。
  Private Sub Storyboard1_Completed(sender As Object, e As System.EventArgs) Handles Storyboard1.Completed
    ImageSave()
  End Sub
画像とXMLファイルを保存する処理
保存する画像のファイル名を作成します。現在の[年月日時間分秒.jpg]をファイル名にし、変数imageFileNameに格納しておきます。
変数storageを、ファイルとディレクトリを格納している分離ストレージ領域を表す、IsolateStorageFileクラスとして宣言します。DirectryExistsメソッドでPictureDataというフォルダが存在しているかどうかをチェックし、存在していない場合は、CreateDirectoryメソッドでPictureDataというフォルダを作成します。
Path.CombineでPictureDataというフォルダとimageFileNameに格納されている画像名とを連結します。
分離ストレージ内のファイルを表すIsolatedStorageFileStreamクラス用オブジェクト変数myStream変数を用意し、IsolatedStorageFile.CreateFileメソッドで、分離ストレージ内にfilePath変数の持っているフォルダ名付き画像ファイルを作成します。次に、IsolatedStorageFileStream.Writeメソッドで、バイト配列から読み取ったデータを使用して、IsolatedStorageFileStreamオブジェクトにバイトのブロックを書き込みます。
IsolatedStorageFileStream.Writeメソッドの書式は下記の通りです。
IsolatedStorageFileStream.Write(書き込むバッファ, 開始位置を示すバッファ内のバイト オフセット,書き込む最大バイト数)
変数xmlStorageを、ファイルとディレクトリを格納している分離ストレージ領域を表すIsolateStorageFileクラスとして宣言します。Path.Combineで、PictureDataというフォルダ名と、imageFileList.xmlという画像ファイル名を記録したXMLファイルを連結し、xmlFilePath変数に格納しておきます。
PictureDataというフォルダ内にimageFileList.xmlが存在していない場合は、Visual Basic の埋め込み式を用いて、XML宣言とルート要素image、その子要素としてfileName、その属性に”imageFileName”を指定し、埋め込み式の構文である を用いてimageFileName変数の値を指定します。これは ASP.NET で使用される構文と同じです。
分離ストレージ内のファイルを表すIsolatedStorageFileStreamクラス用オブジェクト変数xmlStreamを用意し、IsolatedStorageFile.CreateFileメソッドで、分離ストレージ内にxmlFilePath変数の持っているフォルダ名付きXMLファイルを作成します。
imageFileList.xmlファイルが存在する場合は、新しいStreamWriterを生成し、IsolatedStorageFile.OpenFileメソッドで、指定したファイルアクセスを使用して指定したモードでファイルを開き、初期化します。Writeメソッドで埋め込み式のXMLをストリームに書き込みます。保存した旨のメッセージを表示します。
「画像一覧」と「削除」のApplicationBarIconButtonの使用を可能にします。
次は、既にPictureDataフォルダ内にimageFileList.xmlが存在する場合の処理です。
IsolatedStorageFileクラスのOpenFileメソッドでPictureDataフォルダ内のimageFileList.xmlファイルを、指定したファイルアクセスを使用して指定したモードでファイルを開きます。開いたファイルをStreamReaderで読み込みます。ReadToEndメソッドでファイルの最後まで読み取り、変数readXmldoc変数に格納しておきます。読み込んだXMLテキストをParseメソッドでXElementとして読み込みます。
追加するfileName要素を作成し、埋め込み式を用いて、”imageFileName”属性の値にimageFileName変数の値を指定します。新しく生成したXML要素を、読み込んだXMLにAddメソッドで追加します
imageFileList.xmlファイルが存在する場合は、新しいStreamWriterを生成し、IsolatedStorageFile.OpenFileメソッドで、指定したファイルアクセスを使用して指定したモードでファイルを開き、初期化します。Writeメソッドで新しいXML要素の追加されたXMLを、ストリームに書き込みます。保存した旨のメッセージを表示します。
「画像一覧」と「削除」のApplicationBarIconButtonの使用を可能にします。
  Private Sub ImageSave()
    '画像の保存
    Storyboard1.Stop()
    Dim imageFileName As String = DateTime.Now.ToString("yyyyMMddHHmmss") & ".jpg"

    Dim storage As IsolatedStorageFile = IsolatedStorageFile.GetUserStoreForApplication
    If storage.DirectoryExists("PictureData") = False Then
      storage.CreateDirectory("PictureData")
    End If

    Dim filePath As String = Path.Combine("PictureData", imageFileName)
    Using myStream As IsolatedStorageFileStream = storage.CreateFile(filePath)
      myStream.Write(imageByte, 0, imageByte.Length)
    End Using

    'XMLファイルの保存
    Dim xmlStorage As IsolatedStorageFile = IsolatedStorageFile.GetUserStoreForApplication
    Dim xmlFilePath As String = Path.Combine("PictureData", "imageFileList.xml")

    If xmlStorage.FileExists(xmlFilePath) = False Then
        Dim xmldoc As XDocument = <?xml version="1.0" encoding="utf-8"?>
                                  <image>
                                    <fileName imageFileName=<%= imageFileName %>/>
                                  </image>
        Using xmlStream As IsolatedStorageFileStream = xmlStorage.CreateFile(xmlFilePath)
        End Using


        If xmlStorage.FileExists(xmlFilePath) = True Then
            Using xmlwriter As StreamWriter = New StreamWriter(xmlStorage.OpenFile(xmlFilePath, FileMode.Open, FileAccess.Write))
              xmlwriter.Flush()
              xmlwriter.Write(xmldoc.ToString)
            End Using
            MessageBox.Show("画像とXMLファイルを保存しました。")
        End If
        TryCast(ApplicationBar.Buttons(1), ApplicationBarIconButton).IsEnabled = True
        TryCast(ApplicationBar.Buttons(2), ApplicationBarIconButton).IsEnabled = True

    Else
        Dim xmlStream As IsolatedStorageFileStream = xmlStorage.OpenFile(xmlFilePath, FileMode.Open, FileAccess.Read)
        Using xmlreader As StreamReader = New StreamReader(xmlStream)

          Dim readXmldoc As String = xmlreader.ReadToEnd
          Dim doc As XElement = XElement.Parse(readXmldoc)
          Dim addXml As XElement = <fileName imageFileName=<%= imageFileName %>/>
          doc.Add(addXml)
          'xmlreader.Close()
          xmlStream.Close()

          If xmlStorage.FileExists(xmlFilePath) = True Then
              Using xmlwriter As StreamWriter = New StreamWriter(storage.OpenFile(xmlFilePath, FileMode.Open, FileAccess.Write))
                xmlwriter.Flush()
                xmlwriter.Write(doc.ToString)
                'xmlwriter.Close()
                MessageBox.Show("画像とXMLファイルを保存しました。")
              End Using
          End If
        End Using
        TryCast(ApplicationBar.Buttons(1), ApplicationBarIconButton).IsEnabled = True
        TryCast(ApplicationBar.Buttons(2), ApplicationBarIconButton).IsEnabled = True
    End If
  End Sub
「画像一覧」のApplicationBarIconButtonがタップされた時の処理
これから作成するIchiranPage.xamlに遷移します。
  Private Sub GoIchiran(sender As Object, e As EventArgs)
    NavigationService.Navigate(New Uri("/IchiranPage.xaml", UriKind.Relative))
  End Sub
「削除」のApplicationBarIconButtonがタップされた時の処理
これから作成するDeletePage.xamlに遷移します。
  Private Sub GoDelete(sender As Object, e As EventArgs)
    NavigationService.Navigate(New Uri("/DeletePage.xaml", UriKind.Relative))
  End Sub
End Class
「Windows Phone 縦向きのページ」(IchiranPage.xaml(画像一覧))の作成
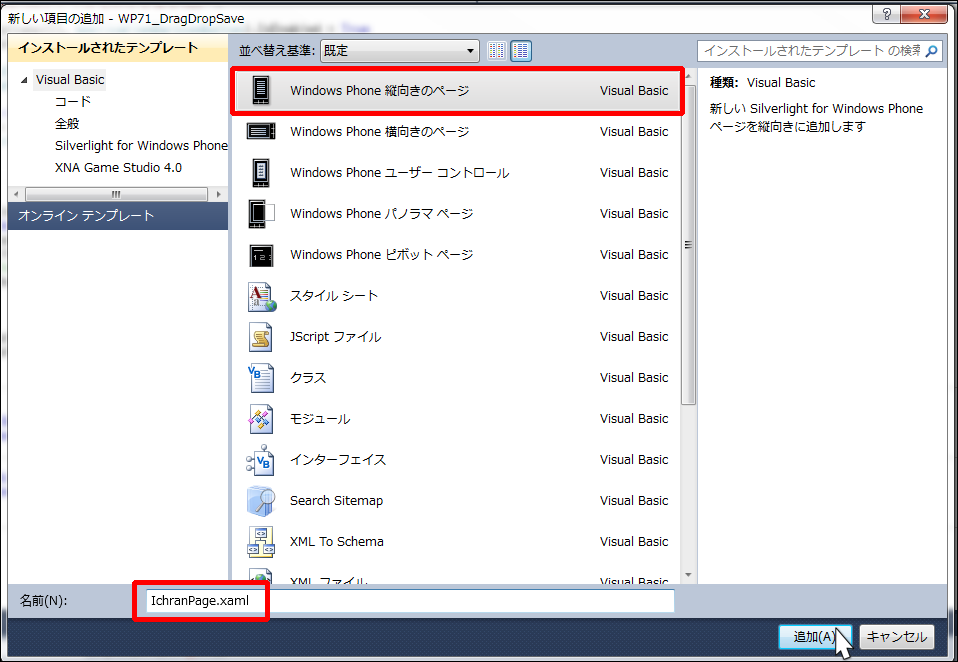
VS2010メニューの[プロジェクト(P)/新しい項目の追加(W)]を選択し、続けて「Windows Phone 縦向きのページ」を選択します。「名前(N)」にはIchiranPage.xamlと入力します(図7)。
|
図7:「Windows Phone 縦向きのページ」(IchiranPage.xaml)を作成する(クリックで拡大) |
IchiranPage.xamlの編集とコントロールの配置
x:NameがPageTitleというTextBlockのTextプロパティに「画像一覧」と指定します。Styleプロパティに指定されているPhoneTextTitle1StyleをPhoneTextTitle2Styleに変更します。フォントが小さくなって表示されます。ツールボックスからListBoxコントロールを1個配置します(図8)。
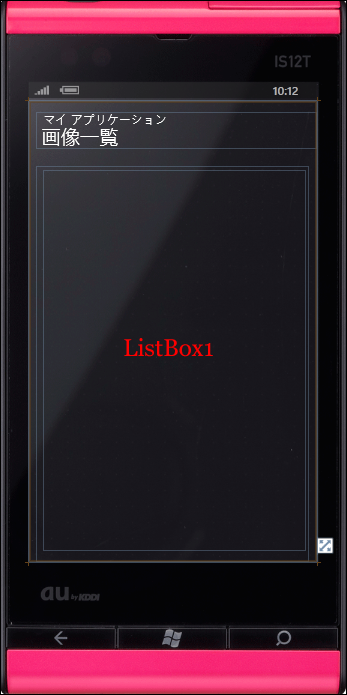 |
図8:ListBoxコントロールを配置した(クリックで拡大) |
書き出されたXAMLコードをリスト3のように編集します。
リスト3 編集したXAMLコード(IchiranPage.xaml)
(1)
ここで指定する名称は、VBコード内のクラスで定義するプロパティ名です。
(2)(1)で定義したListBoxTemplateをItemTemplateに指定して参照します。
<phone:PhoneApplicationPage
  x:Class="WP71_DragDropSave.IchiranPage"
  xmlns="http://schemas.microsoft.com/winfx/2006/xaml/presentation"
  xmlns:x="http://schemas.microsoft.com/winfx/2006/xaml"
  xmlns:phone="clr-namespace:Microsoft.Phone.Controls;assembly=Microsoft.Phone"
  xmlns:shell="clr-namespace:Microsoft.Phone.Shell;assembly=Microsoft.Phone"
  xmlns:d="http://schemas.microsoft.com/expression/blend/2008"
  xmlns:mc="http://schemas.openxmlformats.org/markup-compatibility/2006"
  FontFamily="{StaticResource PhoneFontFamilyNormal}"
  FontSize="{StaticResource PhoneFontSizeNormal}"
  Foreground="{StaticResource PhoneForegroundBrush}"
  SupportedOrientations="Portrait" Orientation="Portrait"
  mc:Ignorable="d" d:DesignHeight="768" d:DesignWidth="480"
  shell:SystemTray.IsVisible="True">
  <phone:PhoneApplicationPage.Resources> ■(1)
    <DataTemplate x:Key="ListBoxTemplate">
      <StackPanel Margin="10">
        <Image Width="400" Height="360" Stretch="Fill" Source="{Binding imageFileName}" Margin="35">
          <Image.RenderTransform>
            <CompositeTransform Rotation="90" CenterX="200" CenterY="180"/>
          </Image.RenderTransform>
        </Image>
      </StackPanel>
    </DataTemplate>
  </phone:PhoneApplicationPage.Resources> ■(1)
  <!--LayoutRoot は、全てのページ コンテンツが配置されるルート グリッドです-->
  <Grid x:Name="LayoutRoot" Background="Transparent">
    <Grid.RowDefinitions>
      <RowDefinition Height="Auto"/>
      <RowDefinition Height="*"/>
    </Grid.RowDefinitions>

    <!--TitlePanel は、アプリケーション名とページ タイトルを格納します-->
    <StackPanel x:Name="TitlePanel" Grid.Row="0" Margin="12,17,0,28">
      <TextBlock x:Name="ApplicationTitle" Text="マイ アプリケーション" Style="{StaticResource PhoneTextNormalStyle}"/>
      <TextBlock x:Name="PageTitle" Text="画像一覧" Margin="9,-7,0,0" Style="{StaticResource PhoneTextTitle2Style}"/>
    </StackPanel>

    <!--ContentPanel - 追加コンテンツをここに入力します-->
    <Grid x:Name="ContentPanel" Grid.Row="1" Margin="12,0,12,0">
      <ListBox Height="636" HorizontalAlignment="Left" Margin="12,6,0,0" Name="ListBox1" VerticalAlignment="Top" Width="438" ItemTemplate="{StaticResource ListBoxTemplate}"/> ■(2)
    </Grid>
  </Grid>

  <!--ApplicationBar の使用法を示すサンプル コード-->
  ~コード略~
</phone:PhoneApplicationPage>
次に、IchiranPage.xamlを展開して表示される、IchiranPage.xaml.vbをダブルクリックしてリスト4のコードを記述します。
ロジックコードを記述する
リスト4 (IchiranPage.xaml.vb)
Option Strict On
Imports System.Xml.Linq
Imports System.IO
Imports System.IO.IsolatedStorage
Imports System.Windows.Media.Imaging
Imports Microsoft.Phone
ImageInfoクラス内にWriteableBitmapクラス型のimageFileNameプロパティを定義しておきます。
Public Class ImageInfo
  Property imageFileName As WriteableBitmap
End Class

Partial Public Class IchiranPage
  Inherits PhoneApplicationPage

  Public Sub New()
    InitializeComponent()
  End Sub
ページがアクティブになった時呼び出されるメソッド
変数storageを、ファイルとディレクトリを格納している分離ストレージ領域を表すIsolateStorageFileクラスとして宣言します。Path.CombineでPictureDataというフォルダとimageFileList.xmlというXMLファイル名を連結します。
分離ストレージ内のファイルを表すIsolatedStorageFileStreamクラス用オブジェクト変数myStreamを用意します。IsolatedStorageFileクラスのOpenFileメソッドで、PictureDataフォルダ内のimageFileList.xmlファイルを、指定したファイルアクセスを使用して、指定したモードで開きます。開いたファイルをStreamReaderで読み込みます。ReadToEndメソッドでファイルの最後まで読み取り、変数readXmldoc変数に格納しておきます。
読み込んだXMLテキストをParseメソッドでXElementとして読み込みます。ImageInfoクラス型の新しいリストであるmyImageInfoオブジェクトを作成します。
Descendantsメソッドで、子孫要素である全ての
Path.CombineでPictureDataフォルダと、
IsolatedStorageFileStreamクラスのOpenFileメソッドで、PictureDataフォルダ内にあるimageFileList.xmlファイルを、指定したファイルアクセスを使用して、指定したモードで開きます。
WriteableBitmap型の変数imageSourceを宣言し、PictureDecoder.DecodeJpegメソッドで、開いたストリームをJPEGファイルとしてWriteableBitmapオブジェクトにデコードします。
PictureDecoder.DecodeJpegメソッドはMicrosof.Phone名前空間に属しています。WriteableBitmapクラスは書き込み更新することのできるBitmapSourceを提供するクラスです。
ImageInfoクラスのimageFileNameプロパティに、読み込んだWriteableBitmapオブジェクトのimageSourceオブジェクトを指定し、AddメソッドでmyImageInfoオブジェクトに追加していきます。ListBox1のItemsSourceプロパティにmyImageInfoオブジェクトを指定します。これで、撮った画像の一覧が表示されます。
  Protected Overrides Sub OnNavigatedTo(e As System.Windows.Navigation.NavigationEventArgs)
    Dim storage As IsolatedStorageFile = IsolatedStorageFile.GetUserStoreForApplication
    Dim filePath As String = Path.Combine("PictureData", "imageFileList.xml")
    Using myStream As IsolatedStorageFileStream = storage.OpenFile(filePath, FileMode.Open, FileAccess.Read)
      Using reader As StreamReader = New StreamReader(myStream)
        Dim readXmldoc As String = reader.ReadToEnd
        Dim doc As XElement = XElement.Parse(readXmldoc)
        Dim myImageInfo As New List(Of ImageInfo)

        For Each result In From c In doc.Descendants("fileName") Select c
          Dim imageFilePath As String = Path.Combine("PictureData", result.Attribute("imageFileName").Value)
          Dim imageStorage As IsolatedStorageFile = IsolatedStorageFile.GetUserStoreForApplication
          Using stream As IsolatedStorageFileStream = imageStorage.OpenFile(imageFilePath, FileMode.Open, FileAccess.Read)
            Dim imageSource As WriteableBitmap = PictureDecoder.DecodeJpeg(stream)
            With myImageInfo
              .Add(New ImageInfo With {.imageFileName = imageSource})
            End With
            'stream.Close()
          End Using
        Next
        ListBox1.ItemsSource = myImageInfo
      End Using
    End Using

    MyBase.OnNavigatedTo(e)
  End Sub
End Class
「Windows Phone 縦向きのページ」(DeletePage.xaml(削除))の作成
VS2010メニューから[プロジェクト(P)/新しい項目の追加(W)]を選択し、続けて「Windows Phone 縦向きのページ」を選択します。「名前(N)」にはDeletePage.xamlと入力します。
DeletePage.xamlの編集とコントロールの配置
x:NameがPageTitleというTextBlockのTextプロパティに、「削除」と指定します。Styleプロパティに指定されているPhoneTextTitle1StyleをPhoneTextTitle2Styleに変更すると、フォントが小さくなって表示されます。
ツールボックスから、ListBoxコントロールを1個と、Imageコントロールを2個配置します。そのうち、1つのImageコントロールのSourceプロパティには、Imageフォルダ内のカバンの画像を指定します。ListBoxコントロールの枠線の太さ(BorderThickness)に5を指定し、枠線の色(BorderBrush)にNavyを指定しておきます(図9)。
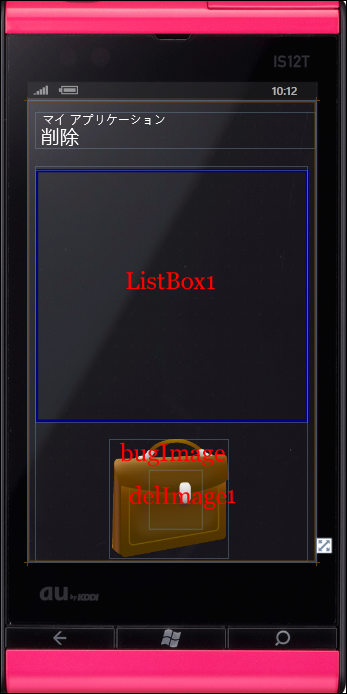 |
図9:ListBoxとImageコントロールを配置した(クリックで拡大) |
書き出されたXAMLコードをリスト5のように編集します。
リスト5 編集したXAMLコード(DeletePage.xaml)
(1)
Marginに15を指定して余白を設けます。子要素として
(2)(1)のままだと、ListBoxに表示される画像が、横一列で表示されてしまうため、複数列に渡って表示されるようにします。WrapPanelListBoxというKey名の
WrapPanelコントロールがツールボックスに登録されていない場合は、ツールボックスを右クリックして表示されるメニューの「アイテムの選択(I)」から追加しておいてください。
追加する場合、Windows Phone Toolkitがインストールされている必要があります。Windows Phone Toolkitは下記URLよりダウンロードできます。
→参照:Windows Phone Toolkit - Nov 2011 (7.1 SDK)
(3)(1)と(2)で定義したListBoxTemplateとWrapPanelListBoxをItemTemplateとItemsPanelに指定して参照します。
<phone:PhoneApplicationPage
  x:Class="WP71_DragDropSave.DeletePage"
  xmlns="http://schemas.microsoft.com/winfx/2006/xaml/presentation"
  xmlns:x="http://schemas.microsoft.com/winfx/2006/xaml"
  xmlns:phone="clr-namespace:Microsoft.Phone.Controls;assembly=Microsoft.Phone"
  xmlns:shell="clr-namespace:Microsoft.Phone.Shell;assembly=Microsoft.Phone"
  xmlns:d="http://schemas.microsoft.com/expression/blend/2008"
  xmlns:mc="http://schemas.openxmlformats.org/markup-compatibility/2006"
  xmlns:toolkit="clr-namespace:Microsoft.Phone.Controls;assembly=Microsoft.Phone.Controls.Toolkit"
  FontFamily="{StaticResource PhoneFontFamilyNormal}"
  FontSize="{StaticResource PhoneFontSizeNormal}"
  Foreground="{StaticResource PhoneForegroundBrush}"
  SupportedOrientations="Portrait" Orientation="Portrait"
  mc:Ignorable="d" d:DesignHeight="768" d:DesignWidth="480"
  shell:SystemTray.IsVisible="True">
    <phone:PhoneApplicationPage.Resources>
      <DataTemplate x:Key="ListBoxTemplate"> ■(1)
        <StackPanel Orientation="Horizontal" Margin="15" HorizontalAlignment="Center">
          <Image Width="200" Height="180" Source="{Binding imageFileName}" HorizontalAlignment="Center" VerticalAlignment="Bottom" Margin="0">
          <Image.RenderTransform>
            <CompositeTransform Rotation="90" CenterX="100" CenterY="90"/>
          </Image.RenderTransform>
        </Image>
      </StackPanel>
    </DataTemplate> ■(1)

    <ItemsPanelTemplate x:Key="WrapPanelListBox"> ■(2)
      <toolkit:WrapPanel Width="500"/>
    </ItemsPanelTemplate> ■(2)

  </phone:PhoneApplicationPage.Resources>
    <!--LayoutRoot は、全てのページ コンテンツが配置されるルート グリッドです-->
  <Grid x:Name="LayoutRoot" Background="Transparent">
    <Grid.RowDefinitions>
      <RowDefinition Height="Auto"/>
      <RowDefinition Height="*"/>
    </Grid.RowDefinitions>

    <!--TitlePanel は、アプリケーション名とページ タイトルを格納します-->
    <StackPanel x:Name="TitlePanel" Grid.Row="0" Margin="12,17,0,28">
      <TextBlock x:Name="ApplicationTitle" Text="マイ アプリケーション" Style="{StaticResource PhoneTextNormalStyle}"/>
      <TextBlock x:Name="PageTitle" Text="削除" Margin="9,-7,0,0" Style="{StaticResource PhoneTextTitle2Style}"/>
    </StackPanel>

    <!--ContentPanel - 追加コンテンツをここに入力します-->
    <Grid x:Name="ContentPanel" Grid.Row="1" Margin="12,0,12,0">
      <Image Height="90" HorizontalAlignment="Left" Margin="185,511,0,0" x:Name="delImage1" Stretch="Fill" VerticalAlignment="Top" Width="100">
        <Image.RenderTransform>
          <CompositeTransform Rotation="90" CenterX="50" CenterY="45"/>
        </Image.RenderTransform>
      </Image>
      <Image x:Name="bugImage"  HorizontalAlignment="Left" Height="200" Margin="124,454,0,0"  VerticalAlignment="Top" Width="200" Source="/WP71_DragDropSave;component/Image/IW007.png" />
      <ListBox Height="422" HorizontalAlignment="Left" Margin="0,6,0,0" x:Name="ListBox1" VerticalAlignment="Top" Width="456" ItemsPanel="{StaticResource WrapPanelListBox}" ItemTemplate="{StaticResource ListBoxTemplate}" BorderBrush="Navy" BorderThickness="5" /> ■(3)

    </Grid>
  </Grid>
  <!--ApplicationBar の使用法を示すサンプル コード-->
  ~コード略~
</phone:PhoneApplicationPage>
次に、ソリューションエクスプローラー内のDeletePage.xamlを選択し、マウスの右クリックで表示される「Expression Blendを開く(X)」からExpression Blendを起動し、カバンの中から画像が出てきて消えるアニメーションを作成します。
- この記事のキーワード
バックナンバー
この記事の筆者

筆者の人気記事
Think ITでは、技術情報が詰まったメールマガジン「Think IT Weekly」の配信サービスを提供しています。メルマガ会員登録を済ませれば、メルマガだけでなく、さまざまな限定特典を入手できるようになります。
