WordPress実行環境(LAMP)の構築
WordPress実行環境(LAMP)の構築
WordPressを実行するためには、以下のソフトウェアが必要です。
- Apache HTTPd Server (Webサーバー)
- MySQL
- PHP
導入していきます!
sudo yum install -y httpd mod_ssl php php-mysql php-xml mysql-server
MySQLの設定
MySQLを起動します。
sudo service mysqld start
以下のようなメッセージが出て、起動すると思います。
Initializing MySQL database:  Installing MySQL system tables...
OK
Filling help tables...
OK

To start mysqld at boot time you have to copy
support-files/mysql.server to the right place for your system

PLEASE REMEMBER TO SET A PASSWORD FOR THE MySQL root USER !
To do so, start the server, then issue the following commands:

/usr/bin/mysqladmin -u root password 'new-password'
/usr/bin/mysqladmin -u root -h motounagiya password 'new-password'

Alternatively you can run:
/usr/bin/mysql_secure_installation

which will also give you the option of removing the test
databases and anonymous user created by default.  This is
strongly recommended for production servers.

See the manual for more instructions.

You can start the MySQL daemon with:
cd /usr ; /usr/bin/mysqld_safe &

You can test the MySQL daemon with mysql-test-run.pl
cd /usr/mysql-test ; perl mysql-test-run.pl

Please report any problems with the /usr/bin/mysqlbug script!                                                    [  OK  ]
Starting mysqld:                                           [  OK  ]
次にDBのパスワード設定などを行います。
以下のコマンドを実行します。
sudo /usr/bin/mysql_secure_installation
MySQLのrootパスワードを設定します。
NOTE: RUNNING ALL PARTS OF THIS SCRIPT IS RECOMMENDED FOR ALL MySQL
      SERVERS IN PRODUCTION USE!  PLEASE READ EACH STEP CAREFULLY!

In order to log into MySQL to secure it, we'll need the current
password for the root user.  If you've just installed MySQL, and
you haven't set the root password yet, the password will be blank,
so you should just press enter here.

Enter current password for root (enter for none): ← 最初は空なので何も入力せずEnter
OK, successfully used password, moving on...

Setting the root password ensures that nobody can log into the MySQL
root user without the proper authorisation.

Set root password? [Y/n] Y ← ここでrootのパスワードを設定します
New password:
Re-enter new password:
Password updated successfully!
Reloading privilege tables..
 ... Success!

By default, a MySQL installation has an anonymous user, allowing anyone
to log into MySQL without having to have a user account created for
them.  This is intended only for testing, and to make the installation
go a bit smoother.  You should remove them before moving into a
production environment.

Remove anonymous users? [Y/n] Y
 ... Success!

Normally, root should only be allowed to connect from 'localhost'.  This
ensures that someone cannot guess at the root password from the network.

Disallow root login remotely? [Y/n] Y
 ... Success!

By default, MySQL comes with a database named 'test' that anyone can
access.  This is also intended only for testing, and should be removed
before moving into a production environment.

Remove test database and access to it? [Y/n] Y
 - Dropping test database...
 ... Success!
 - Removing privileges on test database...
 ... Success!

Reloading the privilege tables will ensure that all changes made so far
will take effect immediately.

Reload privilege tables now? [Y/n] Y
 ... Success!

Cleaning up...

All done!  If you've completed all of the above steps, your MySQL
installation should now be secure.

Thanks for using MySQL!
WordPress用のMySQLユーザーとデータベース作成
以下の内容でMySQLデータベースを作成します。あくまで“サンプル”ですので、本番では複雑なパスワードを設定されることをオススメします!
| DB名 | wordpressdb |
|---|---|
| DBユーザー名 | wpdbuser |
| DBパスワード | Password |
例:
サンプル情報を元に「SQLファイル」を以下のように作成します。
wpcreate.sql:
CREATE DATABASE wordpressdb DEFAULT CHARACTER SET utf8;
CREATE USER 'wpdbuser'@'localhost' IDENTIFIED BY 'Password';
GRANT ALL PRIVILEGES ON wordpressdb.* TO wpdbuser@localhost;
flush privileges;
MySQLに接続して、上記SQLを実行します。
mysql -u root -p
上記が一番簡単な方法ですが、以下の方法でも作成可能です。
mysql -u root -p
mysql> 先ほどのSQLを貼りつける
完了したら、以下のコマンドでMySQLの接続を切っておきましょう。
mysql> quit ← mysqlから抜ける
WordPressのインストール
今回、
http://DNS名/wordpress/
へインストールを行います、以下の手順で進めます。
- Webサーバのルートディレクトリ「/var/www/html」に移動
- WordPressの最新版をwgetコマンドでダウンロード
- tarコマンドでダウンロードしたファイルを展開
- chownコマンドで所有者権限をapacheユーザーへ変更
以下、コマンドのみで記載します。
cd /var/www/html
sudo wget http://ja.wordpress.org/latest-ja.tar.gz
sudo tar zxf latest-ja.tar.gz
sudo chown -R apache.apache wordpress
エンドポイントの設定
WordPressの公開及び管理のために、エンドポイントを追加します。
- HTTP (80)
- HTTPS (443)
を追加します。
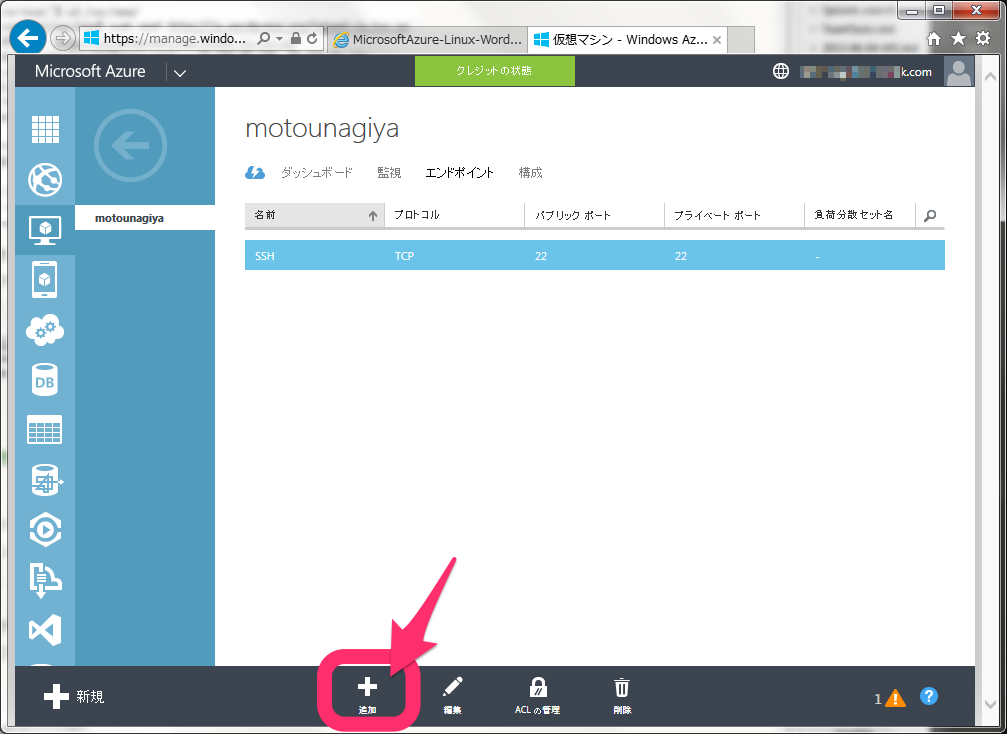
再度「Microsoft Azure 管理ポータル」にアクセスして、自分が作成した「Linux仮想マシン名」をクリックして以下の画面を表示します。
メニューから「エンドポイント」を選択します。

この画面に切り替わります。ここでは、「+ 追加」を選択します。
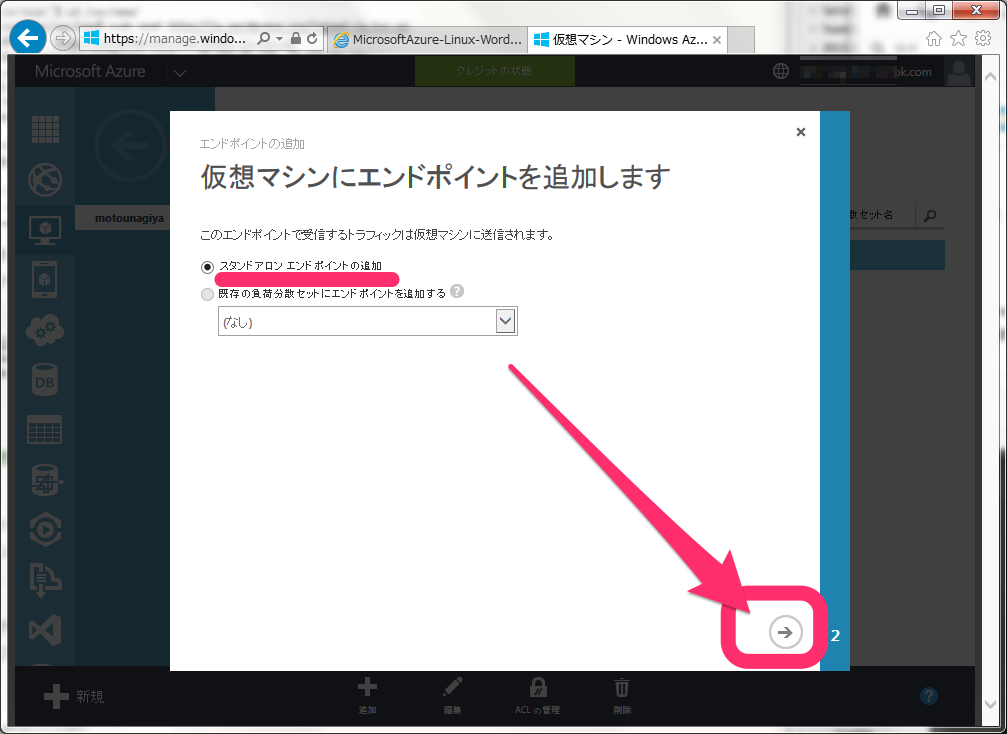
ここでは、「スタンドアロン エンドポイントの追加」を選択して、右下の矢印で「次へ」
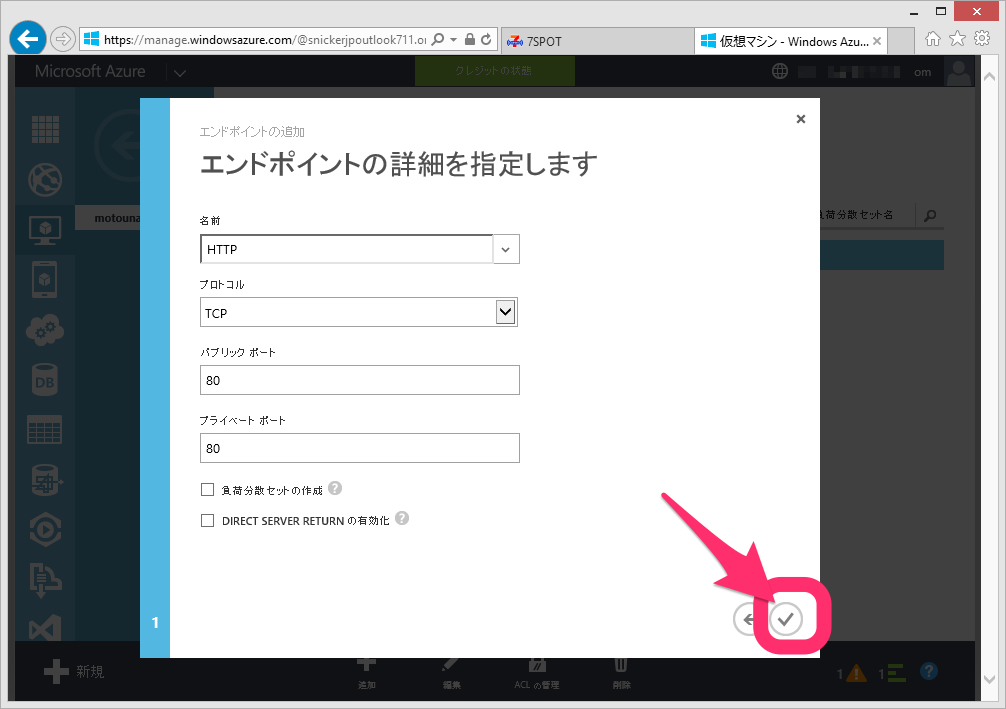
「名前」から「HTTP」を選択します。

「HTTP」です。

他の項目は自動で入力されます。ので、このまま右下の「チェック」をクリックします。
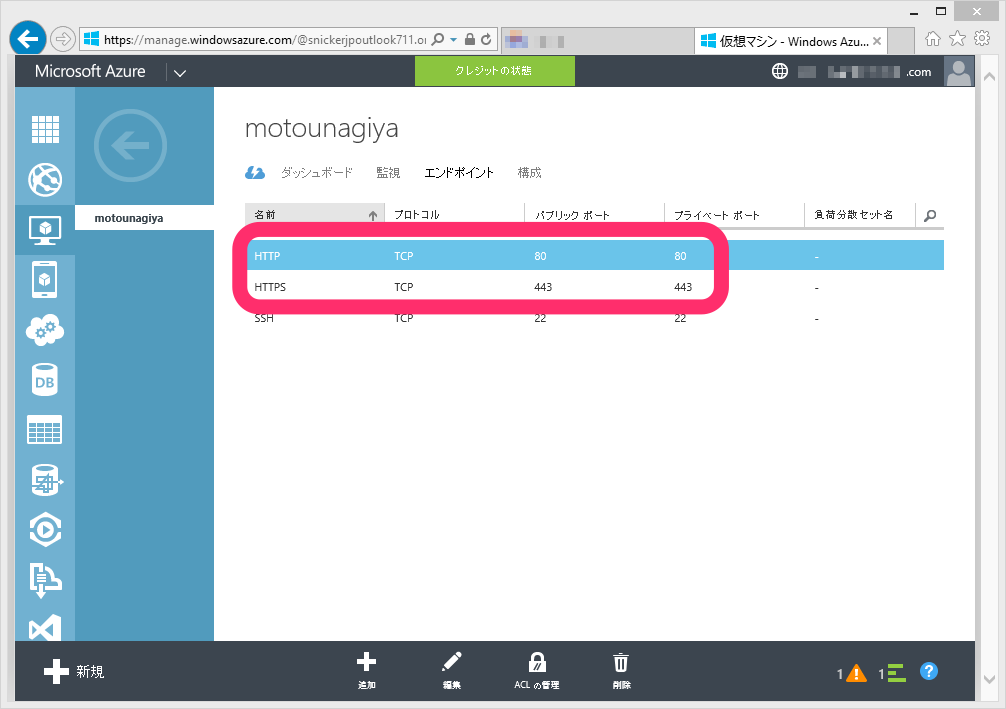
この画面に切り替わって、完了まで数秒待ちます。
完了したら同様に「HTTPS」も追加します。
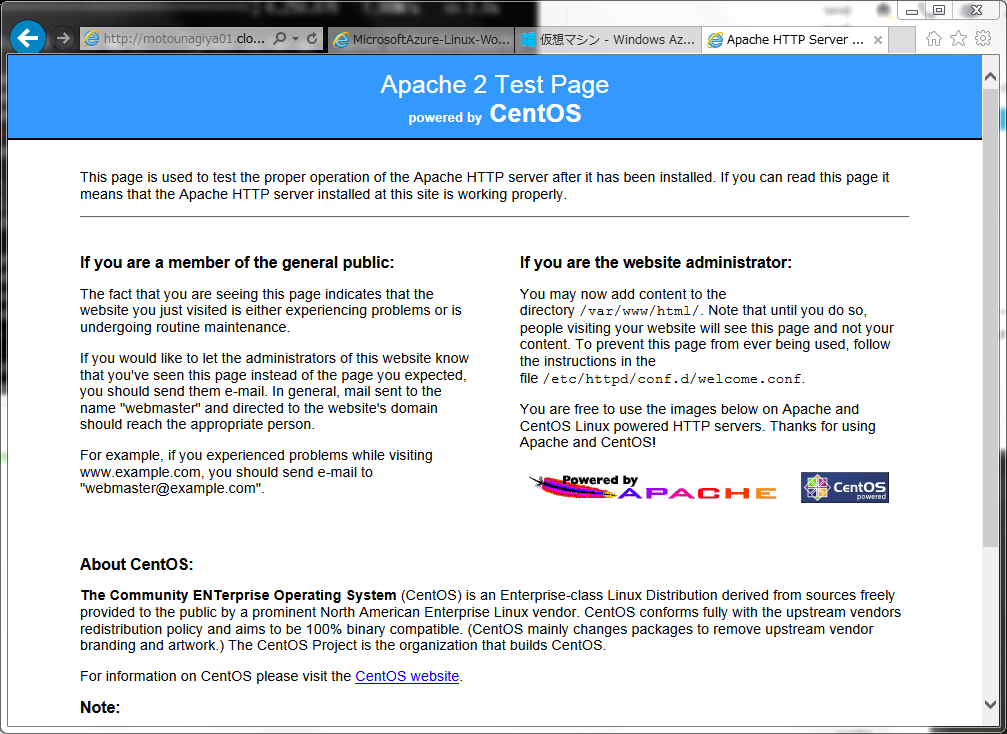
ブラウザで「DNS名」にアクセスして、アクセス可能か確認してみます。
この画面が表示されれば、完了です。
WordPressの管理の安全上の設定は実施しておきましょう。
- IPアドレスで制限
- SSLで管理画面ログイン
WordPressの設定
それでは、WordPressのインストール設定をしていきます。
httpdとmysqldを起動します。
sudo service httpd start
sudo service mysqld start
その後、
http://DNS名/wordpress/
へアクセスして、以下の画面が表示されることを確認します。
「設定ファイルを作成する」で次の画面へ
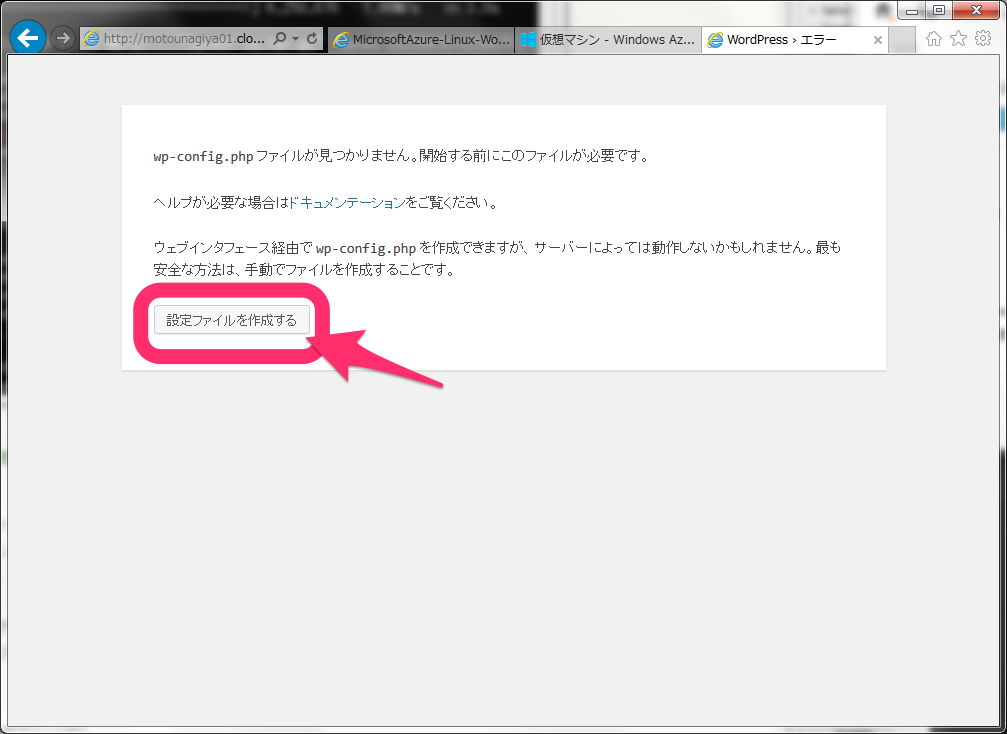
ここは先ほど設定した、データベースの情報用意します。
そして、「さあ、始めましょう!」で次の画面へ
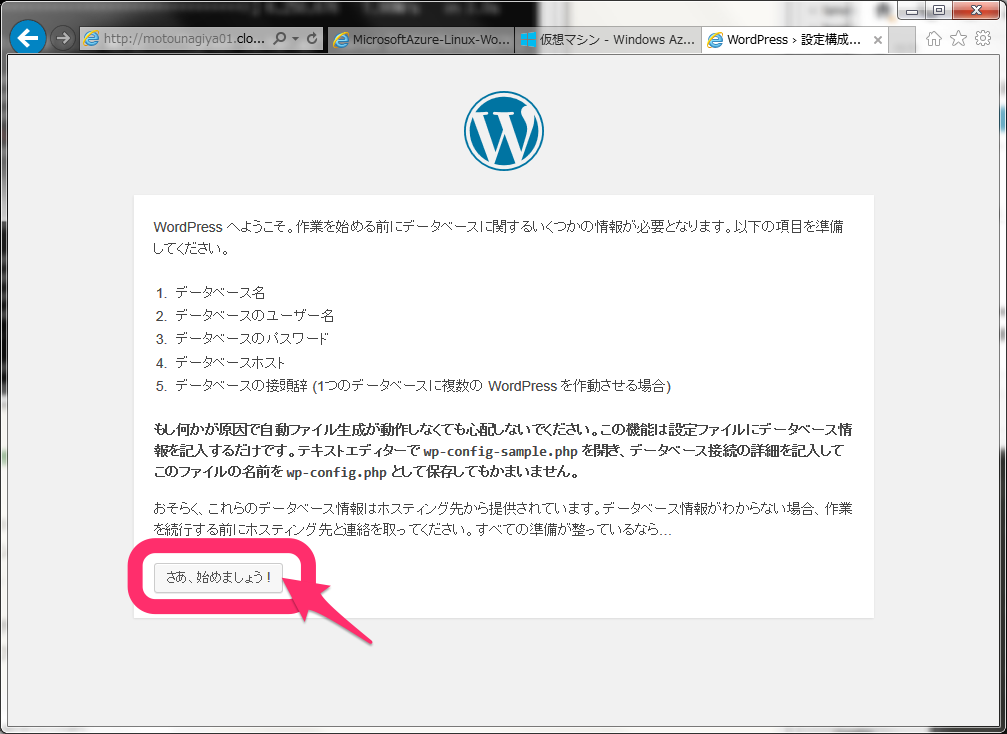
こちらにデータベースの接続情報を入力します。
- データベース名
- ユーザー名
- パスワード
が入力の項目で、他はそのままで大丈夫です。「送信」で次へ

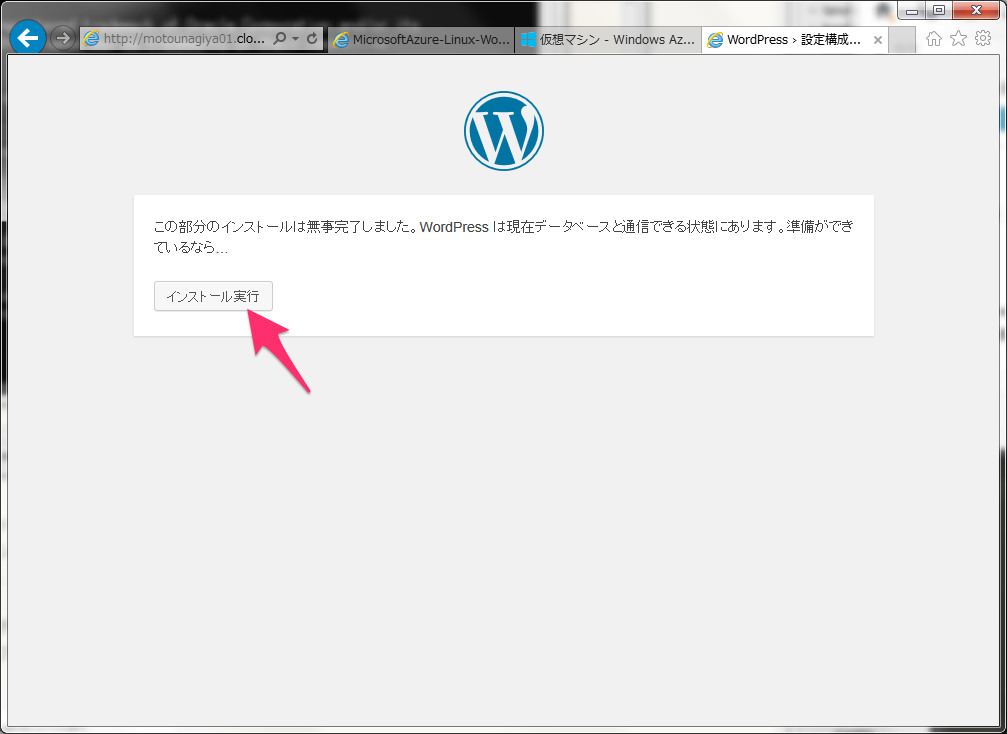
今度は、「インストール実行」で次へ
次に、サイトの設定です。
| サイト名 | 好みのものを入力(例:Tuning Maniax) |
|---|---|
| ユーザー名 | 好みのものを入力(admin以外が好ましい) |
| パスワード | 複雑なもので設定しましょう |
| メールアドレス | 自分のメールアドレス(パスワードを忘れた時に必要です) |
| プライバシー | 今回はコンテスト用なので、「チェックを外します」 |
以下は、例です。
すべての項目が入力完了したら、「WordPressをインストール」で次へ

この画面が出れば、WordPressのインストールは完了です!
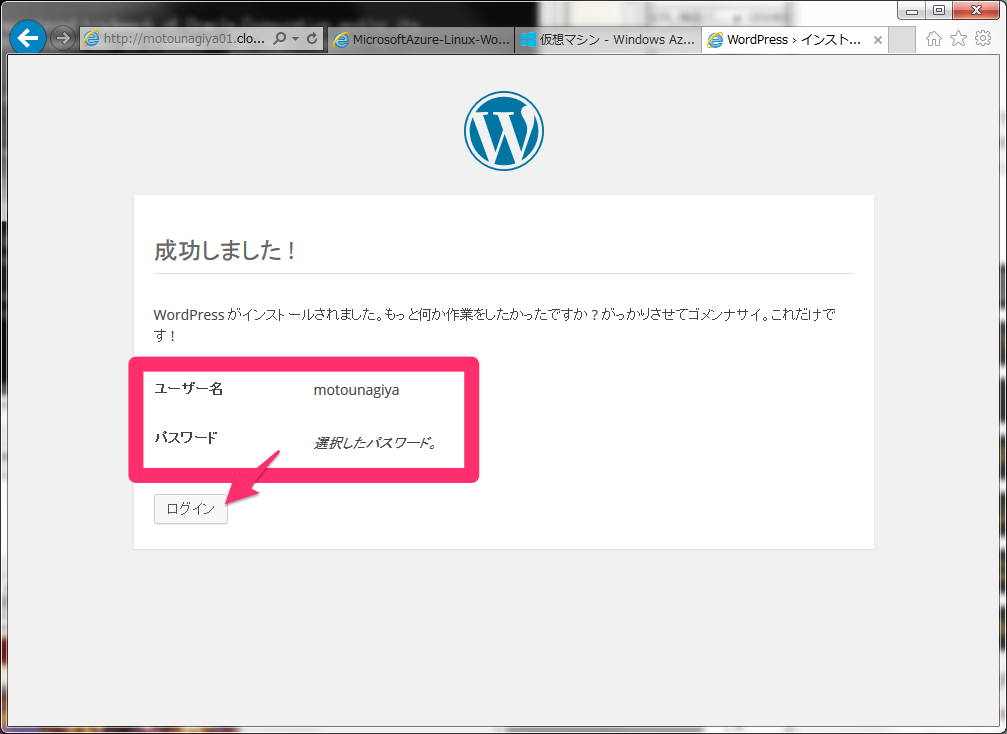
念の為に管理画面にログインしておきましょう。
https://DNS名/wordpress/wp-admin/
と、HTTPSでアクセスを推奨します。
先ほど設定した、
- データベース名
- ユーザー名
を使って、ログインしましょう
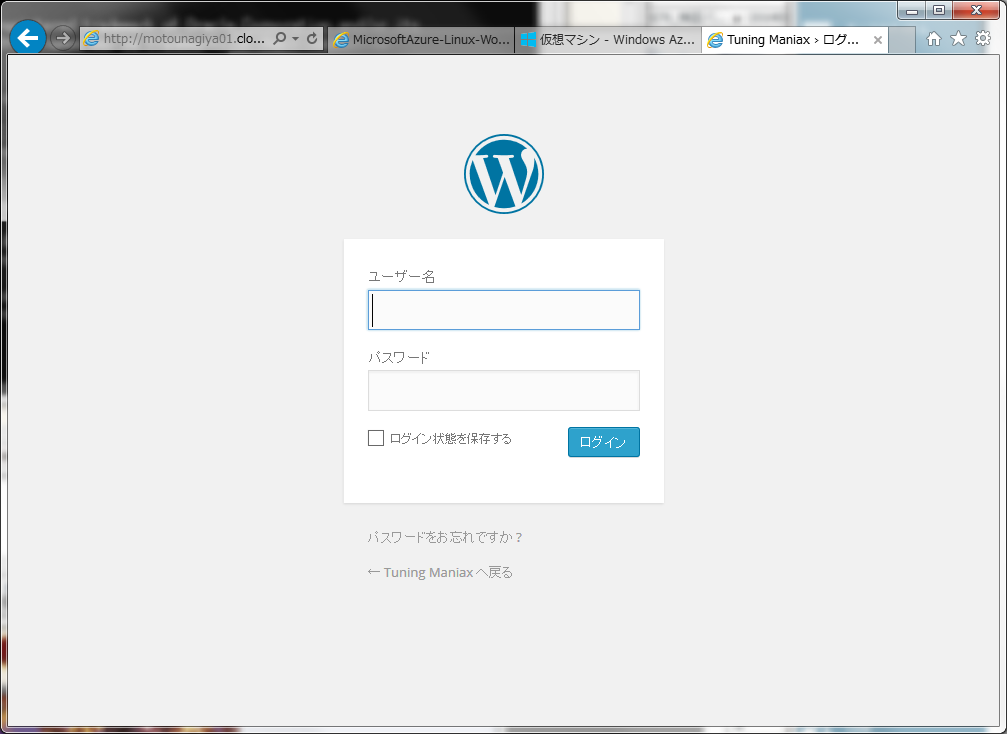
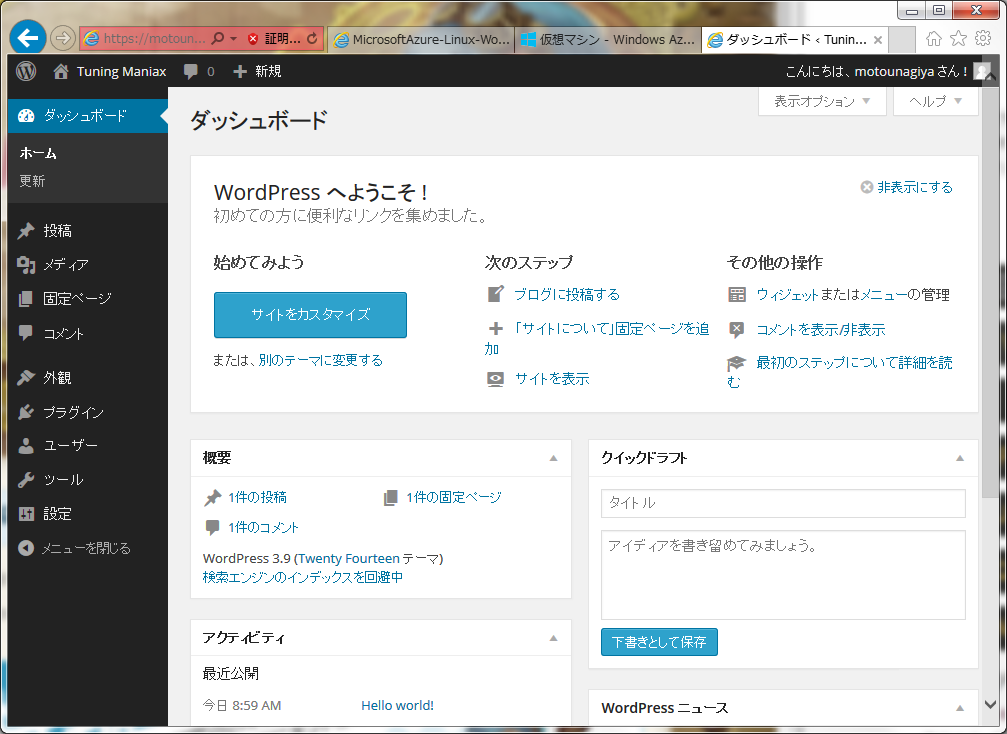
この画面が表示されば、問題ありません!
最後に、サイトのトップページにアクセスしてみます。 http://DNS名/wordpress/
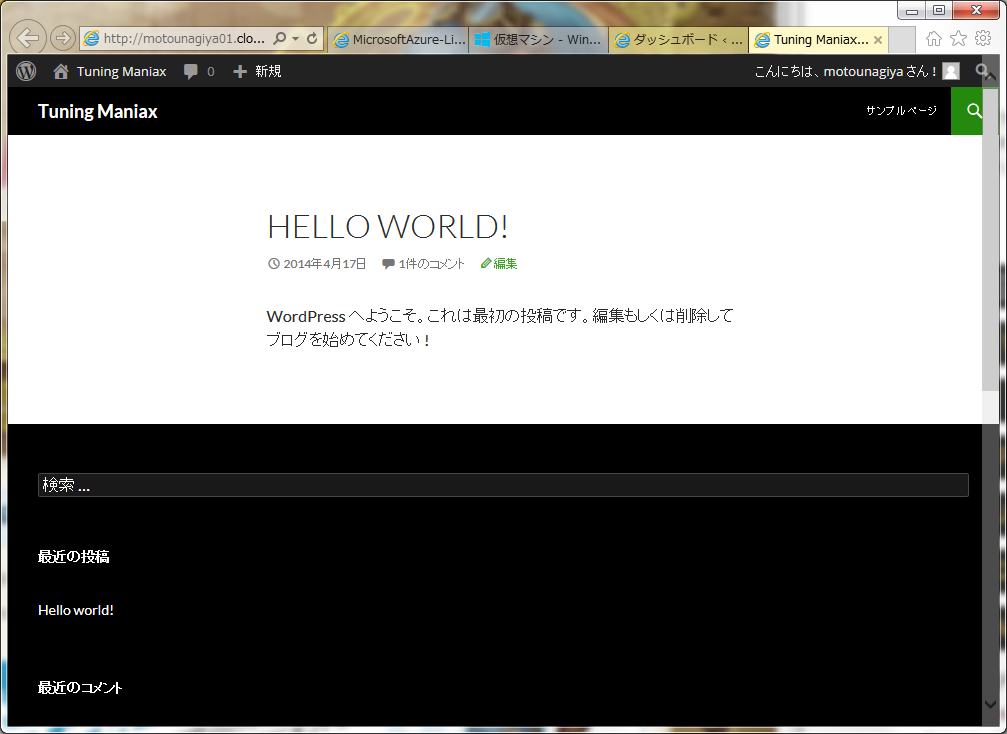
ここまで、表示されればインストールに問題はありません。
競技用データのインポート
WordPressのインストール後、公式サイトに掲載されている手順に沿ってWordPressのデータをインポートしましょう。
WordPressのデータをインポートする - Tuning Maniax 2014
※上記手順でデータがうまくインポートできない場合、PHPのXMLモジュールがインストールされていない可能性があります。例えばCentOSであれば以下のようにXMLモジュールをインストールして、Apacheをリスタートしてください。
sudo yum -y install php-xml
sudo service httpd restart
これが終われば競技前の準備完了です。お疲れ様でした!
【参考リンク】
Windows Azure 自習書シリーズ - 仮想マシン (IaaS) 編 | MSDN
<編集部より> MacからのSSH接続やSQLファイルの作成など、わかりづらかった箇所の追記を行いました。その他、一部の間違いを修正しました。(2014.05.17)
- この記事のキーワード
バックナンバー
この記事の筆者

Think ITでは、技術情報が詰まったメールマガジン「Think IT Weekly」の配信サービスを提供しています。メルマガ会員登録を済ませれば、メルマガだけでなく、さまざまな限定特典を入手できるようになります。
