Windows Phone Tips集 第2弾
第1回
「Windows Phone 縦向きのページ」(DataShowPage.xaml)の作成
「Windows Phone 縦向きのページ」(DataShowPage.xaml)の作成
VS2010メニューの「プロジェクト(P)/新しい項目の追加(W)」と選択し、「Windows Phone 縦向きのページ」を選択します。「名前(N)」にはDataShowPage.xamlと入力します(図7)。
|
|
| 図7:「Windows Phone 縦向きのページ」(DataShowPage.xaml)を作成する(クリックで拡大) |

DataShowPage.xamlの編集とコントロールの配置
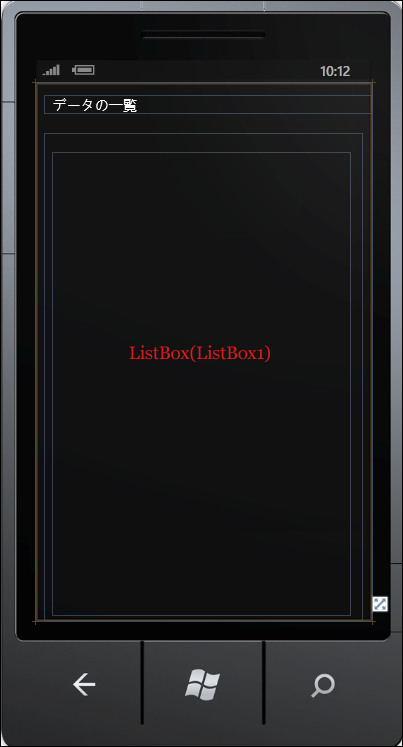
x:NameがPageTitleというTextBlockを削除します。x:NameがApplicationTitleというTextBlockのTextプロパティに「データの一覧」と指定します。ツールボックスからListBoxコントロールを1個配置します(図8)。
|
|
| 図8:ListBoxコントロールを配置した(クリックで拡大) |
書き出されるXAMLをリスト4のように編集します。
リスト4 編集されたXAMLコード(DataShowPage.xaml)
(1)<phone:PhoneApplicationPage.Resources>プロパティ要素内にListBoxTemplateというキー名の<DataTemplate> 要素を配置し、<ListBox>要素に適用するテンプレートを定義します。<StackPanel>要素を配置し、Marginプロパティに20を指定して余白を設けます。この中に子要素として、<Image>要素を配置します。SourceプロパティにはimageFileNameをバインドします。<Image>要素内に<Image.RenderTransform>プロパティ要素を配置し、<CompositionTransform>要素を配置します。回転を表すRotationプロパティに90を指定します。CenterXプロパティには<Image>要素のWidthの半分の値を、CenterYプロパティには<Image>要素のHeightの半分の値を指定します。CenterXプロパティでは、CompositeTransform で指定された、全ての変換の中心点の x 座標を設定します。CenterYプロパティでは、CompositeTransform で指定された、全ての変換の中心点の y 座標を設定します。デフォルトでは画像は横向きで表示されますので、90度回転して縦向きに表示されるようにします。
  <Image>の下に<TextBlock>要素を配置し、TextプロパティにfileNameをバインドします。ここで指定する名称は、VBコード内のクラスで定義するプロパティ名です。
(2)(1)で定義したテンプレートを、<ListBox>要素のItemTemplateプロパティに指定して参照させます。
<phone:PhoneApplicationPage
  x:Class="WP71_CameraPictureSave.DataShowPage"
  xmlns="http://schemas.microsoft.com/winfx/2006/xaml/presentation"
  xmlns:x="http://schemas.microsoft.com/winfx/2006/xaml"
  xmlns:phone="clr-namespace:Microsoft.Phone.Controls;assembly=Microsoft.Phone"
  xmlns:shell="clr-namespace:Microsoft.Phone.Shell;assembly=Microsoft.Phone"
  xmlns:d="http://schemas.microsoft.com/expression/blend/2008"
  xmlns:mc="http://schemas.openxmlformats.org/markup-compatibility/2006"
  FontFamily="{StaticResource PhoneFontFamilyNormal}"
  FontSize="{StaticResource PhoneFontSizeNormal}"
  Foreground="{StaticResource PhoneForegroundBrush}"
  SupportedOrientations="Portrait" Orientation="Portrait"
  mc:Ignorable="d" d:DesignHeight="768" d:DesignWidth="480"
  shell:SystemTray.IsVisible="True" Language="ja-JP">
  <phone:PhoneApplicationPage.Resources> ■(1)
    <DataTemplate x:Key="ListBoxTemplate"> ■(1)
      <StackPanel Margin="20">
        <Image Width="320" Height="240" Stretch="Fill" Source="{Binding imageFileName}" Margin="35"> ■(1)
          <Image.RenderTransform> ■(1)
            <CompositeTransform Rotation="90" CenterX="160" CenterY="120"/> ■(1)
          </Image.RenderTransform>
        </Image>
        <TextBlock Text="{Binding fileName}"/> ■(1)
      </StackPanel>
    </DataTemplate>
  </phone:PhoneApplicationPage.Resources>
    <!--LayoutRoot は、全てのページ コンテンツが配置されるルート グリッドです-->
  <Grid x:Name="LayoutRoot" Background="Transparent">
    <Grid.RowDefinitions>
      <RowDefinition Height="Auto"/>
      <RowDefinition Height="*"/>
    </Grid.RowDefinitions>
    <!--TitlePanel は、アプリケーション名とページ タイトルを格納します-->
    <StackPanel x:Name="TitlePanel" Grid.Row="0" Margin="12,17,0,28">
      <TextBlock x:Name="ApplicationTitle" Text="データの一覧" Style="{StaticResource PhoneTextNormalStyle}"/>
    </StackPanel>
    <!--ContentPanel - 追加コンテンツをここに入力します-->
    <Grid x:Name="ContentPanel" Grid.Row="1" Margin="12,0,12,0">
      <ListBox Height="663" Margin="12,27,18,0" Name="ListBox1" VerticalAlignment="Top" ItemTemplate="{StaticResource ListBoxTemplate}"/> ■(2)
    </Grid>
  </Grid>

  <!--ApplicationBar の使用法を示すサンプル コード-->
 ~コード略~
</phone:PhoneApplicationPage>
次に、DataShowPage.xamlを展開して表示される、DataShowPage.xaml.vbをダブルクリックしてリスト5のコードを記述します。
ロジックコードを記述する
リスト5 (DataShowPage.xaml.vb)
Option Strict On
Imports System.Xml.Linq
Imports System.IO
Imports System.IO.IsolatedStorage
Imports System.Windows.Media.Imaging
Imports Microsoft.Phone

ImageInfoクラス内にWriteableBitmapクラス型のimageFileNameと文字列型のfileNameプロパティを定義しておきます。

Public Class ImageInfo
  Property imageFileName As WriteableBitmap
  Property fileName As String
End Class
Partial Public Class DataShowPage
  Inherits PhoneApplicationPage

  Public Sub New()
    InitializeComponent()
  End Sub
ページがアクティブになった時呼び出されるメソッド
変数storageを、ファイルとディレクトリを格納している分離ストレージ領域を表すIsolateStorageFileクラスとして宣言します。Path.CombineでmyPicturesというフォルダとimageFileList.xmlというXMLファイル名と連結します。
分離ストレージ内のファイルを表すIsolatedStorageFileStreamクラス用オブジェクト変数myStreamを用意し、IsolatedStorageFileクラスのOpenFileメソッドでmyPicturesフォルダ内のimageFileList.xmlファイルを、指定したファイルアクセスを使用して指定したモードでファイルを開きます。開いたファイルをStreamReaderで読み込みます。ReadToEndメソッドでファイルの最後まで読み取り変数readXmldoc変数に格納しておきます。
読み込んだXMLテキストをParseメソッドでXElementとして読み込みます。ImageInfoクラス型の新しいリストであるmyImageInfoオブジェクトを作成します。
Descendantsメソッドで、子孫要素である全ての <fileName> 要素のコレクションを選択し、各要素を、変数resultに格納しながら、以下の処理を繰り返します。
Path.CombineでmyPicturesフォルダと、<filename>要素の属性”imageFileName”の値を連結して、変数imageFilePathに格納しておきます。変数imageStorageを、ファイルとディレクトリを格納している分離ストレージ領域を表すIsolateStorageFileクラスとして宣言します。IsolatedStorageFileStreamクラスのOpenFileメソッドでmyPicturesフォルダ内のimageFileList.xmlファイルを、指定したファイルアクセスを使用して指定したモードでファイルを開きます。WriteableBitmap型の変数imageSourceを宣言し、PictureDecoder.DecodeJpegメソッドで、開いたストリームをJPEGファイルとしてWriteableBitmapオブジェクトにデコードします。PictureDecoder.DecodeJpegメソッドはMicrosof.Phone名前空間に属しています。WriteableBitmapクラスは書き込み更新することのできるBitmapSourceを提供するクラスです。
ImageInfoクラスのimageFileNameプロパティに、読み込んだWriteableBitmapオブジェクトのimageSourceオブジェクトを指定し、fileNameプロパティに<filename>要素の内容テキストを指定して、AddメソッドでmyImageInfoオブジェクトに追加していきます。ListBox1のItemsSourceプロパティにmyImageInfoオブジェクトを指定します。これで、撮った画像とコメントの一覧が表示されます。
  Protected Overrides Sub OnNavigatedTo(e As System.Windows.Navigation.NavigationEventArgs)
      Dim storage As IsolatedStorageFile = IsolatedStorageFile.GetUserStoreForApplication
    Dim filePath As String = Path.Combine("myPictures", "imageFileList.xml")
    Using myStream As IsolatedStorageFileStream = storage.OpenFile(filePath, FileMode.Open, FileAccess.Read)
      Using reader As StreamReader = New StreamReader(myStream)
        Dim readXmldoc As String = reader.ReadToEnd
        Dim doc As XElement = XElement.Parse(readXmldoc)
        Dim myImageInfo As New List(Of ImageInfo)

        For Each result In From c In doc.Descendants("fileName") Select c
          Dim imageFilePath As String = Path.Combine("myPictures", result.Attribute("imageFileName").Value)
          Dim imageStorage As IsolatedStorageFile = IsolatedStorageFile.GetUserStoreForApplication
          Using stream As IsolatedStorageFileStream = imageStorage.OpenFile(imageFilePath, FileMode.Open, FileAccess.Read)
            Dim imageSource As WriteableBitmap = PictureDecoder.DecodeJpeg(stream)
            With myImageInfo
              .Add(New ImageInfo With {.imageFileName = imageSource,
              .fileName = result.Value})
            End With
          End Using
        Next
        ListBox1.ItemsSource = myImageInfo
      End Using
    End Using

    MyBase.OnNavigatedTo(e)    End Sub
End Class
「カメラで写した写真を分離ストレージに保存し、写真の一覧を表示する」サンプルプログラム
You don't have access to download this file.
- この記事のキーワード
関連記事
バックナンバー
この記事の筆者

筆者の人気記事
Think ITでは、技術情報が詰まったメールマガジン「Think IT Weekly」の配信サービスを提供しています。メルマガ会員登録を済ませれば、メルマガだけでなく、さまざまな限定特典を入手できるようになります。
