コントロールの配置
コントロールの配置
はじめに
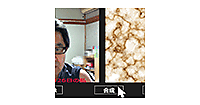
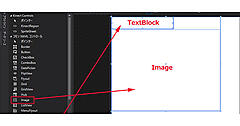
ツールボックスからデザイン画面上にImageコントロールを3個、次に、「元画像」「合成」「テクスチャ」「保存」用のButtonコントロールを4個配置します。ImageコントロールのWidthに640、Heightに480と指定しています。Buttonコントロールは、[元画像]以外は、プロパティの[共通]パネル内にあるIsEnabledのチェックを外して使用不可としておきます。
書き出されるXAMLコードはリスト1、レイアウトは図8になります。
リスト1 書き出されたXAMLコード(MainPage.xaml)
- (1)
要素を配置し、Widthに640、Heightに480と指定しています。 - (2)「元画像」「合成」「テクスチャ」「保存」用の
<Page
  x:Class="Win8_WriteableBitmapEx_Bilt.MainPage"
  xmlns="http://schemas.microsoft.com/winfx/2006/xaml/presentation"
  xmlns:x="http://schemas.microsoft.com/winfx/2006/xaml"
  xmlns:local="using:Win8_WriteableBitmapEx_Bilt"
  xmlns:d="http://schemas.microsoft.com/expression/blend/2008"
  xmlns:mc="http://schemas.openxmlformats.org/markup-compatibility/2006"
  mc:Ignorable="d" Width="1920" Height="1080">

  <Grid Background="{StaticResource ApplicationPageBackgroundThemeBrush}">
    <Image x:Name="Image1" HorizontalAlignment="Left" Height="480" Margin="10,10,0,0" VerticalAlignment="Top" Width="640" />■(1)
    <Image x:Name="Image2" HorizontalAlignment="Left" Height="480" Margin="679,10,0,0" VerticalAlignment="Top" Width="640" />■(1)
    <Image x:Name="Image3" HorizontalAlignment="Left" Height="480" Margin="408,577,0,0" VerticalAlignment="Top" Width="640"/>■(1)
    <Button x:Name="makeButton" Content="合成" HorizontalAlignment="Left" Height="59" Margin="606,507,0,0" VerticalAlignment="Top" Width="191" FontFamily="Meiryo UI" FontSize="36" IsEnabled="False"/>■(2)
    <Button x:Name="readButton1" Content="元画像" HorizontalAlignment="Left" Height="59" Margin="218,507,0,0" VerticalAlignment="Top" Width="191" FontFamily="Meiryo UI" FontSize="36"/>■(2)
    <Button x:Name="readButton2" Content="テクスチャ" HorizontalAlignment="Left" Height="59" Margin="914,507,0,0" VerticalAlignment="Top" Width="191" FontFamily="Meiryo UI" FontSize="36" IsEnabled="False"/>■(2)
    <Button x:Name="saveButton" Content="保存" HorizontalAlignment="Left" Height="59" Margin="1183,507,0,0" VerticalAlignment="Top" Width="191" FontFamily="Meiryo UI" FontSize="36" IsEnabled="False"/>■(2)
  </Grid>
</Page>
ピクチャライブラリへのアクセス許可の設定
今回のサンプルは「ピクチャライブラリ」にアクセスするため、ピクチャライブラリへのアクセス許可が必要になります。ソリューションエクスプローラー内にpackage.appxmanifestというファイルがありますので、このファイルをダブルクリックします。「機能」タブをクリックします。
「機能」タブが開いたら、左の「機能:」内にある、「画像ライブラリ」にチェックを付けます(図8)。
次に、ソリューションエクスプローラー内のMainWindow.xamlを展開して表示される、MainWindow.xaml.vbをダブルクリックしてリスト2のコードを記述します。
ロジックコードを記述する
リスト2 (MainWindow.xaml.vb)
Option Strict On
ユーザーがファイルを参照し、ファイルを開き、ファイルを保存する時、名前や拡張子、場所、を選択可能にするUI要素を管理するクラスの含まれる、Windows.Storage.Pickers名前空間をインポートします。
Imports Windows.Storage.Pickers
コーデック(データのエンコードとデコードを双方向に行うことができるソフトウエア)がインストールされているイメージファイル(任意の形式)から、デコーディング、編集、およびエンコードが可能なクラスの含まれる、Windows.Graphics.Imaging名前空間をインポートします。
Imports Windows.Graphics.Imaging
シーケンシャルとランダム アクセスのストリームの読み書きを提供するクラスの含まれる、Windows.Storage.Streams名前空間をインポートします。
Imports Windows.Storage.Streams
System.Runtime.InteropServices.WindowsRuntime 名前空間には、マネージ コードおよび Windows ランタイムとの相互運用をサポートするクラスが含まれています。
Imports System.Runtime.InteropServices.WindowsRuntime
ファイル、フォルダー、およびアプリケーションの設定を管理するクラスの含まれる、Windows.Storage名前空間をインポートします。
Imports Windows.Storage
コア システムの機能と、その UI についてのランタイム情報にアクセスするアプリケーションを提供するクラスの含まれる、Windows.UI名前空間をインポートします。
Imports Windows.UI
コンテキスト メニューおよびメッセージ ダイアログ ボックスに関するクラスの含まれる、Windows.UI.Popups名前空間をインポートします。
Imports Windows.UI.Popups

Public NotInheritable Class MainPage
  Inherits Page
WriteableBitmapクラス型のメンバ変数myBilt1とwb1を宣言します。
  Dim myBilt1 As WriteableBitmap
  Dim wb1 As WriteableBitmap
ファイルを表すStorageFileクラスのメンバ変数myFile2とmyFileを宣言します。
  Dim myFile2 As StorageFile
  Dim myFile As StorageFile
[元画像]ボタンがクリックされた時の処理
FileOpenPickerクラスの新しいインスタンスmyFileOpenPickerオブジェクトを作成します。FileOpenPickerクラスは、ユーザーが選択し、ファイルを開くことのできるUI要素を表すクラスです。
ファイルの表示モードを指定するViewModeプロパティに、サムネイル表示を指定します。サムネイル表示のほかにリスト(List)表示があります。ファイルを開く最初の場所を設定する、SuggestedStartLocationプロパティにPicturesLibrayを指定しておきます。開くファイルタイプを指定するFileTypeFilter.Addで「アスタリスク」を指定して全てのファイルを指定しておきます。PNGファイルだけを指定する場合は、FileTyleFilter.Add(“.png”)と指定します。”*.png”ではないので注意してください。
PickSingleFileAsynメソッドで、ユーザーが1つのファイルを選択できるように、ファイルピッカーを表示し、変数myFileで参照します。変数myFileがファイルを参照している場合は、新しいBitmapImageクラスのインスタンスmyBmpオブジェクトを作成します。SetSourceメソッドにAwait myFile.OpenReadAsyncと指定して、ファイルの内容を読み込むために、現在のファイルを、ランダムアクセスストリームで開きます。
Image1のSourceプロパティにmyBmpオブジェクトを指定します。これで、ファイルピッカーで指定したファイルが表示されます。「元画像」に表示されます。
非同期処理で行われるため、メソッドの先頭にAsyncを追加します。
  Private Async Sub readButton1_Click(sender As Object, e As RoutedEventArgs) Handles readButton1.Click
    Image3.Source = Nothing
    Dim myFileOpenPicker As New FileOpenPicker
    myFileOpenPicker.ViewMode = PickerViewMode.Thumbnail
    myFileOpenPicker.SuggestedStartLocation = PickerLocationId.PicturesLibrary
    myFileOpenPicker.FileTypeFilter.Add("*")
    myFile = Await myFileOpenPicker.PickSingleFileAsync()
    If myFile Is Nothing = False Then
      Dim myBmp As New BitmapImage
      myBmp.SetSource(Await myFile.OpenReadAsync)
      Image1.Source = myBmp
    End If
    readButton2.IsEnabled = True
  End Sub
[テクスチャ]ボタンがクリックされた時の処理
FileOpenPickerクラスの新しいインスタンスmyFileOpenPickerオブジェクトを作成します。FileOpenPickerクラスは、ユーザーが選択し、ファイルを開くことのできるUI要素を表すクラスです。
ファイルの表示モードを指定するViewModeプロパティにサムネイル表示を指定します。サムネイル表示のほかにリスト(List)表示があります。
ファイルを開く最初の場所を設定する、SuggestedStartLocationプロパティにPicturesLibrayを指定しておきます。
開くファイルタイプを指定するFileTypeFilter.Addで「アスタリスク」を指定して全てのファイルを指定しておきます。
PickSingleFileAsynメソッドで、ユーザーが1つのファイルを選択できるようにファイルピッカーを表示し、変数myFile2で参照します。変数myFile2がファイルを参照している場合は、新しいBitmapImageクラスのインスタンスmyBmpオブジェクトを作成します。
SetSourceメソッドにAwait myFile2.OpenReadAsyncと指定して、ファイルの内容を読み込むために、現在のファイルを、ランダムアクセスストリームで開きます。
Image2のSourceプロパティにmyBmpオブジェクトを指定します。これで、ファイルピッカーで指定したファイルが表示されます。「テクスチャ」に表示されます。[合成]ボタンの使用を可能にします。
非同期処理で行われるため、メソッドの先頭にAsyncを追加します。
  Private Async Sub readButton2_Click(sender As Object, e As RoutedEventArgs) Handles readButton2.Click
    Dim myFileOpenPicker As New FileOpenPicker
    myFileOpenPicker.ViewMode = PickerViewMode.Thumbnail
    myFileOpenPicker.SuggestedStartLocation = PickerLocationId.PicturesLibrary
    myFileOpenPicker.FileTypeFilter.Add("*")
    myFile2 = Await myFileOpenPicker.PickSingleFileAsync()
    If myFile2 Is Nothing = False Then
      Dim myBmp As New BitmapImage
      myBmp.SetSource(Await myFile2.OpenReadAsync)
      Image2.Source = myBmp
    End If
    makeButton.IsEnabled = True
  End Sub
- この記事のキーワード


