MainWindow.xaml内に[UpDownModel]を取り込む。
プログラム・コードはリスト4のようになります。
リスト4(UpDownModel.vb) 指のアップ・ダウンで円を拡大縮小するクラス
Imports System.ComponentModel
Imports Leap
Public Class UpDownModel

'  プロパティの値が変更されたことをクライアントに通知する、
'  INotifyPropertyChangedインターフェースをインプリメントしておく。
  Implements INotifyPropertyChanged

  Private ctlr As Controller
  Private listener As LeapListener

'  Newメソッド
'  各インスタンスを作成して、AddHandlerステートメントで、listenerオブジェクトの
'  LeapSwipeイベントに、SwipeActionベントハンドラ—を追加する。
  Public Sub New()
    ctlr = New Controller
    listener = New LeapListener
    ctlr.AddListener(listener)
    AddHandler listener.LeapSwipe, AddressOf Me.SwipeAction
  End Sub

‘ EllipseHeightプロパティの定義
  Private myHeight As Double

  Public Property EllipseHeight As Double
    Get
      Return myHeight
    End Get
    Set(value As Double)
      myHeight = value
      OnPropertyChanged("EllipseHeight")
    End Set
  End Property

'  EllipseWidthプロパティの定義
  Private myWidth As Double
  Public Property EllipseWidth As Double
    Get
      Return myWidth
    End Get
    Set(value As Double)
      myWidth = value
      OnPropertyChanged("EllipseWidth")
    End Set
  End Property

'  UpとDownによってEllipseHeightとEllipseWidthの値を変化させるSwipeActionメソッドの処理
  Private Sub SwipeAction(ByVal sd As SwipeDirection)
    Select Case sd
      Case SwipeDirection.Up
        EllipseHeight += 10
        EllipseWidth += 10

        Exit Select
      Case SwipeDirection.Down

        EllipseHeight -= 10
        EllipseWidth -= 10
        Exit Select
    End Select
  End Sub

' プロパティの値が変更された時に、変更されたことをクライアントに通知する
'  PropertyChangedイベント。
  Public Event PropertyChanged(sender As Object, e As PropertyChangedEventArgs) Implements INotifyPropertyChanged.PropertyChanged

'  OnPropertyChangedメソッドの処理
'  RaseEventでプロパティ名で初期化されたPropertyChangedイベントを発生させる。
  Private Sub OnPropertyChanged(ByVal propertyName As String)
    RaiseEvent PropertyChanged(Me, New PropertyChangedEventArgs(propertyName))
  End Sub
End Class
MainWindow.xaml内に[UpDownModel]を取り込む。
まず名前空間として「xmlns:local="clr-namespace:FingerRecognizeUpDown"」を定義します。
次に
※注意
リスト5(MainWindow.xaml) 「UpDownMode」を取り込んだMainWindow.xaml
<Window x:Class="MainWindow"
  xmlns="http://schemas.microsoft.com/winfx/2006/xaml/presentation"
  xmlns:x="http://schemas.microsoft.com/winfx/2006/xaml"
  xmlns:d="http://schemas.microsoft.com/expression/blend/2008"
  xmlns:mc="http://schemas.openxmlformats.org/markup-compatibility/2006" mc:Ignorable="d"
  xmlns:local="clr-namespace:FingerRecognizeUpDown"
  Title="MainWindow" Height="768" Width="1366" >
  <Window.DataContext>
    <local:UpDownModel/>
  </Window.DataContext>
 ・・・・以下コード略・・・・
</Window>
プログラム・コード(MainWindow.xaml.vb)指の個数を表示させる処理
MainWindows.xaml.vbファイルを見ていきましょう(リスト6)。
新しいControllerクラスのインスタンスであるleapメンバー変数を宣言します。次に、インク・ストローク(=System.Windows.Ink名前空間のStrokeクラスで表現される、WPF上でのインクの線)の外観を指定する新しいDrawingAttributesクラス(System.Windows.Ink名前空間)のインスタンスである「touchIndicatorメンバー変数」を宣言します。
MainWindow_Loadedメソッドの処理
MainWindow_Loadedメソッド(=メイン・ウィンドウのLoadedイベントのハンドラー)では、MainWindowが読み込まれたときの処理を実装します。
AddHandlerステートメントを使って、構成ツリーのオブジェクトがレンダリングされる直前に発生する「CompositionTarget.Renderingイベント」に対するイベント・ハンドラーとしてUpdateメソッドを指定します(※Updateメソッドの実装内容は後述)。
インク・ストロークの外観を表す、DrawingAttributesオブジェクトのインスタンス「touchIndicator」のWidthプロパティとHeightプロパティにそれぞれ「30」を指定します。スタイラスの形状を指定するStylusTipプロパティに「StylusTip.Ellipse」を指定して円形とします。Leap Motionの上で指をかざすと、かざした指の本数が5本で、30px(px=ピクセル)の円が表示されるようになります。
Updateメソッドの処理
次は、CompositionTarget.Renderingイベント・ハンドラーであるUpdateメソッドの処理です。
まず、上記のコードを実装した段階で、「Update」の位置に[エラー修正のオプション]というスマート・タグが表示されるので、そのタグのメニューから[’ ChangeBackgroundLeapMotion.MainWindow’ に ‘ Update’ のメソッド スタブを生成]をクリックすると、Updateメソッドのひな型が追加されます。次に、そのメソッド内を実装していきます。
「paintCanvas」という名前のInkPresenter内をクリアします。この処理を行っていないと、Updateメソッドは常に呼び出されているため、円を画面上で動かすと、円の軌跡が残ったまま表示されてしまいます。そのため、InkPresenter内をクリアする必要があります。
Leap Motionのフレームを表すFrame型(Leap名前空間)の変数「frame」を宣言します。InteractionBox型(Leap名前空間)の変数「interactionBox」を宣言し、そこにleap.Frame.InteractionBoxプロパティからInteractionBoxオブジェクトを取得します。InteractionBoxオブジェクトは、Leap Motionで認識できる可動範囲となります。InteractionBoxオブジェクトを使用することで、指やツール(=ペンなど)の位置を実際のディスプレイの座標系に変換できます。詳細な図については、「Leap Motionでのタッチ操作はどう開発するのか?」を参照してください。
Leap.Frame.Pointablesプロパティで得られるPointableListオブジェクト内を変数「Pointable」で反復処理しながら、1つずつPointableオブジェクトを処理し、それぞれのタッチ位置を取得していきます。
interactionBoxオブジェクトのNormalizePointメソッドに引数としてPointable.StabilizedTipPositionプロパティ値を渡し、ポインター上の位置を取得します。
変数「windowWidth」と「windowHeight」で表されたクライアント領域のウィンドウがある場合、
Dim tx As Double = normalizedPosition.x * windowWidth

Dim ty As Double = windowHeight - normalizedPosition.y * windowHeight
のコードで示す計算式を使用してこのウィンドウ内のタッチ・ポイントの2D座標を得ることができます。
最後に、
  Dim tips As New StylusPointCollection(New StylusPoint() {touchPoint})
  Dim touchStroke As New Stroke(tips, touchIndicator)
  paintCanvas.Strokes.Add(touchStroke)
と記述して、ディスプレイ上に円形のタッチ・ポイントを表示します。
実際のコードはリスト6になります。
リスト6(MainWindow.xaml.vb)
Imports Leap
Imports System.Windows.Ink
Class MainWindow
  Private leap As New Controller
  Private windowWidth As Double = 1366
  Private windowHeight As Double = 768
  Private touchIndicator As New DrawingAttributes

'  MainWindow_Loadedメソッドの処理
  Private Sub MainWindow_Loaded(sender As Object, e As RoutedEventArgs) Handles Me.Loaded
    AddHandler CompositionTarget.Rendering, AddressOf Update'  Updateメソッドをイベント・ハンドラーに追加する
    touchIndicator.Width = 30
    touchIndicator.Height = 30
    touchIndicator.StylusTip = StylusTip.Ellipse' スタイラスの形状を30pxの円形に指定する
  End Sub

'  Updateメソッドの処理
  Private Sub Update(sender As Object, e As EventArgs)
    paintCanvas.Strokes.Clear()
    windowWidth = Me.Width
    windowHeight = Me.Height

    Dim frame As Leap.Frame = leap.Frame

'  Leap Motionで認識できる可動範囲を取得する
    Dim interactionBox As InteractionBox = leap.Frame.InteractionBox
    For Each Pointable As Pointable In leap.Frame.Pointables
      Dim normalizedPosition As Leap.Vector = interactionBox.NormalizePoint(Pointable.StabilizedTipPosition)
      Dim tx As Double = normalizedPosition.x * windowWidth
      Dim ty As Double = windowHeight - normalizedPosition.y * windowHeight
      Dim touchPoint As StylusPoint = New StylusPoint(tx, ty) '  ウィンドウ内のタッチ・ポイントの位置を取得する

      Dim tips As New StylusPointCollection(New StylusPoint() {touchPoint})
      Dim touchStroke As New Stroke(tips, touchIndicator)
      paintCanvas.Strokes.Add(touchStroke) '  ディスプレイ上にタッチ・ポイントを表示
    Next
  End Sub
End Class
これでVS2012のメニューから[デバッグ]−[デバッグ開始]と実行すると、5本の指のアップ・ダウンで円が拡大縮小表示されます。
リスト5を見ていただくとわかりますが、画面のWidthに1366、Heightに768と指定し、全画面表示にはしていません。
※注意
サンプルをダウンロードして動かす場合は、「LeapCSharp.NET4.0.dll」や「LeapCSharp.dll」、「Leap.dll」を読者の方自身のフォルダ内にあるDLLファイルに指定し直さなければ動かない可能性があるので、動かない場合は再指定してください。
Leap Motionの有料、無料アプリを販売しているAirspace Storeがあります。
筆者は無料のアプリを2つほどダウンロードして試してみました。
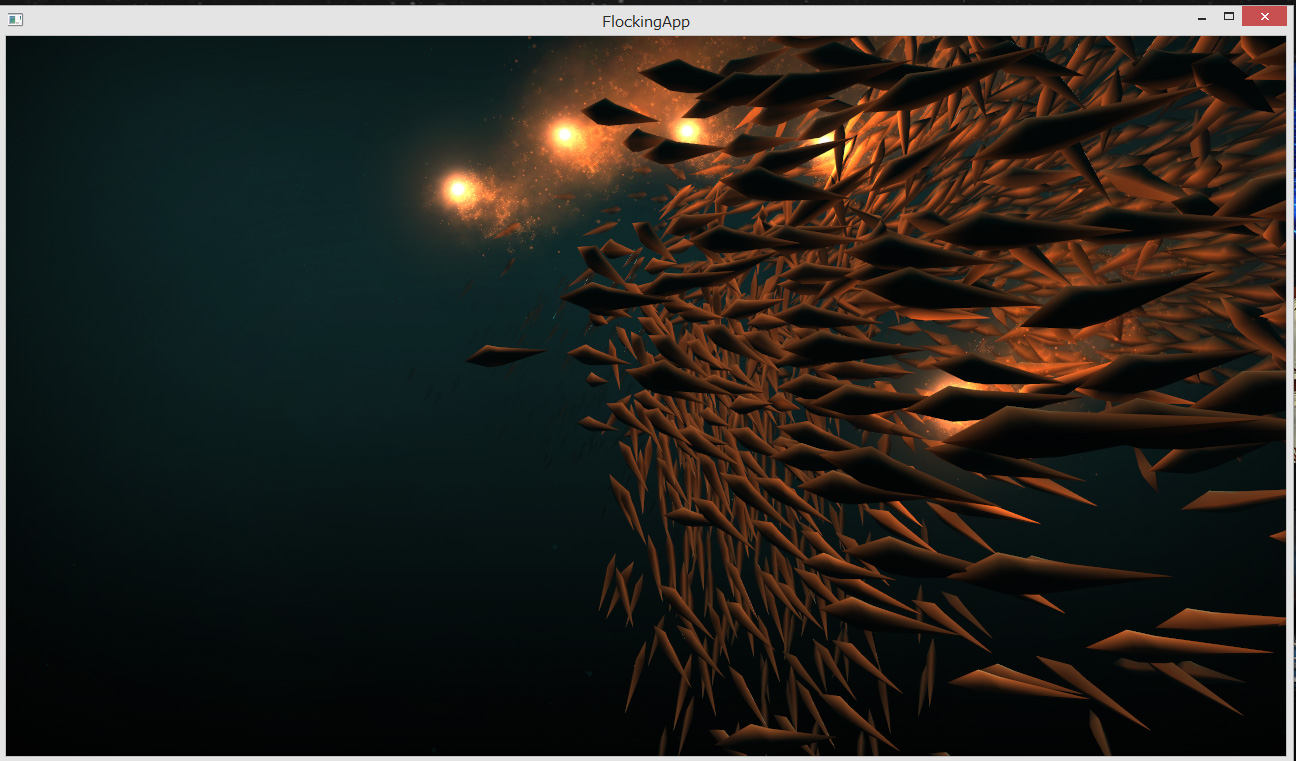
まず、「Flocking」は下記の図のように、指の動きに合わせて魚群が移動する美しいアプリです。
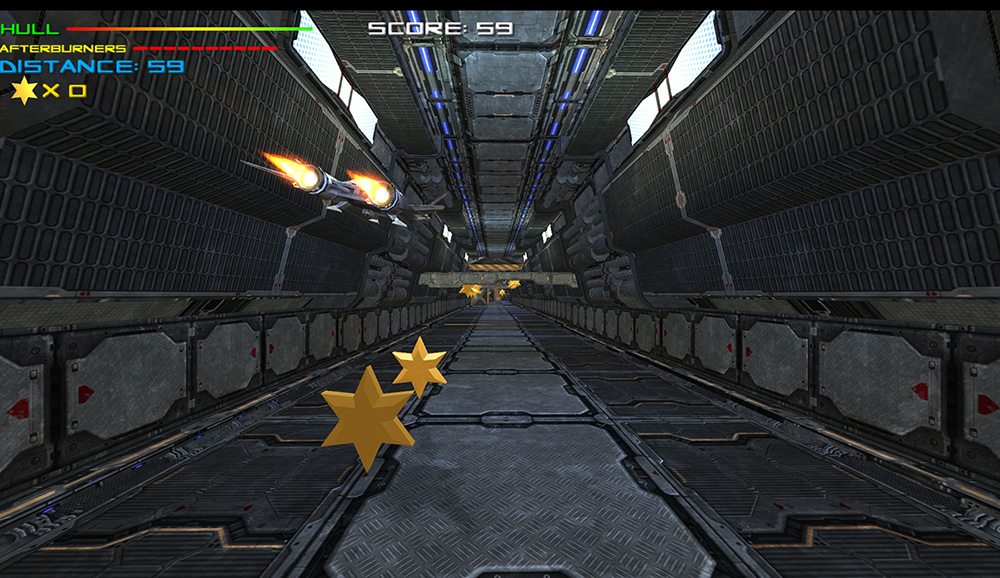
もう一つは「ESCAPE VELOCITY」というシューティングゲームです。筆者はゲームが苦手なため、全く操作ができませんでした(-_-;)
この記事をシェアしてください
関連記事
Leap Motionのスクリーン・タップを使った音声の再生と画像の表示
2013年10月18日 1:00
マウス・カーソルで指定した画像の一部を拡大表示するLeap Motionプログラム
2013年11月12日 1:30
画面に並んだ写真が指の動きに反応して回転するLeap Motionプログラムを作る
2013年12月5日 21:30
好きな写真を指で選んで順番に拡大表示するLeap Motionプログラムを作る
2013年12月6日 23:00
Leap MotionアプリをWindowsストアに申請して認定させる
2014年2月5日 0:30
Kinect v2のジェスチャーでBing Mapsを未来的に直感操作する
2015年1月14日 18:00
バックナンバー
この記事の筆者

筆者の人気記事
Think ITでは、技術情報が詰まったメールマガジン「Think IT Weekly」の配信サービスを提供しています。メルマガ会員登録を済ませれば、メルマガだけでなく、さまざまな限定特典を入手できるようになります。
