RGBカメラ、距離カメラ、スケルトンのフレームが更新されたことを通知するイベント
前ページからの続きです。
RGBカメラ、距離カメラ、スケルトンのフレームが更新されたことを通知するイベント
personImageという名前を持つImageコントロールのSourceプロパティに、e.OpenColorImageFrameメソッドで新しいフレームのRGBカメラの情報を取得します。
次に、Coding4Fun.Kinect.Wpfの拡張メソッドであるToBitmapSourceで、colorFrameをBitmapSourceに変換して指定します。
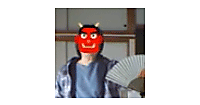
これで、personImage内にカラー画像(実写)が表示されます。
フレームごとのスケルトンデータを表すクラスである、SkeletonFrame型のskeletonFrameData変数を宣言し、e.OpenSkeletonFrameメソッドで、新しいフレームのスケルトンの情報を取得します。
スケルトン配列の長さを取得するSkeletonArrayLengthプロパティで初期化された、新しいSkeletonクラス型の配列変数allSkeletonsを宣言します。
CopySkeletonDataToメソッドで、現在のSkeletonFrameDataにあるスケルトンデータを、指定した配列(allSkeletons)にコピーします。
CopySkeletonDataToメソッドで取得されるデータはプレイヤー分取得されるため、それぞれのトラッキング状態を確認します。
Skeletonクラス用オブジェクト変数firstSkeletonで、スケルトンデータを持つallSkeletons配列変数内で、全ての関節の位置がトラッキングされた状態にある、先頭の要素を取得し、Skeletonクラス型のメンバ変数firstSkeletonに格納していきます。
このメソッドで取得されるColorImageFrameおよびSkeletonFrameは、Usingで括るか、明示的にDisposeする必要があります。
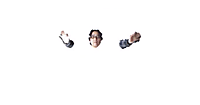
faceImageとトラッキングされた状態にある、先頭の頭のジョイント情報と、rightHandImageとトラッキングされた状態にある、先頭の右手のジョイント情報を引数にScalePositionプロシージャを実行します。
また、スケルトンの位置を取得するGetCameraPointプロシージャも実行します。
  Private Sub kinect_AllFramesReady(sender As Object, e As AllFramesReadyEventArgs)
    Try
      kinect = TryCast(sender, KinectSensor)
      If kinect Is Nothing Then
        Return
      End If
      Using colorFrame = e.OpenColorImageFrame()
        personImage.Source = colorFrame.ToBitmapSource
      End Using
    Catch ex As Exception
      MessageBox.Show(ex.Message)
   Exit Sub
    End Try
  Try
    If _closing = True Then
      Return
    End If
    Using skeletonFrameData As SkeletonFrame = e.OpenSkeletonFrame()
      Dim allSkeletons As Skeleton() = New Skeleton(skeletonFrameData.SkeletonArrayLength - 1) {}
      skeletonFrameData.CopySkeletonDataTo(allSkeletons)
      firstSkeleton = (From s In allSkeletons Where s.TrackingState = SkeletonTrackingState.Tracked Select s).FirstOrDefault()
    End Using

    If firstSkeleton Is Nothing Then
      Return
    End If
    ScalePosition(faceImage, firstSkeleton.Joints(JointType.Head))
    ScalePosition(rightHandImage, firstSkeleton.Joints(JointType.HandRight))
    GetCameraPoint(firstSkeleton, e)
  Catch
    Exit Sub
 End Try
End Sub
スケルトンの位置を取得する処理
Kinectセンサーの距離カメラから、距離カメラのフレームデータを表すDepthImageFrameクラス型のdepth変数を宣言し、OpenDepthImageFrameメソッドで、距離カメラのフレームデータを取得します。
距離データのピクセル座標、および距離、プレイヤーIDを表す、DepthImagePoint構造体のheadDepthPoint変数を宣言し、MapFromSkeletonPointメソッドで、スケルトンの座標を、距離カメラの座標に変換します。
この場合、頭の位置を距離カメラの座標に変換します。同じく右手の位置も距離カメラの座標に変換します。
MapFromSkeletonPointメソッドでの書式は下記です。
DepthImagePoint. MapFromSkeletonPoint(変換するスケルトンの座標)
次に、頭の位置を取得します。RGBカメラのX-Y座標データを表す、ColorImagePoint構造体の変数headColorPointを宣言し、MapToColorImagePointメソッドで、距離カメラの座標をRGBカメラの座標に変換します。
同様に、右手の位置をrightColorPointで取得します。書式は下記です。
DepthImageFrame.MapToColorImagePoint(距離カメラのX座標,距離カメラのY座標,RGBカメラのフォーマット)
この場合、頭の距離カメラのX座標と、Y座標、RGBフォーマットで解像度が640×480、フレームレートは毎秒30フレームに変換しています。同様に右手に対しても同じ処理を行います。
距離カメラのデータをRGBカメラ(実写)のデータにマップします。
faceImageと頭のRGBカメラの座標、rightHandImageと右手のRGBカメラの座標を引数に、手の動きに合わせて画像の位置が変化するCameraPositionプロシージャを実行します。
  Private Sub GetCameraPoint(ByVal first As Skeleton, ByVal e As AllFramesReadyEventArgs)
    Using depth As DepthImageFrame = e.OpenDepthImageFrame()
      If depth Is Nothing = True Then
        Return
      End If
      Dim headDepthPoint As DepthImagePoint = depth.MapFromSkeletonPoint(first.Joints(JointType.Head).Position)
      Dim rightDepthPoint As DepthImagePoint = depth.MapFromSkeletonPoint(first.Joints(JointType.HandRight).Position)

      Dim headColorPoint As ColorImagePoint = depth.MapToColorImagePoint(headDepthPoint.X, headDepthPoint.Y, ColorImageFormat.RgbResolution640x480Fps30)
      Dim rightColorPoint As ColorImagePoint = depth.MapToColorImagePoint(rightDepthPoint.X, rightDepthPoint.Y, ColorImageFormat.RgbResolution640x480Fps30)

      CameraPosition(faceImage, headColorPoint)
      CameraPosition(rightHandImage, rightColorPoint)
    End Using
  End Sub
頭や右手の動きに合わせて画像の位置が変化する処理
Canvas.SetLeftとSetTopプロパティの書式は下記です。
Canvas.SetLeft(プロパティ値の書き込み対象の要素,指定した要素のCanvas.Left属性を設定)
Canvas.SetTop(プロパティ値の書き込み対象の要素,指定した要素のCanvas.Top属性を設定)
  Private Sub CameraPosition(ByVal element As FrameworkElement, ByVal point As ColorImagePoint)
    Canvas.SetLeft(element, point.X - (CLng(element.Width) / 2))
    Canvas.SetTop(element, point.Y - (CLng(element.Height) / 2))
  End Sub
画像が頭や右手の動きに反応する処理
Coding4Fun Kinect ToolkitのScaleToメソッドで、指定した幅と高さにJointオブジェクトの位置をスケーリングします。書式は下記です。
Joint.ScaleTo(width As Integer, height As Integer)
Canvas.SetLeftとSetTopプロパティの書式は下記です(1920×1080は筆者のパソコンの解像度)。
Canvas.SetLeft(プロパティ値の書き込み対象の要素,指定した要素のCanvas.Left属性を設定)
Canvas.SetTop(プロパティ値の書き込み対象の要素,指定した要素のCanvas.Top属性を設定)
  Private Sub ScalePosition(ByVal element As FrameworkElement, ByVal joint As Joint)
    Dim scaledJoint As Joint = joint.ScaleTo(1920, 1080)
    Canvas.SetLeft(element, scaledJoint.Position.X)
    Canvas.SetTop(element, scaledJoint.Position.Y)
  End Sub
「お面」の画像が表示されているListBox内の項目が選択された時の処理
ListBox1より選択された項目を、FancyDressInfoクラスにキャストして、_widthと_heightプロパティの値を取得して変数に格納しておきます。
BitmapImageであるmySource変数には、FancyDressInfoクラスのnameプロパティの値を格納します。
faceImageコントロールのWidthとHeightプロパティに、取得した幅と高さの半分の値を指定します(半分にしているのは単に元の画像が大きいという理由です)。
Sourceプロパティには変数mySourceオブジェクトを指定します。
  Private Sub ListBox1_SelectionChanged(sender As Object, e As System.Windows.Controls.SelectionChangedEventArgs) Handles ListBox1.SelectionChanged
    Dim myWidth = CInt(DirectCast(ListBox1.SelectedItem, FancyDressInfo)._width)
    Dim myHeight = CInt(DirectCast(ListBox1.SelectedItem, FancyDressInfo)._height)
    Dim mySource = New BitmapImage(New Uri(DirectCast(ListBox1.SelectedItem, FancyDressInfo).name, UriKind.Relative))
    faceImage.Width = myWidth / 2
    faceImage.Height = myHeight / 2
    faceImage.Source = mySource
  End Sub
「金棒」や「扇子」の画像が表示されているListBox内の項目が選択された時の処理
ListBox1の処理と同じです。「金棒」や「扇子」は元の画像が大きくありませんので、そのままのサイズを指定しています。
  Private Sub ListBox2_SelectionChanged(sender As Object, e As System.Windows.Controls.SelectionChangedEventArgs) Handles ListBox2.SelectionChanged
    Dim myWidth = CInt(DirectCast(ListBox2.SelectedItem, FancyDressInfo)._width)
    Dim myHeight = CInt(DirectCast(ListBox2.SelectedItem, FancyDressInfo)._height)
    Dim mySource = New BitmapImage(New Uri(DirectCast(ListBox2.SelectedItem, FancyDressInfo).name, UriKind.Relative))
    rightHandImage.Width = myWidth
    rightHandImage.Height = myHeight
    rightHandImage.Source = mySource
  End Sub
ウィンドウが閉じられる時の処理
Kinectセンサーが動作している時は、イベントハンドラの登録を解除し、Kinectセンサーの動作を停止します。
音声認識も停止します。
最後にDisposeメソッドでリソースを解放します。
  Private Sub MainWindow_Closing(sender As Object, e As System.ComponentModel.CancelEventArgs) Handles Me.Closing
    If kinect Is Nothing = False Then
      If kinect.IsRunning = True Then
        RemoveHandler kinect.AllFramesReady, AddressOf kinect_AllFramesReady
        kinect.Stop()
        engine.RecognizeAsyncStop()
        kinect.Dispose()
      End If
    End If
  End Sub
End Class
以上で今回のサンプルは終了です。手軽にキャラクターになりきることができたりと、Kinectの本領を発揮するサンプルなので、ぜひ試してみてください。
- この記事のキーワード


