Windows Storeアプリ開発で今覚えておきたいTips10選+α 第11回
プロジェクトの作成
プロジェクトの作成
VS 2012のメニューから[ファイル(F)/新規作成(N)/プロジェクト(P)]と選択します。次に、「テンプレート」から「Windows ストア」を選択し、右に表示される項目名から「新しいアプリケーション(XAML)」を選択します。「名前(N)」に任意のプロジェクト名を指定します。ここでは「Win8_VideoSave」という名前を付けています。
ソリューションエクスプローラー内にImagesというフォルダを作って、画像を1枚配置しておきます。
ダウンロードされたサンプルファイルには、画像ファイルは追加済みです。
コントロールの配置
ツールボックスからデザイン画面上に、Buttonコントロールを2個、MediaElementコントロールを1個、Imageコントロールを1個配置します。
書き出されるXAMLをリスト1、レイアウトは図5のようになります。
リスト1 書き出されたXAMLコード(MainPage.xaml)
- (1)playButtonという名前の
- (2)MediaElement1という名前の
要素を配置します - (3)backButtonという名前の
- (4)
要素を配置し、SourceプロパティにImageフォルダ内の画像を指定します。
<Page
  x:Class="Win8_VideoSave.MainPage"
  xmlns="http://schemas.microsoft.com/winfx/2006/xaml/presentation"
  xmlns:x="http://schemas.microsoft.com/winfx/2006/xaml"
  xmlns:local="using:Win8_VideoSave"
  xmlns:d="http://schemas.microsoft.com/expression/blend/2008"
  xmlns:mc="http://schemas.openxmlformats.org/markup-compatibility/2006"
  mc:Ignorable="d">

  <Grid Background="{StaticResourceApplicationPageBackgroundThemeBrush}">
    <Button x:Name="playButton" Style="{StaticResourcePlayAppBarButtonStyle}" HorizontalAlignment="Left" Height="85" Margin="-22,683,0,0" VerticalAlignment="Top" Width="76"  FontSize="36" RenderTransformOrigin="0.474,0.936"/>■(1)
    <MediaElementx:Name="MediaElement1" HorizontalAlignment="Left" Height="720" Margin="76,0,0,0" VerticalAlignment="Top" Width="1280"/>■(2)
    <Button x:Name="backButton" Style="{StaticResourceBackButtonStyle}" HorizontalAlignment="Left" Height="108.298" Margin="4.51,-2.985,0,0" VerticalAlignment="Top" Width="99.483"  FontSize="60"/>■(3)
    <Image HorizontalAlignment="Left" Height="187" Margin="1175,558,0,0" VerticalAlignment="Top" Width="168" Source="Image/video.png"/>■(4)
  </Grid>
</Page>
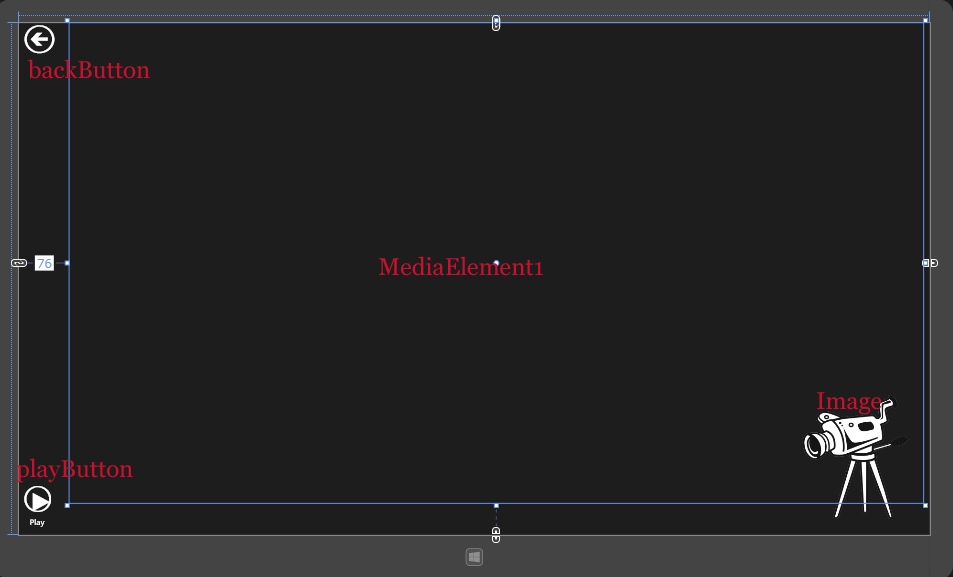
図5:各コントロールを配置した(クリックで拡大)
ビデオライブラリへのアクセス許可
ソリューションエクスプローラー内のPackage.appxmanifestファイルをダブルクリックして開きます。
「機能」タブ内の「機能:」にある、「マイク」と「ビデオライブラリ」「Webカメラ」にチェックを付けます(図6)。
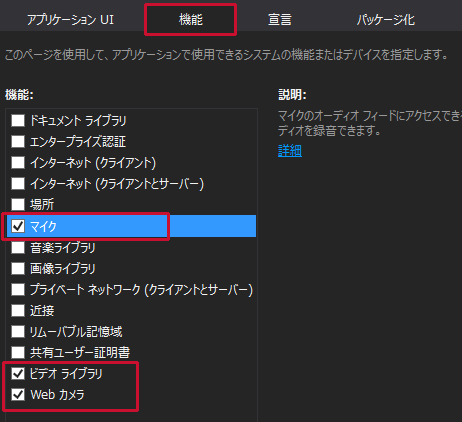
図6:「マイク」「ビデオライブラリ」「Webカメラ」にチェックを付ける(クリックで拡大)
Webカメラの動画を保存して再生するアプリ
You don't have access to download this file.
- この記事のキーワード
この記事をシェアしてください
関連記事
バックナンバー
この記事の筆者

筆者の人気記事
Think ITでは、技術情報が詰まったメールマガジン「Think IT Weekly」の配信サービスを提供しています。メルマガ会員登録を済ませれば、メルマガだけでなく、さまざまな限定特典を入手できるようになります。
